Saturday, September 29, 2012

French Onion Soup

While summer weather is my favorite of the year, there are so many things I love about Fall. I love comfy sweaters, cool boots and the delicious Fall flavors. The cooler weather also signals the beginning of soup season!

One soup that I have never tried making before, but which daddy orders whenever he has the opportunity, is French onion soup. So this week, we decided to give it a try at home.  I chose a recipe and set to work.

The longest part of the process is the onions. Onions are the star of this soup, but it takes a lot of work, time and patience to turn them into soup.

I started with a five pound bag of yellow onions...


...and proceeded to peel and chop for... well... a while. Little miss helped me with the peeling for a while, but after the first pound or so, decided she'd rather read on the couch.

But with a bit of persistence, I soon had a bag full of onion skins...


...and a soup pot over half full with onion slices.


Now, I know a lot of recipes start with "caramelized onions." Notice the quotation marks. Because the recipe usually says "add your onions to the pan and sautee for 5-7 minutes, until caramelized." Yeah. True caramelization takes time. Not a quick, high heat burn, but a ssslllloooowwww process of cooking them down, extracting the moisture and cooking all the delicious natural sugars that live inside those onions.

As they start the process, you can see how much they cook down.


And after about an hour (yes, an hour!), if you are lucky, you have a pot of deliciously golden deliciousness.


(two things to note with the above picture - 1) the lighting was TERRIBLE and the golden color was very washed out, but trust me - they were golden brown and delicious looking; 2) how in the world is that four pounds worth of onions?? CRAZY how small it cooks down!)

(anyway...)

Once the onions are all caramelized, it's time to turn them into soup, which is pretty much the easiest thing in the world. Just add stock.  And season to taste.


The primary spice called for in the recipe that I used is thyme. I also added some salt to balance out the sweetness of the caramelized onions.

Now, if you have ever ordered French onion soup out, you know that the best part is the delicious cheese melted on top of each serving.

But I don't have oven safe crocks in which to serve the soup in order to achieve that cool look (and taste).

Not to be deterred, I did the next best thing.

See, French onion soup is also usually served with a big crouton or chunk of French bread in the soup.  So I made the bread do double-duty.  Before putting the bread into the soup bowl, I topped it with cheese (gruyere is traditional, I used swiss) and popped it under the broiler.


I then put the melty, bubbly bread pieces into the bowls and served the soup right around them.


Not quite the same, but it definitely gave the feeling of cheese-topped bread-filled French onion soup. This French onion soup is sweeter than what we've had before, but was still rich and delicious and well worth the time it took to make it.


French Onion Soup
(adapted from BS' In The Kitchen)

4 tablespoons Unsalted Butter
4 pounds yellow onions
2 teaspoons sugar
2 tablespoons flour
6 cups beef stock
4 teaspoons fresh thyme or 1½ teaspoons dried thyme
Salt & Pepper to taste
French Bread
Swiss cheese (gruyere is more traditional, but I didn't have any)

Start by preparing all of your onions.  All of the onions need to be peeled and evenly sliced.
Once your onions are sliced, put the butter in your largest pot, set the heat to medium low, and, once the butter has melted, add all of those onions right in the pot. Sprinkle the tops with the sugar and then... be patient.
Let the onions caramelize, stirring only as often as needed to keep them from burning or sticking to the pan. You don’t want to stir too often, as this will prevent them from browning and caramelizing.
Once they become a beautiful, even, deep golden brown, increase the heat to medium, and after a minute or two, mix in the flour and then start pouring in your stock.
Slowly pour the stock in, stirring as your pour.  Add thyme and continue to stir.  Allow soup to simmer for 30 - 45 minutes, tasting as you go. Salt and pepper to taste.

To serve, slice the French bread into thick slices and top with slices of swiss cheese. Broil the cheese-topped bread for just a minute or two until the cheese is toasted and bubbly.

Place one or two cheese-toasts into your bowl and then ladle the soup onto/around them.

Enjoy!

Thursday, September 27, 2012

September Daring Bakers' Challenge - Empanada

Patri of the blog, Asi Son Los Cosas, was our September 2012 Daring Bakers’ hostess and she decided to tempt us with one of her family’s favorite recipes for Empanadas! We were given two dough recipes to choose from and encouraged to fill our Empanadas as creatively as we wished!

Well wouldn't you know, empanadas have been on my "hmm... I should try those one day!" list for a while! Now, I always thought of empanadas as, well, kind of like hand pies - small, individually sized meat, well, hand pies! Turns out, the empanadas that Patri shared with us were family-sized, made with yeasted dough, and filled with just about anything that you can imagine.

So the first decision came in trying to decide what I'd use as my filling. Me being me, all of my first thoughts were dessert. But then inspiration hit when I looked at my meal plan. The week after the challenge was announced, the first thing on the meal plan was Italian sausage, pepper and onion sandwiches. As I started pulling out the yeast and flour to make the rolls, I thought - hey! I could do the same meal, just in empanada form! So that's what I did.

Instead of making rolls, I used my yeast and flour to pull together the very simple empanada dough.  The dough calls for paprika. Taking inspiration from my filling, I used garlic powder instead.


As the dough rested, I prepped my filling - chopping onions and peppers and removing the casings from some sausages.


I then cooked up the filling in a large skillet...


...and constructed the empanada. About half of the dough is rolled out nice and thin and placed onto (and over the edges) of a baking sheet. The dough is then covered with the cooked filling. I topped half of the filling with thickly sliced provolone cheese, too, for some extra ooey-gooey goodness.


The other half of the dough is then rolled out and placed over top. The edges are sealed (I tried for a crimped pattern...). The top is then both decorated and vented.


And then it bakes!  The dough gets nice and golden, and the whole thing looks pretty fun.


And makes for a pretty tasty dinner!


But, me being me, I couldn't let the idea of a dessert empanada go.  All along, I'd been wanting to try an apple-pie inspired version, but the month kept slipping away from me. So I finally went for it last night. You heard me. Mere hours before this post had to go live.

The dough came together just as easily, though this time I used cinnamon as my spice of choice, and added in a touch of sugar to sweeten things up.


And for my filling? I wanted to go caramel-y with my apples. So I started with butter and brown sugar.


Yum.

And then I set to peeling and slicing these.


And cooking them down in that delicious, caramel-y goodness.


Unfortunately, my four apples and one pear were not enough to fill my empanada. Which I didn't realized until all of my dough was rolled out and I was to the point of, well, filling it up. So I quickly had to peel and cut and ooey-gooey caramelize a few more apples and pears. But after that...


...we were good. And for the decoration this time?


I went with little miss's favorite - my old fairy design (remember that? from here? and here?). She requested that I add hair. And a face. The face didn't show up so well, but when it came out of the oven, she declared it a success, so that's all I could ask for.


Well, I could ask for a little more than that, but then she told me she loved it, and that answered that question. And it really is delicious - yummy fall goodness encased in flaky deliciousness.


I have to say - I was so pleased with this challenge. The dough was simple, but flaky and delicious, the possibilities are endless for delicious fillings, and it's fun to make and decorate, and share with family and friends!

Patri, thank you so much for sharing your family's dish with us and for being such a wonderful host!

To see the amazing, creative and gorgeous empanadas baked up in the kitchen this month, check them out here.


Empanada Dough
(a recipe using wheat flour from “La Empanada Gallega” as provided in the challenge)

3½ cups all-purpose or bread flour
1 cup warm water
½ cup less 1 tablespoon of liquid fat (I used canola oil)
1 tablespoon active dry yeast
1 teaspoon salt
1 teaspoon sweet paprika (or garlic powder or cinnamon - depending on your filling!)

Sift the flour into a bowl, make a well in the middle and add all the ingredients.
Mix with a wooden spoon until all the ingredients have been incorporated
Turn dough onto your counter and knead for 8 minutes
Make a ball and allow to rise covered with a cloth for about half an hour before using.
The rest of the steps are the same as with the first recipe.
You can also use knead this dough in a stand mixer - just reduce the kneading time to 5 minutes.


Prepare a filling of your choice.

When you are ready to prepare the empanada, preheat the oven to 350 degrees.
Divide the dough roughly in half.
Roll the larger piece on parchment paper to just-larger than a baking sheet. Place the dough, still on the parchment, onto the baking sheet. the dough will hang over the edges a bit.
Layer your prepared (and cooled) topping over the rolled out dough.

Take the other half of the dough and spread it out to approximately the same thinness of the base. You can use a piece of parchment paper for this, too. Take into account that this “top” dough needs to be smaller around than the bottom, as it only needs to cover the filling.
Carefully transfer the top to the pan cover the filling by carefully moving the parchment to the pan, turning it over, then gently peeling off the wax paper.
Using your fingers, join bottom and top dough, when you have gone all the way around, start pinching top and bottom together with your thumb and index finger and turning them half way in, that way you end up with a rope-like border.
When you are finished, make a 1 inch hole in the middle of the top layer (or otherwise vent the top to go with whatever design you choose to make...) This will help hot air exit the empanada while it’s baking without breaking the cover.
You can use left-over dough to decorate the empanada, using rounds, bows, lines… let your imagination flow and make it pretty!
Bake the completed empanada for 45 minutes, until golden brown.

Enjoy!

Saturday, September 22, 2012

Pumpkin Chai Sourdough Bread

Ah, Fall.

The days are getting shorter, the air is getting cooler... puts me in the mood to curl up on the couch with a cup of some hot beverage and something delicious baked with pumpkin.

So when I saw this post for a pumpkin coffee sourdough bread, it sounded like the perfect way to ring in the new season!

I made a couple of minor changes. The first of which was to change up the liquid. While coffee is good, I prefer a yummy chai latte, so I used that instead.


I then mixed up the dough as directed - a firm starter (that had been prepared the night before, using my regular starter and a specific proportion of water and flour) and pumpkin puree...


...was combined with the cooled chai, additional flour and some salt.


And when I say the ingredients are combined, I mean that literally. Simple stir it all together with a wooden spoon until the flour is incorporated.


This dough is then a result of quick, rough kneading and plenty of waiting. But as a result of the minimal handling and ample time, the dough turns from this...


...into this.


I then rested my dough overnight in the refrigerator, and then pulled it from the fridge first thing in the morning to take the chill off of it.

Once the dough came back to room temperature, I divided it in two and shaped my loaves.  With one loaf, I tried to create a more classic look, pulling the dough to create some surface tension.  For the other, I decided to just see where the dough wanted to go, and it came out a little bit swirly looking.


And then came the other minor modification that I made. You see, most sourdough breads, immediately prior to going into the oven are floured and then slashed with a sharp knife.  For this bread, I chose to skip the flour and dust the tops with cinnamon sugar prior to slashing them.


And after about half an hour in a super hot oven, I saw that that decision was a pretty good one.


Not only did the bread smell delicious, the cinnamon sugar made the bread look glittery!


And the best part?

The bread tasted delicious. Sourdough richness, chai flavor, cinnamon sugar sweetness, and it was beautifully soft with a delicious chew.


So far it's made a delicious snack, yummy side, slathered in butter, and an awesome lunch, made into a grilled cheese. I can't wait to try it as French toast.

And to make it again.


Pumpkin Chai Sourdough Bread
(only slightly adapted from nadira2100's post on The Fresh Loaf)


For the firm starter:
2/3 cup sourdough starter (100% hydration)
4.5 oz. bread flour
1/4 cup water

Mix these together and let ferment at room temperature for 4 hrs. Refrigerate overnight. (or even up to a few days).


For the bread:
All of the firm starter
20.5 oz bread flour
1 3/4 cups prepared chai latte beverage, cooled
1 cup pumpkin puree
2 teaspoon salt

Let the firm starter rest at room temperature for 1 hr to take off the chill.
Mix together the starter with the bread flour, coffee, salt and pumpkin until a shaggy dough ball forms.
Let rest for 20min before turning out on a well floured surface.
Perform 4-5 stretch and folds, then place in a well oiled bowl for 15min.
Stretch and fold 3 times. The rest for 15 min. Repeat 2 more times, then let the dough rest at room temperature for 3 hrs. I left the house at this point to meet a friend for margaritas. 3 hrs later it had tripled in volume.
Divide the dough in half and pre-shape into boules. Let rest for 20 min before the final shaping. I made a spiral boule out of 1 and proofed the other in a banneton. After shaping, I stuck these in the fridge overnight.
Preheat the oven to 500 and take out the dough 1 hr before baking.
Score and bake with steam for 2 min. Then drop the temp to 450 and continue baking for another 8 min. Rotate the bread, and bake for another 10-15min or until golden brown.
Allow to cool completely before cutting.

Enjoy!

Thursday, September 20, 2012

Sourdough Surprises #6 - English Muffins

I am not sure if you remember, but earlier this year I finally tried my hand at homemade English muffins. Which are fantastic. And then I tried my hand at a different recipe for them. Which were different, but also delicious. I have been wanting to try more English muffin recipes, so I was super excited with this month's Sourdough Surprises choice!

The recipe is actually super easy. It just requires a little bit of advanced planning, as you have to make a specific starter (like a levain) the night before.  But then in the morning, you're all ready to go with a healthy, bubbling base for your muffins!


I gathered together everything that I needed first thing in the morning, before taking little miss to school, so that I could get started as soon as I got back home.


Then the rest of the ingredients are mixed in, and enough flour is kneaded in to make a workable dough.


The dough is then rolled out and cut to shape. The recipe says to used a biscuit cutter, but I chose to use my actual English muffin rings. Seemed appropriate, no?


The cut pieces of dough were then set on a cookie sheet that I'd liberally dusted with cornmeal, and then also topped with more cornmeal.


These were then set to proof for 45 minutes. Okay, so the recipe said to rest them for 45 minutes. I let them rest longer, as little man and I hit the library for story time.  So they rested for closer to an hour and a half.  They didn't rise took much, but they did spread a bit. 

And then it was time to cook. Like most English muffin recipes I have seen, these are cooked on top of the stove rather than in the oven.  It was pretty fun to watch these cook. They went on a very lightly greased skillet for about five minutes per side. Can you see that bubble there? We could actually watch them as they cooked! Pretty cool!


Once flipped, I could see that they'd reached the beautiful, golden color that I'd hoped for.


The hardest part was waiting for them to cool enough to taste.


But it was totally worth the wait! These tasted delicious, but, surprisingly, they didn't have a strong sourdough tang for me. Also surprisingly, little miss, who has recently told me that she likes neither English muffins nor sourdough, loved them.

These might just be my new favorite English muffins. So easy, so delicious, and check out those nooks and crannies!


We've had them plain, with jam, with butter and honey - any way you can think of, these are a winner.

So did you enjoy your English muffins as much as I did? Link up and show us how you did!


Sourdough English Muffins
(from Baking Bites)


½ cup sourdough starter, fed
3 cups all purpose flour
1 cup water
½ tsp baking soda
½ tsp salt
2 tbsp sugar
cornmeal for dusting

Combine starter with 2 cups of flour and 1 cup of water. Stir thoroughly, cover with plastic wrap and let sit out overnight (about 7-10 hours).
In the morning, add the baking soda, salt, sugar to the dough and gradually add the remaining 1 cup of flour, 2 tablespoons at a time, until the dough looses its stickyness. Turn dough out onto a lightly floured surface and roll until about ½ inch thick. Use a lightly floured biscuit cutter (I used my English muffin rings) and cut the dough into as many rounds as possible (I got eight). Place rounds on an ungreased baking sheet that has been generously dusted with cornmeal. Sprinkle the tops of the muffins with additional cornmeal and leave them to rise, covered with a clean dishtowel or plastic wrap, for about 45 minutes.
Heat a lightly oiled or nonstick skillet over high heat until very hot, then reduce the temperature to medium/medium high.
Cook the muffins for about 5 minutes on each side, turning only once. The muffins will reach a light or medium brown (turn town the temperature slightly if they cook too quickly) on both the top and the bottom when they are cooked through. Before the first flip, the sides of the muffin will start to look dry, like the edges of a pancake, when it it ready to be turned. You can peek at the underside, too.
Cool completely before storing.

Enjoy!

Tuesday, September 18, 2012

Pumpkin Pancakes

As I have mentioned, with little miss in school now, I like to make sure that she has a good breakfast in the morning. It's great when the breakfast can be prepared the night before (like this one), but that's not always possible. So I at least try to get as much prepared ahead of time as I can.

So last week when little miss requested pancakes, I knew I'd be able to get it done. And, with the start of Fall weather around here, I was in the mood to make them festive fall pancakes, so I reached for a can of pumpkin puree.

To make things easier for me in the morning, I measured out and whisked together the dry ingredients before bed, and also set out everything else I'd need. (well, everything that could sit out overnight...)


In the morning, all I had to do was measure out the wet ingredients and then incorporate them into the already prepared dry ingredients.


Then, while little miss got dressed, the pancakes cooked.


And then little miss, little man and I were ready to eat!


These were a great start to the day, as well as a great start to the fall eating season.


Pumpkin Pancakes

1 cup all purpose flour
2 tablespoons brown sugar
2 teaspoons baking powder
1/2 teaspoon salt
1/2 teaspoon ground cinnamon
1 cup milk (I used coconut milk)
1 egg
1/4 cup pumpkin puree
1 teaspoon vanilla extract

Whisk together the flour, sugar, baking powder, salt and cinnamon. Set aside.
In a separate bowl (or right in the measuring cup, if it's big enough!), combine the milk, egg, pumpkin and vanilla.
Pour the wet mixture into the dry ingredients and mix until well combined.
Heat a skillet to medium/medium high heat.
Spray pan lightly with nonstick cooking spray.
Spoon mixture into skillet (whatever size you like your pancakes) and cook a few minutes. The top will start to bubble (lightly) and the edges will begin to look dry. Flip pancake and cook for a minute or two on the other side.
Serve with topping of your choice (maple syrup, powdered sugar - whatever you like!).

Enjoy!

Sunday, September 16, 2012

Chicken, Potato and Green Bean Skillet

We've gotten a little lax about meal planning around here. Not that we haven't been planning at all, I just haven't been specific. So the other day, all I knew was that I would be having chicken. Okay, I knew the cut, too - I had to plan ahead to make sure I took the right thing out of the freezer to defrost. So I knew I'd be working with boneless, skinless chicken breasts.

But I didn't plan anything more specific than that.

So when little man went down for a nap, I had to get a bit more specific. So looked to see what else we had that looked good.

Potatoes. Onions. Fresh green beans. Yum. I can work with this.  I saw this recipe online and it inspired me to get cooking.

Well, first it inspired me to get chopping.

I chopped potatoes. And onions.


And green beans.


And chicken, too, but I am not a fan of posting photos of raw meat.

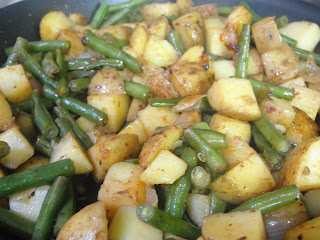
Once everything was chopped, it was time to get cooking. It was basically a process of each ingredient taking its turn in the frying pan.  Once all of the veggies were cooked, I combined them all in my big pan while I had my smaller pan going, cooking the chicken.


And then it was time to put the whole thing together.


And that was it! Despite all of the chopping and pan shuffling, it was actually super easy.

And better than that, it was delicious.


Little man gobbled up his chicken, little miss's favorite part was the potatoes, and me? I loved the whole thing all together.

Not too shabby for what was basically a punt!


Chicken, Potato and Green Bean Skillet
(based on a Land O Lakes recipe)

1-2 tablespoons extra virgin olive oil
5 medium sized potatoes (I used yukon gold)
1 pound (approximately) fresh green beans
2 boneless, skinless chicken breasts
garlic salt (to taste)


Roughly chop potatoes and onions. Snap the ends off of the green beans and cut them into pieces about 1 inch long.

Heat olive oil in a skillet. Add potatoes and onions, and season (to taste) with garlic salt. Cook over medium-high heat, stirring occasionally, until potatoes are browned (about 12 to 14 minutes). Remove from skillet and set aside.

Add the chicken into the same skillet. Cook over medium-high heat, turning once, until lightly browned and no longer pink (10 to 12 minutes). Remove chicken from skillet and set aside.

Add the green beans into the same skillet. Cook, stirring occasionally, for about 5 minutes. With the beans still in the pan, add about 1/2 cup of water to deglaze the pan, stirring up any bits from the bottom of the pan. When the water comes to a boil, lower the temperature and cover the pan. Allow it to cook for another 5 minutes.

Return the potatoes and chicken to the pan and stir to combine everything. Cover again and continue cooking, stirring occasionally, until heated through (1 to 3 minutes).

Enjoy!
Related Posts with Thumbnails