Showing posts with label Secret Recipe Club. Show all posts

Monday, December 8, 2014

Cereal Muffins

Hi, all!

This post is a bit different for me. It marks a transition of sorts.

Today is Secret Recipe Club reveal day, which is always exciting. I love finally getting to post what I've spent a month thinking about,and I love going through all of the blogs in my group waiting to see who shared a recipe from my blog.

But today's post marks my last with the Secret Recipe Club.  At least for now.

I'm sure you've noticed that my posting has slowed down significantly. And for that I apologize. This blog has been such a wonderful thing for me for so long.  Through this blog, I have been a part of amazing communities and have met some really wonderful, true friends.

As time goes on, though, things in my life have changed, and what is best for me at this time is to take a little break. Not from cooking and baking - that is something that I'll always do. But for a little while, I am going to do it just for me and my family.

It was with a heavy heart that I handed over the reins of The Daring Kitchen, and now, that I take a break from SRC.

Knowing that this would be my last SRC post, and that I'd only be posting sporadically for a while at this point, I wanted to make sure to choose something special. Which was made easy by the fact that my assigned blog this month was From Grandma Loy's Kitchen. This blog is always amazing, and has such fantastic recipes, collected over a delicious lifetime and shared with love.

There were so many things that I wanted to try, but one caught my eye and I just couldn't get it out of my head. Simple as it sounded, it also sounded absolutley perfect: Cereal Muffins.

I mean, with two kids, all kinds of activities and very busy mornings, what could be better? Two easy breakfasts, all rolled into one!

The recipe is pretty simple. It recommends using bran cereal, Cheerios or corn flakes.  I chose to use multigrain Cheerios.


To start the recipe, pour milk over the cereal and let it sit.


While those soak, I prepared the rest of my ingredients. I did make one change. The recipe calls for 1/4 cup of oil. No problem, But. What goes great on cereal, that can also be used as an oil substitute? Bananas! Little man helped me mash.


Soaked cereal, mashed banana, some dry ingredients and one beaten egg.


Yup - ready to go. Now just mix everything together...


 ...and scoop into muffin tins!


And a short 20-25 minutes later...


Yum.

Now... while these were baking, I had a fun idea. Different cereal. Fun cereal. Leftover Halloween cereal!


Yes, I know that Frankenberry is completely against the way I usually food shop... food coloring, fake everything... but after Halloween when the supermaret puts in on sale for 67 cents a box... well, makes it hard to resist. And, so you know, we don't eat it for breakfast. After school snack only. Or... in muffins.

For theses, I used oil instead of banana, and the results were... colorful. And fun.


And absolutely delicious. I will say that both little man and I preferred the Cheerios version, but little miss absolutely loves the Frankenberry variety. Which is just fun.

Grandma Loy, thank you so much for this super fun recipe. I know I'll be making these with just about every cereal that comes into my house from now on.

And to the whole SRC crew - thank you. I can't even begin to tell you what it's meant to me to be a part of this group. You are all amazing bakers, cooks, photographers, bloggers and, most importantly, pepple. And I'm honored that I got to spend so much time being a part of this wonderful group.


Cereal Muffins
(only slightly modified from Grandma Loy's Kitchen)

1 1/4 cups milk (I used coconut milk)
1 1/2 cups whole-bran cereal, or 2 cups Cheerios, or 3 cups corn flakes (or any cereal you choose! Choose the measurement listed for the cereal most similar in shape or consistency to the cereal you choose.)
1 1/2 cups all-purpose flour
1/3 cup sugar (if you are using a sugary cereal, you can reduce this)
1 teaspoon salt
1 tablespoon baking powder
1 egg, beaten
1/4 cup vegetable oil (can substitute mashed banana if the flavor goes with the cereal you choose!)

Preheat oven to 400 degrees and spray a 12-well muffin tim with non-stick cooking spray.
Combine milk and cereal in a large bowl. Set aside.
In a separate bowl, combine the flour, sugar, salt and baking powder.
Add beaten egg and vegetable oil (or banana) to the milk and cereal and mix well.
Add dry ingredients.  Mix only until dry ingredients are moistened (batter will be lumpy).
Fill prepared muffin tin cups almost full.
Bake for 20-25 minutes.
Enjoy!

Note: Grandma Loy provided the following yummy ideas for variations. Simply add any of these to batter before adding dry ingredients:
Blueberry - Add 1 cup fresh or unthawed frozen blueberries or 1 cup well-drained canned blueberries.
Apple - Peel and finely dice 1 medium apple (3/4-1 cup).  Toss with 2 tablespoons of sugar and 1/2 teaspoon of cinnamon.
Pineapple - Add 3/4 cup well-drained crushed pineapple.
Bacon - Add 4 slices crisp cooked bacon, crumbled.
Cranberry - Add 1 cup whole berry cranberry sauce.

Monday, November 10, 2014

Pumpkin-Cinnamon Scones

I can't believe it's Secret Recipe Club time again! But I'm super excited for this post. Because I got a super awesome blog assignment this month.

This month I was privileged to spend lots of quality time over at Pale Yellow.  This blog is full of so much deliciousness, it's insane. And Tracy, the awesome blogger who creates all of the deliciousness, is really a girl after my own heart. From the fact that she shares her love by feeding people to the recipes she chooses to share, I knew I'd gotten a good one.

There were many recipes I wanted to try, but her recipe for Pumpkin Scones with Cinnamon Chips just spoke to me. The pumpkin, the spices - it is just absolutely perfect for the season.

I made a couple of simple changes, but kept the full spirit of the challenge. The first change was that I didn't have cinnamon chips. I know. That's kind of a biggie. But I increased the amount of cinnamon called for in the recipe and called it somewhat even. I also used regular (unbleached) all purpose flour instead of the gluten free version.  Oh, and I don't have allspice, so I used cardamom instead.

The scones come together beautifully.  It starts with the dry ingredients - including a beautiful rainbow of spices.


Then it was time to incorporate the butter. Rather than cube the cold butter and cut it in, I grated the frozen butter and then just mixed it into the dry ingredients  with my fingertips. So much easier.


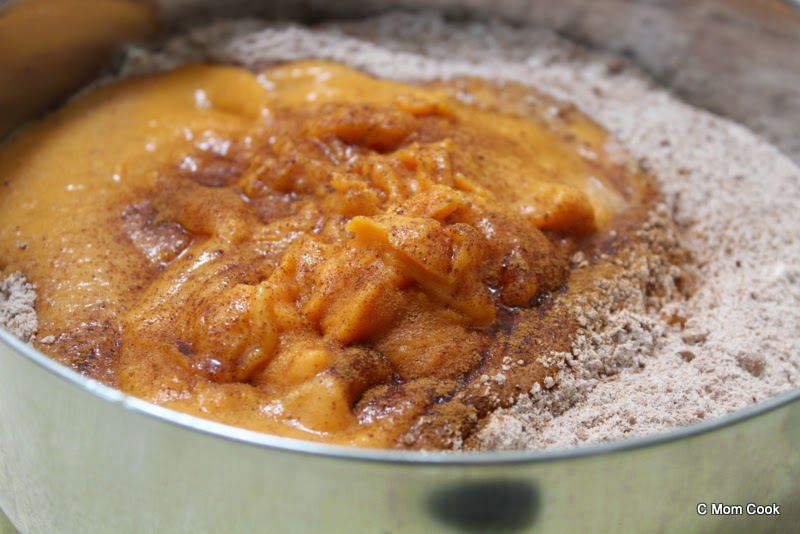
Once the butter is incorporated, the wet ingredients, including eggs and pumpkin puree, are gently kneaded in until everything holds together.


And then it's time to shape the scones...


...and add a delicious finishing touch. Or... let the kiddos add the finishing touch. A nice sprinkling of turbinado sugar.


The kids are very generous with their sprinklings.


And then they bake.  And it's magical.


These were the absolute perfect breakfast for a day off from school and both the kids and I really enjoyed them. Just the right amount of pumpkin, just the right amount of spice - absolutely perfect for a crisp, Fall morning.


Tracy, thank you so much for this recipe and for all of your delicious inspiration! I can't wait to try out more of your delicious recipes!


Pumpkin-Cinnamon Scones
slightly adapted from Pale Yellow

2 3/4 cups all-purpose flour
1/3 cup sugar
1 teaspoon baking powder
3/4 teaspoon salt
1 1/2 teaspoon cinnamon
1/4 teaspoon ground cardamom
1/4 teaspoon ground nutmeg
1/4 teaspoon ground ginger
1/2 cup (1 stick) unsalted butter, cold
2 eggs
1 teaspoon vanilla
1/4 cup coconut milk
1/4 cup turbinado sugar or any other coarse sugar

Whisk together the flour, sugar, baking powder, salt, cinnamon, cardamom, nutmeg, and ginger.  Cut the butter into small pieces and use a pastry blender to incorporate into the dry ingredients.  Blend until you have pea sized pieces. Or grate the butter using a box or rotary grater and use your hands to incorporate it into the dry ingredients.
In a small bowl whisk together the pumpkin puree, eggs, and vanilla.  Add this to the dry and mix until just combined.
I used my hands to lightly knead the dough together.
Divide the dough in half and place one half on a parchment lined baking sheet.  Shape the dough into a long rectangle with greased or floured hands and then divide into thirds with a greased bench scraper.  Cut each third diagonally with the bench scraper.  Lightly move the triangles away from each other.  Repeat with the other half of the dough on a second baking sheet.
Brush the top of each scone with the half-and-half and then generously sprinkle with turbinado sugar.
Place the baking sheets in the freezer for 30 minutes.  While the scones are chilling, preheat the oven to 425 degrees.
Bake the scones for 22-25 minutes or until golden brown.
Cool slightly before eating on a wire rack.

Enjoy!


Monday, October 13, 2014

Bazlama (Turkish Flatbread)


Happy Monday! Second Monday of the month, know what that means? Secret Recipe Club time!

This month I was assigned to a blog that was new to me, and I couldn't be happier about it. Rachel Cotterill is an amazing blogger. She is a writer (like, actual published author!), a photographer, a PhD student, and an all-around amazingly impressive person. Seriously, check out her blog - her travels, her adventures - she is amazing.

I was seriously torn about what to make this month. I really wanted to try her squash and chickpea stew, and have been craving scones since seeing her recipe. But I was totally intrigued by her post about Turkish Flatbread, and just knew I had to try it.

The ingredients themselves are not what are intriguing - it's a pretty basic bread recipe: flour, salt, yeast and water.  But what's intriguing is how the bread is cooked. The bread is not baked in the oven like most yeasted breads, - it is cooked on a pan on the stove, more like tortillas. I had to give it a shot.


The dough comes together super easily.

I did all of the kneading by hand, which I love. There's nothing quite like getting a real feel for your dough. And when it really starts to come together and smooth out, when you're kneading by hand, you know it right away. I love that.


Then the dough rests - and rises!

Shaping this "loaf" is a simple matter of rolling the risen dough into a ball, then rolling it out to about an inch thick. I tried to roll it to approximately the size of the pan I would be using.


And then you cook!

Five minutes on each side to get things started, then a few minutes more on each side, flipping regularly, until it's golden brown on each side and sounds hollow when tapped.


I think I had my heat up a bit too high, so my bread cooked pretty quickly, but it wasn't a problem.

I served this bread as a side with dinner, cutting it to be almost like bread sticks. Some of us buttered our pieces, but the bread tasted delicious even on its own.


And the next day, I found myself dipping the leftover breadstick pieces in hummus for an afternoon snack - yum!

Rachel, thank you so much for your beautiful blog and your delicious inspiration. I look forward to making lots more of your recipes and to following along with your future adventures.

Bazlama, Turkish Bread
(from Rachel Cotterill)

Makes 1 large loaf

350g (12oz, 2 cups) plain flour
1tsp salt
10g (1tbsp) instant dried yeast
200ml (7fl.oz) lukewarm water

Whisk together the flour, salt, and yeast.
Gradually add in the warm water, mixing with your fingers, ensuring that no dry patches of flour remain. As with any bread, the exact amount of water required will depend on the humidity, so pour slowly, and be prepared to add more as required.
Knead the bread for five minutes, until the dough is smooth and flexible.
Set the dough in a lightly oiled bowl (turning to coat all sides), cover with plastic wrap, and set to rise in a warm place for about half an hour.
Gently deflate the dough, give it a gently knead, and form it into a smooth ball.
On a lightly floured surface, roll the ball out to about an inch thick, trying to keep the thickness as even as possible. The bread should be about the size of a dinner plate.
Warm a dry frying pan over a medium heat (do not add any spray or oil!), and place the bread onto the pan.
Cook for about five minutes on each side to begin with, then continue to turn regularly until both sides are golden brown and it sounds hollow when tapped. Be patient - it could take up to about 20 minutes total, and be sure to keep an eye on it as it cooks.

Enjoy!


Monday, September 8, 2014

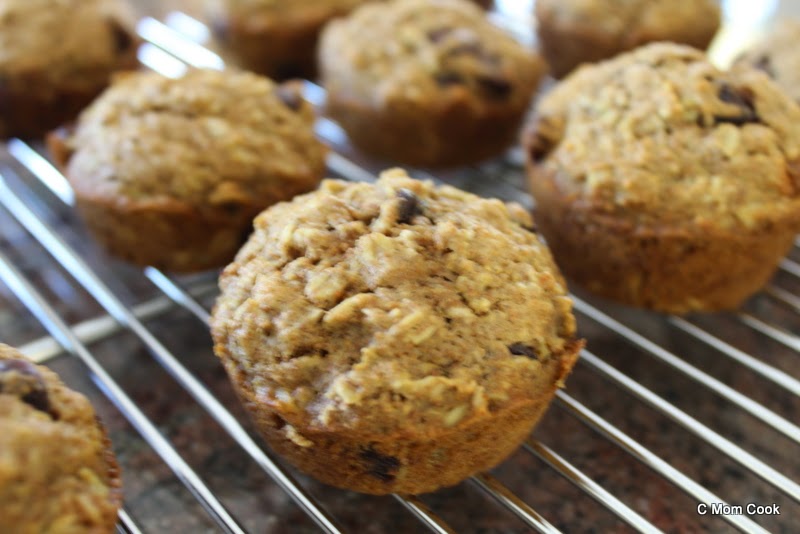
Oatmeal Chocolate Chip Cookie Muffins

Today is a big day in our house.

Today, little man has his orientation/meet the teacher day for preschool.


This might not seem like a big deal, but it is to me. 

For the last three and a half years, he's been my baby. But now he is starting school. Like a big kid. Once he starts, there's no stopping it. And that's scary. 


Yes, I went through this with little miss, too.

And now she's in third grade.  See? There is no stopping this.

BUT.

Back to school means one fun thing for a mommy-food-blogger.


It means after-school snacks!

(You were wondering how I was going to link this in, weren't you??)

My Secret Recipe Club assignment this month was Secrets From The Cookie Princess. I knew I'd love the blog just from the title. Cookies? Sign me up! And let me tell you, there are cookies galore - if you can dream it, Colleen can cookie it.  But there's also a great variety of recipes on the blog, too, from main dishes to appetizers and everything before, during and after.  Seriously, it's amazing.


When I started perusing the blog, I was actually looking for dinner ideas.  I was seriously tempted by her Butternut Squash and Black Bean Chili. And by the Acorn Squash Soup. And I totally plan on making both of those this fall, when those squashes are more readily available. 


But then I saw her recipe for Oatmeal Chocolate Chip Cookie Muffins and knew I just had to try them. 

The muffins come together very easily. As you can see from the photos, little man helped me out, too. A lot.


I guess that is the silver lining of his getting older, right?


And the results?


Yummy.

Super yummy.

And, seriously, they're really not that bad for you. So much so that I had no guilt at all giving them as an after school snack. Or as a treat breakfast the next morning. Oh yes, I did. 


Colleen, thank you so much for your awesome blog full of delicious inspiration. I can't wait to try your S'mores Banana Bread, all of your snickerdoodle variatioins, and many, many of your cookies!! You are amazing!


Oatmeal Chocolate Chip Cookie Muffins
(slightly adapted from Secrets From The Cookie Princess)

1 cup rolled oats (old fashioned)
1 cup milk, divided (I used unsweetened coconut milk beverage)
1 egg
1/3 cup brown sugar
1/4 cup butter, melted and cooled (I used coconut oil, just above room temperature)
1 1/2 teaspoons vanilla extract
1 cup whole wheat pastry flour (I used regular whole wheat flour)
1 teaspoon baking soda
1/2 teaspoon cinnamon
1/4 teaspoon salt
1 cup chocolate chips

Preheat oven to 350 degrees and spray a 12-well muffin tin with nonstick cooking spray.
In a medium bowl, combine oats and 1/2 cup milk.  Let soak for 5-10 minutes.
While the oats are soaking, whisk together the egg and brown sugar in a large bowl until smooth and caramel colored.  Gradually add the butter (coconut oil), constantly whisking to temper (I didn't have to temper, but I had to get teh consistency nice and smooth), then whisk in vanilla.
Add flour, baking soda, cinnamon and salt and stir to combine.  Add in oat mixture and stir in the rest of the milk, then fold in chocolate chips.
Divide batter evenly into the prepared muffin pan.
Bake at for 18 minutes or until tops are golden and a tester inserted in center comes out clean. I had to bake for three extra minutes, but I think that's just my oven.
Let cool in pan for 10 minutes before removing to wire rack to cool completely or serve warm.
Enjoy!

Monday, August 11, 2014

Chai Tea Bread

Hello and happy August!

I have to apologize again for my lack of posting. Things here have been crazy. Getting used to the new house, each of the kids have had camps and other fun summer activities, and then... we all got sick. All of us. So I've been concentrating on disinfecting the house and trying to get all of the germs out of here!

That being said, the bright spot of this month was my Secret Recipe Club assignment!  This month had me scouring Morsels of Life, and, let me tell you, there is no lack of inspiration there! This blog... let me tell you. It's awesome. And there's something for absolutely everyone. I promise.

I was worried that I was going to have a hard time choosing, and, don't get me wrong - there were plenty of awesome choices - but when I saw a posting for Chai Tea Bread, I knew I had a winner. You know my love of all things chai, so this should come as no surprise at all!

I made a couple of changes, but just to make the recipe dairy-free.

For my base chai flavoring, I steeped a chai tea bag (a special spicy one!) in coconut milk, which I used as my main liquid for the bread.


I did wind up having to heat this a bit (I just transferred it to a small saucepan and put it over low-medium heat for a few minutes) to extract more flavor, but that was no big deal.

While that heated, I mixed together the dry ingredients, including the delicious chia-inspired spices (cardamom, cinnamon and ground cloves).


Then it was a simple matter of mixing up the wet ingredients and barely stirring in the dry ones...


...then transferring it to a loaf pan to bake!  Right before popping the loaf into the oven, you do something magical.  You sprinkle it with shredded coconut.

While the bread bakes, the coconut toasts.

And the results are amazing.


This was a really delicious bread - it had a nice, smooth chai flavor without being too strong (remember, little miss isn't a fan of cardamom - and this bread satisfied my chai-love and still made her happy!).

Everyone's favorite part, though, was that toasted coconut on top.


Absolute perfection.


Chai Tea Bread
(only slightly adapted from Morsels of Life)


1/4 cup butter (I used coconut oil)
2 cups flour (I used 1 cup whole wheat and 1 cup white.)
2 teaspoons baking powder
3/4 teaspoon cardamom, ground
1/4 teaspoon ground cinnamon
1/8 teaspoon cloves, ground
1/2 cup sugar
3/8 cup milk
1/2 cup Chai concentrate or Chai tea
(in place of the milk and chai concentrate, I used 5/8 of a cup of coconut milk, into which I steeped a chai tea bag)
2 teaspoons vanilla extract
2 eggs
1/8 cup shredded coconut

Preheat oven to 350 degrees and grease a loaf pan.
In a medium bowl, combine the sugar, butter, eggs, chai concentrate or tea, milk and vanilla.
In a separate bowl, combine the flour, baking powder, cardamom, cinnamon and cloves.
Add the dry ingredients to the wet, combining them until just barely moistened.
Pour the prepared batter into the prepared loaf pan.
Sprinkle shredded coconut on top.
Bake until a lovely scent wafts through the kitchen (which it will!), about 50 minutes.

Monday, July 14, 2014

Sweet Potato Chocolate Brownie Cake

It is super, crazy busy here. We are in the process of moving houses. Which means my kitchen is... well... in two places at once.

But does that stop me from signing up for the Secret Recipe Club's monthly challenge? Heck no!

But knowing that things would be... well... a bit all over the place (literally), I had to get an early start.

This month I was lucky enough to be assigned to Fit Mama Real Food, run  by the impressive Heather who, as you might imagine, has a passion for both fitness and healthy eating - two things interests I happen to share with her!

She  has some really interesting and delicious looking recipes on her page, with all kinds of healthy substitutions and alternatives.  While everything looked great, I zeroed in on my choice right away. I mean, the post was titled irresistible chocolate brownie cake. Who was I to try to resist??

And the twist? It's made with these beauties.


Yup - sweet potatoes. In a chocolate cake.

I baked the sweet potatoes then gave them a whirl with my immersion blender.


I had to add a little bit of water, since they were super thick (and Heather indicated that she'd used baby food sweet potatoes, which are much thinner), but it was quick and easy to do.

Then the cake comes together much like normal.

Dry ingredients...


Wet ingredients...


And voila!

I added chocolate chips on top of mine. Because... why not?


And it baked up beautifully.


Little miss was a little wary to try it, because she knew about the sweet potatoes, but little man had no such qualms.


And after little man let it be known how much he liked it, little miss just had to try it for herself. And wouldn't you know, she loved it, too!  Me? I thought it was great. The sweet potato added a nice richness to both the texture and flavor of the cake, and also let me enjoy an extra piece guilt free!

Heather, thank you so much for this awesome recipe and for all the fun you share on your blog!


Sweet Potato Chocolate Brownie Cake
(slightly adapted from Fit Mama Real Food)

1/2 cup milk of choice (I used coconut milk beverage)
1/2 cup olive oil, or substitute more milk (I used canola oil - it was what I had. And it worked great!)
2 tablespoons vanilla extract
2 cups sweet potato puree (I pureed three large sweet potatoes and added a bit of water as I pureed to thin it out)
2 cups whole wheat flour (I used one cup whole wheat, one cup all purpose)
1 teaspoon baking soda
1 teaspoon sea salt
2 teaspoon baking powder
1/2 cup cocoa powder
2/3 cup natural cane sugar (I used granulated sugar)
optional: chocolate chips to either mix in or sprinkle on top or both!

Preheat oven to 350 and grease a loaf pan and standard-sized 6 muffin pan. You can choose to only use a loaf pan and make no muffins, you will just need to bake it longer than listed below. I used a loaf pan and two mini-cake pans.
In a mixing bowl, whisk together milk, oil vanilla extract and sweet potato puree.
In a separate bowl, combine flour(s), baking soda, salt, baking powder, cocoa powder and sugar.
Stir wet ingredients into the dry and mix gently until just combined. Try not to over-mix.
Distribute batter evenly among the prepared pans, and, if desired, sprinkle chocolate chips on top.
Bake muffins for 12 minutes and the loaf for 25 minutes. My loaf took about 32 minutes (I used more than half of the batter) and my mini cakes took about 20. Make sure to keep an eye on yours, based on the pan sizes you chose.
Check with a toothpick for doneness before removing from the oven.
Allow to cool 5-10 minutes before removing from the pans.

Enjoy!


Monday, June 16, 2014

Banana Bread Milkshake (smoothie) - an SRC bonus

I know, I know, I just posted my Secret Recipe Club post last week.  But when I learned that a member of this week's reveal group had a family emergency and needed help with her assignment, I couldn't resist volunteering.

And I was sosososo lucky that I did, too! The blog that needed help was none other than Mangia, written by the awesome Chelsy.  Sound familiar? It should! Because I actually baked from her blog before, when I made this pumpkin cake.

Now... if you look back to that post, you'll see that I wanted to make... umm... everything on her blog. And even attempted multiple recipes at the time.

So I had the same problem this time. 

I almost tried to make coconut butter again, but, once again, I didn't have unsweetened coconut.

But then I saw this. A recipe for a milkshake made out of a banana muffin. It was so intriguing that I knew I had to try it.

Now, Chelsy made her milkshake out of these muffins. They're grain free, vegan and super interesting. I was really tempted to try that recipe. But I didn't have all of the ingredients (like... umm.. .the coconut butter...). I was also a bit worried about whether little man could eat them, because coconut flour works very differently from traditional (wheat) flour and requires more eggs when used in baked goods. Little man is allergic to eggs. And while he can eat them in the correct proportion when baked into a recipe, this version used way more eggs in proportion to the rest of the ingredients, so I didn't think they'd work for him.  So I made these instead. 

With the intention of making them into milkshakes.

Which completely amused the kids.


Yup - just pop a muffin right into the blender.

Then add the rest of the ingredients. I kept this dairy free (coconut milk) and nut free (Sunbutter instead of the almond butter called for in the recipe) so that little man could enjoy.


And then just blend!


Seriously - that easy. And seriously - I'd never have thought to make a milkshake (okay, more like smoothie - I didn't freeze the banana first...) out of a muffin.


But trust me. I will definitely do it again some day.

Because...


YUM! These were quick, easy, fun and absolutely delicious. And you can customize it however you want - change the muffin, change the sweetener, use any kind of nut or seed butter... yeah - what an awesome idea. 

Chelsy, I am so glad to have had another opportunity to play with your blog. And I promise to make the coconut butter one day. For real :)


Banana Bread Milkshake (Smoothie)
(from Mangia)

1 banana muffin (I used my crumb topped banana muffins)
½ frozen banana (for a milkshake consistency. A non-frozen banana works, but it's more of a smoothie)
1 cup unsweetened coconut milk (from a carton, not a can)
1 tablespoon pure honey
1 tablespoon all-natural almond butter (I used sunbutter to make it nut-free)
1/2 banana muffin, for topping

Place the muffin, banana, coconut milk, honey and nut/seed butter (whichever you are using) into a blender and blend on high until creamy.
Pour the milkshake into a small bowl or glass.
Crumble the last 1/2 banana muffin over the top of the milkshake and serve.

Enjoy!


Monday, June 9, 2014

Chocolate Molten Cake

You know what I love about the Secret Recipe Club?

That it introduces me to all sorts of blogs that I might have missed otherwise.

Such as my June assignment, Learning Patience, written by the awesome Corey. And when I say awesome, I mean... like... really awesome. For starters, she and her husband live in Trinidad. Well, they live in Trinidad right now. In a week they're moving to London. Seriously. Secondly, she's a runner. I'd say "like me" at the end of that sentence, but she's a much better runner than I am. Thirdly, she's so open and honest and... well... likeable. Her posts are so easy and fun to read. Fourthly, she has awesome taste in food. Like, super yummy stuff.

I had so many of her recipes running through my head to make for this assignment, but kept coming back to the one for Chocolate Molten Cake. I have always wanted to make those little (single serve) molten lava cakes that ooze (in a yummy way, of course) chocolate deliciousness when you cut into them, and this looked like a lava cake's big brother. Or older cousin. Or some other really cool, bigger relative.

That, and the recipe just looked so... different. The way this cake goes together was so interesting. I had to wait until the kids could help me because I knew little miss, in particular, would get a kick out of seeing it come together.

The base batter is pretty standard.

A bunch of dry ingredients...


...get mixed with some wet ingredients. Little miss is doing that on the left here:


And what's little man mixing? One of the next few layers.

See, that batter that little miss put together is spread on the bottom of a pan. Then chocolate chips are sprinkled on top.


Then that mixture that little man was working on gets sprinkled on top of the chips.


And not mixed in.

And to top all of that off, pour some coffee over it.


Well, technically it's supposed to be espresso powder mixed with hot water. But we aren't huge espresso (or coffee...) drinkers here, so I used instant coffee.

And... again... don't mix it in.

Little miss was confused and amused all at the same time.

And, to be honest, so was I.

But then it bakes. And comes out like this:


Nicely baked on the perimeter, but with a little jiggle (sorry, can't see that in a photo...) in the middle.

And is it ooey gooey?


Holy smokes yes, in the yummiest possible way. That coffee settles in and the bottom becomes this... pudding type substance that is just... so delicious. And the cake itself is delicious, too! It tastes amazing with ice cream. Or whipped cream. Or just by itself. 

This really was super fun to make and way too easy to eat. Seriously, you have to try it.


Chocolate Molten Cake

1 cup flour (I used whole wheat)
2 teaspoons baking powder
1/2 cup unsweetened cocoa powder (divided)
1/2 teaspoon salt
1 cup brown sugar (divided)
1/2 cup whole milk (I used coconut milk)
4 tablespoons unsalted butted, melted
1 egg yolk
2 teaspoons vanilla extract
1 tablespoon espresso powder (I used instant coffee)
1 cup hot water
1/2 cup semi-sweet chocolate chips

Pre-heat oven to 325.
In a medium bowl, combine flour, baking powder, salt, 1/4 cup of the cocoa and 1/2 cup of the brown sugar. Whisk until well combined and not clumpy.
Stir in the milk, vanilla, yolk and melted butter.
Spread the mixture into a buttered 9" square pan. I couldn't find my square pan (weird, I know) so used a 9 inch round pan and it worked great.
In a small bowl, combine the remaining 1/2 cup brown sugar and 1/4 cup of cocoa. Whisk to break up clumps.
Sprinkle the chocolate chips over the cake batter and then sprinkle the cocoa powder and sugar mixture on top of that. Don't stir any of this in.
Combine the espresso powder with the hot water and pour all over the top. Again - do not stir.
Bake for 14 minutes and then start checking cake. Depending on the oven, it could take between 20 to 35 minutes. The edges of the cake should feel baked but the middle should have a gentle jiggle. Mine took about 24 minutes.
The sauce poured on top has now settled to the bottom to create a rich pudding.
Let cool in pan for about 5 minutes and serve, preferably with ice cream.

Enjoy!


Related Posts with Thumbnails