Showing posts with label gingerbread. Show all posts

Monday, February 18, 2013

Gingerbread Spread - One More SRC Bonus

The call goes out, and I can't help but volunteer. For this week's Secret Recipe Club reveal, there were a couple of missing posts, so I offered to help out. And when the hostess sent me the blog that needed "rescuing," I was in heaven.

While I had never seen it before, Mele Cotte may just be one of my new favorite blogs. Christina, the blogger behind Mele Cotte, is amazingly talented and has so many mouthwateringly delicious looking recipes. Within minutes of scanning the blog, I already had half a dozen earmarked to try.

For the sake of getting a post up quickly, I chose a quick recipe, but one that I would have bookmarked to try during the holiday season (yes, planning way ahead...) - gingerbread spread.  As you may have noticed, I love just about anything gingerbread, and this simple cream cheese spread looked too good to pass up.

The first thing that I did was to measure out all of my spices - brown sugar, cinnamon, ginger, cloves and nutmeg.


In a separate bowl, I placed one block of softened cream cheese and two tablespoons of molasses.


Now, the recipe, as it is written, calls for all of the ingredients to be mixed together in a food processor. I didn't feel like pulling out my mini-food processor, nor making that much noise (it was bedtime for the kiddos), so I mixed everything together by hand. While I am sure the food processor makes it quicker, it really wasn't difficult to get everything incorporated and smooth.

The results were delicious!


The sharp spices and the cool cream cheese come together deliciously, and spread on my graham crackers, I almost felt like I was eating gingerbread cookies!


I think I am going to have this on a bagel for breakfast tomorrow!

Christina, while I don't ever wish for anyone to be orphaned, I am so glad to have been introduced to your blog, and I can't wait to make lots more of your recipes!!


Gingerbread Spread
(from Mele Cotte)


1 8-oz package cream cheese, softened
2 Tbsp. molasses
1 tsp. brown sugar
2 tsp. ground cinnamon
1 tsp. ground ginger
¼ tsp. ground cloves
¼ tsp. ground nutmeg

In the bowl of a food processor, add all the ingredients and blend until smooth.
If you don't have a food processor (or need to make this more quietly...), you can mix everything together by hand.
Transfer the mixture into an airtight container and let chill for at least 30 minutes before serving.
Makes about 1 cup.

Enjoy!


Friday, January 4, 2013

Gingerbread Cheesecake

We have a New Years tradition in our house. Well, it begins a few weeks before New Years.  And it always brings me back to the very start of this here blogging adventure. 

My first post (well, the first actual food post) was about the first ever gingerbread house that we made. It's crazy to look at that post now and think that the little three and a half year old girl helping me out is now a big first grader. And a big sister... But that first gingerbread house is what started our tradition. Each holiday season we bake and build a house and little miss decorates it with as much candy as she can. 

Then on New Years Day, we break it apart, letting out all the joy, love and luck that was baked and built into it, filling our home with all sorts of positive energies for the year ahead.  Fun and constructive while also being fun and destructive (breaking apart that house can be hard!)

Okay, so come New Years Day afternoon, we were trying to figure out what to bring for dessert to the family's traditional pork and sauerkraut and lentil dinner.  Daddy wanted cheesecake, which made me think of this awesome, delicious looking gingerbread version I'd seen the week before.  But it called for gingerbread cookie crumbs for the crust.  I lamented to daddy that I wished I had some leftover gingerbread cookies to crush up in order to make this. And he looked at me like I was crazy.  "Shell," he said, "you have so much baked gingerbread just waiting for you!" and he pointed to the battered, broken, good-luck house on the table.

Duh.


Crust ready, it was time for the filling. The recipe in the link above looked good, but after doing all of those Willow Bird Baking challenges, I know that Juile's basic cheesecake recipe is an absolute winner, so I just adapted that for the gingerbread flavor by adding molasses and traditional gingerbread spices (ginger, cinnamon, nutmeg and clove). Worked like a charm.

Rather than bake a large cheesecake, we made this individual-sized by using a muffin tin rather than the usual springform pan.

I am not sure what went wrong in the baking process - if it had something to do with the reduced size or what, but all of my mini cheesecakes cracked and sank.


But aside from that, they were absolutely perfect. Silky smooth texture plus delicious gingerbread flavor. Talk about a win-win!


Everyone really enjoyed them, and even asked to keep some of the leftovers!


Now, the recipe as I made it made both more crust and more filling than I needed for the twelve-well cupcake pan that I used, so I baked up the extra in a pie plate.


Next time I really want to make a full sized version of this, but these were the perfect dessert for the end of the holidays. And what a delicious way to share the good luck our our gingerbread tradition with the rest of the family!


Gingerbread Cheesecake
(inspired by That Winsome Girl, cheesecake base based on Willow Bird Baking)

for the crust:
2 cups gingerbread cookie crumbs
5 tablespoons unsalted butter, melted

Preheat oven to 350 degrees. Combine butter with cookie crumbs until all crumbs are moistened. Scoop into wells of muffin tin and use a small cup (shot glass?) to press the crumbs in and shape them up the sides to create mini crusts. Alternately, you can press it into the bottom and up the sides of a springform pan. Bake for 6-10 minutes to set. Allow to cool.

for the cheesecake:
3 8-ounce packages of cream cheese, room temperature
3/4 cup granulated sugar
1 1/2 tablespoons all purpose flour
2 teaspoons vanilla extract
3 large eggs
1/4 cup molasses
1 heaping teaspoon ground ginger
1 heaping teaspoon ground cinnamon
a dash of ground nutmeg
a dash of ground cloves

In a large bowl, beat the cream cheese and sugar on medium-high speed until well blended. Beat in the flour and spices. Add in the vanilla and molasses, and beat until well incorporated, scraping down the sides of the bowl as needed. Beat in the eggs one at a time, scraping down the bowl between each addition. Pour or scoop (if doing the mini version) the filling into your prepared and cooled crust(s).
Bake for about 40 minutes - the top(s) will be lightly browned and may have cracked.
Allow to cool completely and chill for a few hours in the refrigerator.

Enjoy!

Friday, December 9, 2011

Gingerbread Cookies

In this new online world, I have made many invisi-friends. Other stay at home moms, other food bloggers - there are amazing communities full of some really great people out there. I am honored to have been asked to guest-post on the blog of someone who spans both communities - someone I met as a stay at home mom who also happens to write a really fun blog, Adventures in Mommy-Land. She's hosting a week of guest posts for a virtual cookie party, and asked me to share a recipe! You should check out her blog and the other delicious recipes that have been shared this week. And for fun, here's a link, and the post that I shared over there!


Hi! I am Shelley from C Mom Cook. I have been reading Charlene's blog for years, and am so excited to be a part of this online cookie exchange!

In our house, baking is a family affair. My five year old daughter has been helping me in the kitchen from the time she could stand on a chair or stool, and my almost one year old son loves to take part as well. From helping to measure or pour ingredients to mixing and stirring, or even just getting their hands into everything and making a flour-y mess - it's all about fun and learning.


We carry this family baking spirit right on into the holidays with us each year. We bake a wide variety of treats over the entire holiday season, to be enjoyed by everyone - friends, family, teachers, members of our community. And in our house, no one cookie says "Happy Holidays" quite like a gingerbread cookie. Sure we make lots of other cookies (and devour every crumb!), but there's nothing quite like the deliciously warm, spicy scent and flavor of gingerbread to make the season that much more special.

The following is our favorite gingerbread cookie recipe.


Gingerbread Cookies
(from Grandma's Molasses)

8 tablespoons (1 stick) butter (at room temperature)
1/2 cup sugar
1/2 cup molasses
1 egg
2 cups flour
1 teaspoon baking soda
1/4 teaspoon salt
1 teaspoon ground ginger
1 teaspoon cinnamon
1/8 teaspoon ground cloves

In a mixer, cream together the butter, sugar and molasses. Add egg and beat until well combined.
In a separate bowl, sift together the flour, baking soda, salt and spices.
With the mixer on low, slowly add the dry ingredients to the butter/egg mixture.
Once the dough has come together, wrap it in plastic wrap and allow it to rest in the refrigerator for at least two hours (or you can put it into the freezer for an hour, if you are pressed for time). (The dough can rest in the refrigerator overnight, too, if it is easier to make it a two-day process.)
When you are ready to bake the cookies, it is best to divide the dough into portions, to allow the portions not being used to remain in the refrigerator while you are working with one section.
Preheat the oven to 350 degrees.
Roll each section of dough to approximately 1/4" thick and cut into shapes using the cookie cutter(s) of your choice. Lay each cookie onto a baking sheet, about an inch apart. You can decorate the cookies with sprinkles or chocolate chips prior to baking, if you wish.
Bake each tray of cookies for 8-10 minutes.
If you choose to decorate these cookies after they are baked, allow them to cool fully first.

Please note that this recipe makes delicious cookies, but shouldn't be used for gingerbread houses - you need more of (what we refer to as...) a "construction grade" gingerbread cookie for house-building, and these cookies are soft and chewy.

Happy Holidays!


Sunday, December 19, 2010

Gingerbread Overload!

Okay, when I said that December was gingerbread month for me, I wasn't exaggerating. At all. This past week was extremely gingerbread heavy for us, and there are plenty more recipes that I want to try... time permitting.

This past week saw a lot of this:


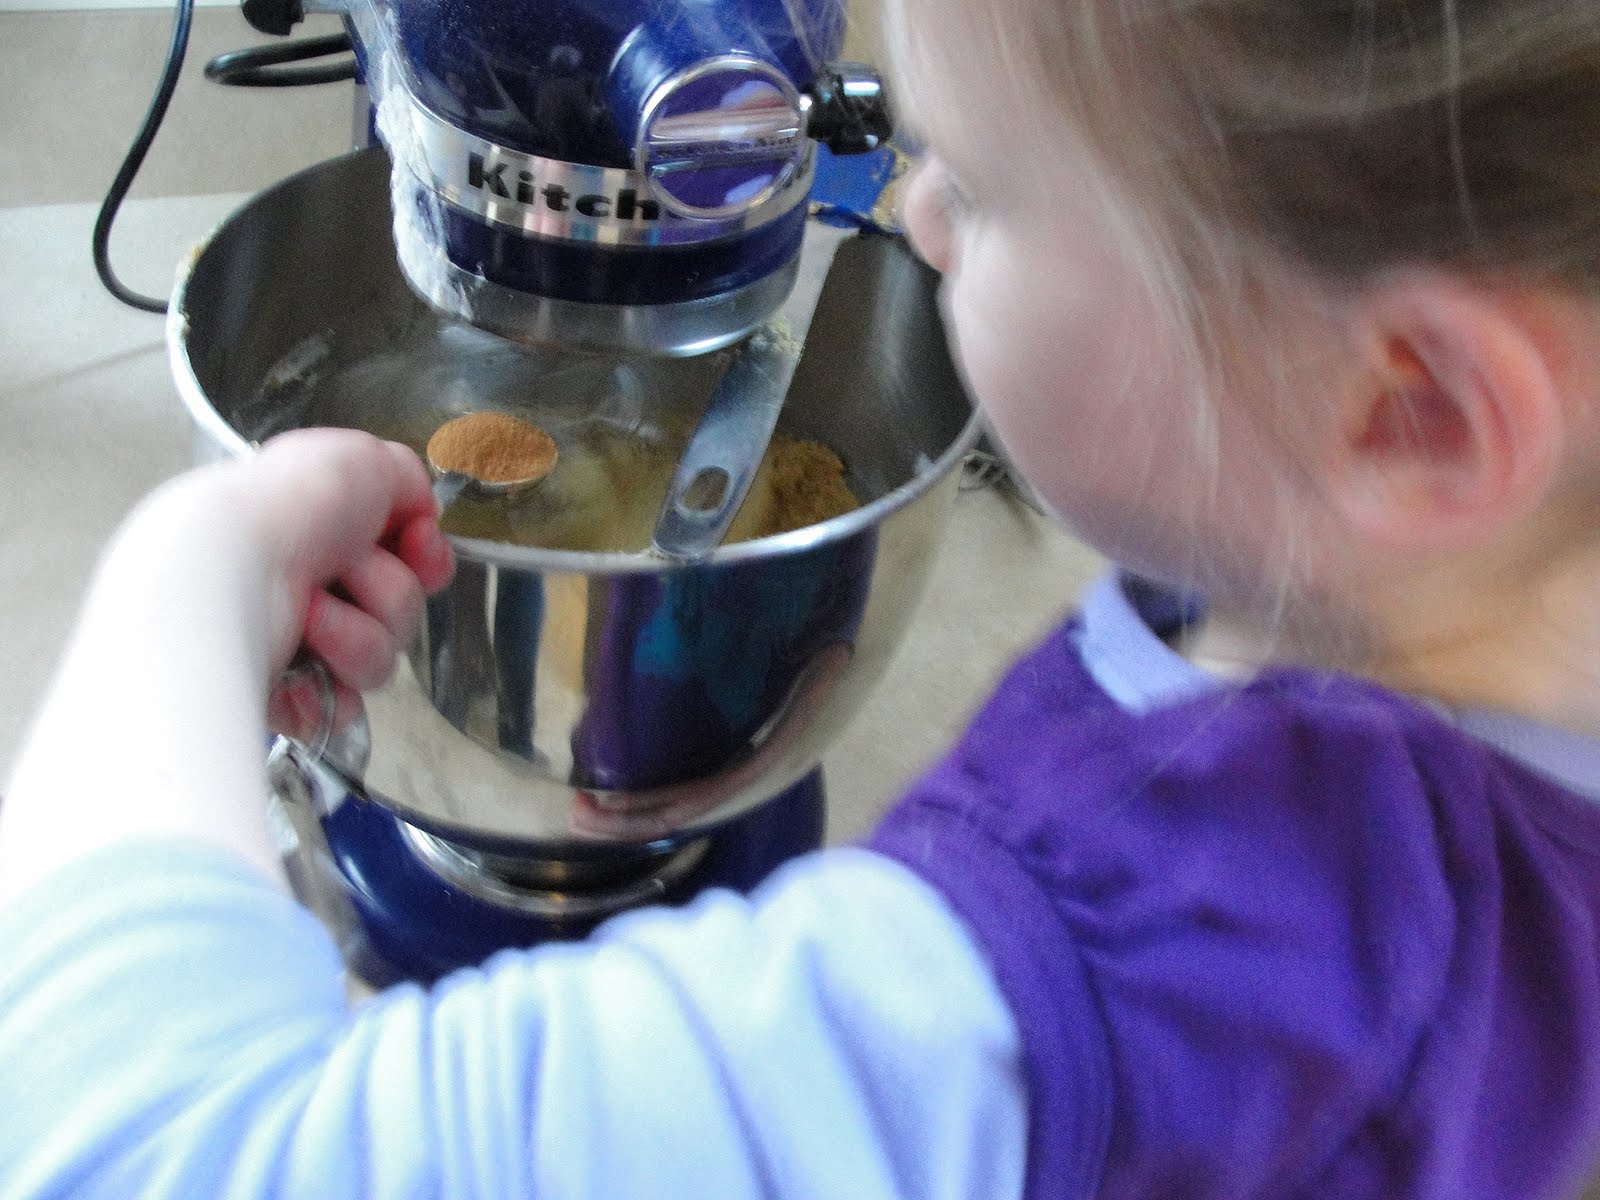
That would be little miss measuring ingredients for gingerbread cookie dough.

And we also did a lot of this:


That would be little miss giving her rolling pin a very good workout.

You see, we had two big gingerbread projects this week.

The first was for little miss's ballet class, where they had a holiday celebration and cookie exchange.

As soon as little miss heard that there would be a holiday cookie exchange, she immediately requested gingerbread. And who was I to disagree? I have a go-to gingerbread cookie recipe, and I am almost embarrassed to admit that it is the recipe from the first bottle of molasses I bought... but it has worked and gotten more rave reviews than any other gingerbread cookie recipe I have tried, so now it is my standard.

I wanted to try to think of a way to make these cookies special both for the holiday and for a group of four-year-old ballerinas, so here's what we came up with. Gingerbread girls. Dressed in tutus. Shiny, pink, sugary tutus. Little miss helped with the rolling and cutting, I piped the tutus, and little miss handled the sugar. I am no artist, but even I think these came out pretty cute. And the girls at ballet seemed to like them, too, so we were pretty pleased.


Our second gingerbread project this week was to prepare our second annual gingerbread house. I chose the Pixie House pattern from this site, as little miss has quite a thing for pixies and fairies these days, and we set to work. We actually use a different recipe for our gingerbread house than we do for our cookies. The recipe that we use for cookies includes baking powder, and bakes up beautiful and a bit puffy, and has a nice soft texture. Fantastic for a cookie, but not exactly what I would call construction-grade. For our house, I use this recipe, as it is specifically given in reference to building a house. I made a half batch this year, as I knew that this house would be a bit smaller than the one we made last year, and it actually worked out to be exactly the amount of dough we needed for our pattern.

A gingerbread house is a multi-day process, which is sometimes a little tough for an impatient preschooler, but little miss was actually really good about it. Day one involved making the dough and baking the pieces.
Day two is construction day, involving lots of royal icing, several soup cans, a lot of patience and quite a bit of mess (well, for us, anyway). Little miss's favorite part is positioning the cans to hold up the walls while they dry. My favorite part is when I see that it doesn't collapse as the royal icing sets.
Day three, though, is the favorite for everyone - decorating day. The decorating process begin with little miss repeatedly going through every single piece of candy that we have in the house and choosing which would be appropriate decorations for our gingerbread house. This process is actually repeated many times, until the final decorating day arrives. Once the candy is chosen and actually pulled aside, I try to let little miss handle as much of the decorating work as possible, including piping out the royal icing and choosing candy placement. Every once in a while I have to make a suggestion or two, based on candy weight (as in: "umm... I don't think that heavy candy will stay up on a vertical wall, no matter how much icing you put on it..."), but otherwise, little miss has total creative license.
The final result is a whimsical, fun house which will never win a prize in any kind of contest, but shows the true spirit of the baker and designer - that we are learning and trying and having fun with it. One day I will get better at making these, but for now, I am proud of our little house. As is little miss, who, as it so happens, took the final picture posted here. I think I have a budding food-blogger on my hands!

Sunday, December 12, 2010

Gingerbread Waffles

There are certain seasons that I associate with specific tastes and flavors, and it is so ingrained in me, that during those specific seasons, those flavors actually appeal to me more than any other, and more than any other time of year. During the summer, I will pick any recipe involving fresh fruit, no matter what other recipes are lined up next to them. During October and November, I will try any recipe calling for pumpkin. And in December, I will always choose gingerbread.

So it should be no shock that, while foodgawking recently, I was really drawn to several gingerbread themed recipes. The most intriguing to me, though, were these gingerbread waffles.

Today being Sunday (and my birthday...), I decided to have these as a special breakfast (well, brunch) treat. And, being the weekend, daddy and little miss were on hand to help out, which was a good thing, because this recipe called for lots of bowls and lots of steps - there was definitely plenty for everyone to do!

Little miss started out by mixing the wet ingredients - egg yolks, brown sugar, buttermilk (or my usual substitution of milk "soured" with vinegar) and molasses. Then, with a little help from daddy, she mixed in some melted butter.

While daddy and little miss worked on the wet ingredients, I pulled together the dry ones - flour, baking powder, baking soda and a whole assortment of the yummy spices that make gingerbread as flavorful as it is. I always love the look of all of the different shades of spices sitting together, not to mention how the whole mixture smells - YUM!

Anyway, once I whisked together the dry ingredients and daddy and little miss were done mixing the wet ingredients, it was time to mix the two together. As you can see, little seems to think that, when pouring from one bowl into another, the liquid being poured requires a helping step from the spoon... I haven't figured out if this does anything other than make the liquid being poured splash a bit, but she seems to think that is a vital part of the process...

Anyway, as the wet ingredients were being incorporated into the dry, there was one last ingredient to prepare (read: one more dish to dirty). The egg whites associated with those previously mentioned yolks were whipped up into stiff peaks, and then folded gently into the rest of the batter.

Now it was time for the waffle iron to do its job, and it definitely earned its stripes this morning!! Every other time I have made waffles, due to the size of my iron, the batter winds up making three or four waffles, maybe five if I am lucky... This batter made eight beautiful, soft, and fluffy waffles, and made the whole house smell absolutely scrumptious.

The only question left was how to serve these up. I wasn't sure if maple syrup was the way to go, since the waffles themselves were already chock full of delicious flavors already. So I opted to stay simple, and merely gave my waffle a dusting of powdered sugar and let the gingerbread flavor speak for itself. YUM.

Daddy and little miss, on the other hand, went a little fancier. You know, since it was a celebration... They busted out the whipped cream and cinnamon, and daddy even added some banana slices, and made some absolutely amazing looking delicacies.

These got rave reviews all around, and the leftovers will absolutely be enjoyed for breakfast tomorrow... or maybe even for dessert with a scoop of ice cream. With all of the steps and the resulting mountain of dishes, I will keep these for special occasions, but they will definitely be made again.


Gingerbread Waffles

1/2 - 2/3 cup brown sugar (depending on how sweet you want them)
2 eggs, separated
1 1/2 cup buttermilk
1/2 cup molasses
6 tablespoons butter, melted
2 cups flour
3 teaspoons baking powder
1 teaspoon baking soda
2 teaspoons ground ginger
1 1/2 teaspoons ground cinnamon
1/2 teaspoon salt
1/4 teaspoon ground cloves
1/4 teaspoon ground nutmeg

In a small bowl, mix together brown sugar and egg yolks until creamy. Stir in buttermilk, molasses and butter.

Into a large bowl, sift together the flour, baking powder, baking soda and spices.

In a clean glass or metal bowl, whip the egg whites with an electric mixer until stiff peaks form.

Add the liquid mixture in to the sifted dry ingredients and stir together. Carefully fold in the egg whites.

Cook according to the manufacturer's instructions for your waffle iron.

Enjoy!

Saturday, January 2, 2010

First Ever Gingerbread House

A couple of years ago I decided that I wanted to make gingerbread men. I'd never made them before, had barely even eaten them before, but they looked like a ton of fun. And we'd found a set of cookie cutters for my daughter, 1 1/2 at the time, that had cutters for pretty much any occasion, so we wanted to put them to good use. The cookies were a hit, and have joined the semi-regular cookie rotation around here. Then last December, a friend brought me the beautiful holiday gift of a homemade gingerbread house. It was amazing and impressive, and I was pretty awed by it. So this winter, I was ready to take on the challenge.

The project took three days, and my little helper was there through each step. And was just as excited as I was at the undertaking.

Day 1 - Baking Day:


Gathering ingredients, sorting the candy (which needs to be done many times throughout this process), stirring, mixing, rolling, cutting, baking, cooling - all done on day one.


By the end of day one, I was pretty pleased with our results!


Day 2 - Construction:

Ah, royal icing. So much sugar, the worry over egg whites (we used powdered - I REALLY don't want anyone getting salmonella), a wonderful edible spackle.

We used soup cans to hold up the walls as they dried, which worked like a charm. And which little miss claimed were there in case the gingerbread baby who would live in the house would get hungry. Such a sweetie.

By the time we got the roof up, I was feeling pretty good about the project. And we were super excited for the following day...

Day 3 - Decorating!!
This is what my little helper was waiting for the whole time, and I have to tell you, she did a great job. With only minimal help from mommy and daddy, she wielded the icing bag like a three and a half year old pro, and didn't eat TOO much of the candy as we went.


And here is the finished product! I am by no means about to go pro at this whole house-making thing, but I feel confident enough to make another next year, and maybe even try a less-simplified pattern. And maybe try a stained-glass window! Not to get too ahead of myself...
Related Posts with Thumbnails