Monday, July 14, 2014

July Daring Cooks' Challenge - Bibimbap

The July Daring Cooks' Challenge took us to Korea, where Renata of Testado, Provado & Aprovado taught us to make bibimbap. This colorful rice dish can be customized to meet any taste, and is as much fun to eat as it is to say!

Two posts in one day?? That's what happens every few months when the second Monday of the month (SRC posting day) happens to fall on the 14th of that month (Daring Cooks' posting day).

And, yes, that means that I had two challenges in flux while preparing to move. Whee!

But I couldn't not participate in this awesome challenge, hosted by the even more awesome Renata.  Renata is from Brazil, but spent the last few years in Korea, so has such amazing influences in her cooking. She is always an inspiration and I just had to cook along with her.

This month she challenged us to make bibimbap, a Korean rice dish that usually involves a variety of vegetables, some sort of protein and, in most cases, an egg - usually added to the dish raw!

The dish is usually a bit spicy, thanks in part to a red pepper sauce that is served alongside the main dish.

Preparing to move, I didn't want to add another jar to my pantry, so I decided to forgo the red pepper paste and create my own sauce, inspired by the given recipe.  Many Asian dishes use peanut sauces, so I went with a nut-allergy-friendly version, and made a Sunbutter sauce, made with Sunbutter, soy sauce, rice wine vinegar and minced garlic.


It was super thick, even though I added quite a bit of extra soy sauce, but I decided to just go with it.


Sauce resting in the fridge, it was time to consider the main dish. Bibimbap is a rice dish, but the rice is the hidden part of the dish, being placed in the bowl under a variety of sauteed  vegetables.  The possibilities are endless, so I just went with what I had on hand.


The longest part of the process is prepping all those veggies.  They all had to be sliced into relatively similar matchstick sized pieces.


Then each veggie is sauteed, separately, in sesame oil.

But the result is a really pretty plate of deliciousness.


The final aspect is the egg. Now, the traditional dish is served in a stone bow, which is heated prior to serving. What does this have to do with the egg? Well, when using that traditional, heated dish, the egg is added just prior to serving - and is cracked right into the bowl, over the finished dish.  When served, one simply starts stirring things together, which results in the egg cooking right in the bowl.  Pretty cool.

Except I don't have any stone bowls.

So I had to cook my egg prior to serving.  So I whipped up an egg and cooked it nice and flat...


...then sliced it up into matchstick sized pieces comparable to the veggie pieces.

Then it was time to construct the meal!

It starts with a layer of rice...


...then all of those veggies and the egg strips, arranged as artistically as you can manage. Not so much for me, but hey.


For the finishing touches, add a protein of your choice (I chose chicken tenderloins, sauteed in sesame oil and seasoned with salt, garlic powder and soy sauce), and serve with a side of the previously prepared sauce.


I know it seems like a lot of work and a lot of steps.  But it actually isn't so bad, and the results? Totally worth it!  This was interesting to prepare and actually really fun to eat.

Renata, thank you so much for this fun challenge - I can't wait to try other versions of this rice dish inspired by the recipe that you chose.

To see the challenge as Renata presented it to us, check it out here.


Sweet Potato Chocolate Brownie Cake

It is super, crazy busy here. We are in the process of moving houses. Which means my kitchen is... well... in two places at once.

But does that stop me from signing up for the Secret Recipe Club's monthly challenge? Heck no!

But knowing that things would be... well... a bit all over the place (literally), I had to get an early start.

This month I was lucky enough to be assigned to Fit Mama Real Food, run  by the impressive Heather who, as you might imagine, has a passion for both fitness and healthy eating - two things interests I happen to share with her!

She  has some really interesting and delicious looking recipes on her page, with all kinds of healthy substitutions and alternatives.  While everything looked great, I zeroed in on my choice right away. I mean, the post was titled irresistible chocolate brownie cake. Who was I to try to resist??

And the twist? It's made with these beauties.


Yup - sweet potatoes. In a chocolate cake.

I baked the sweet potatoes then gave them a whirl with my immersion blender.


I had to add a little bit of water, since they were super thick (and Heather indicated that she'd used baby food sweet potatoes, which are much thinner), but it was quick and easy to do.

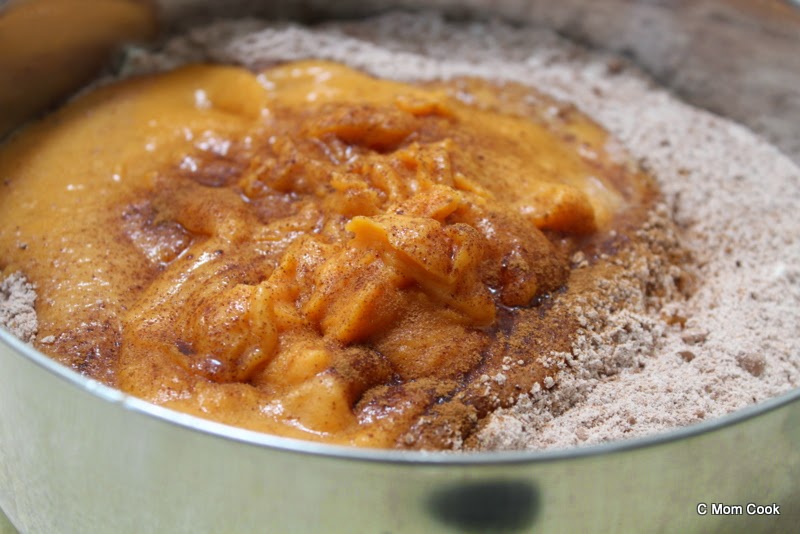
Then the cake comes together much like normal.

Dry ingredients...


Wet ingredients...


And voila!

I added chocolate chips on top of mine. Because... why not?


And it baked up beautifully.


Little miss was a little wary to try it, because she knew about the sweet potatoes, but little man had no such qualms.


And after little man let it be known how much he liked it, little miss just had to try it for herself. And wouldn't you know, she loved it, too!  Me? I thought it was great. The sweet potato added a nice richness to both the texture and flavor of the cake, and also let me enjoy an extra piece guilt free!

Heather, thank you so much for this awesome recipe and for all the fun you share on your blog!


Sweet Potato Chocolate Brownie Cake
(slightly adapted from Fit Mama Real Food)

1/2 cup milk of choice (I used coconut milk beverage)
1/2 cup olive oil, or substitute more milk (I used canola oil - it was what I had. And it worked great!)
2 tablespoons vanilla extract
2 cups sweet potato puree (I pureed three large sweet potatoes and added a bit of water as I pureed to thin it out)
2 cups whole wheat flour (I used one cup whole wheat, one cup all purpose)
1 teaspoon baking soda
1 teaspoon sea salt
2 teaspoon baking powder
1/2 cup cocoa powder
2/3 cup natural cane sugar (I used granulated sugar)
optional: chocolate chips to either mix in or sprinkle on top or both!

Preheat oven to 350 and grease a loaf pan and standard-sized 6 muffin pan. You can choose to only use a loaf pan and make no muffins, you will just need to bake it longer than listed below. I used a loaf pan and two mini-cake pans.
In a mixing bowl, whisk together milk, oil vanilla extract and sweet potato puree.
In a separate bowl, combine flour(s), baking soda, salt, baking powder, cocoa powder and sugar.
Stir wet ingredients into the dry and mix gently until just combined. Try not to over-mix.
Distribute batter evenly among the prepared pans, and, if desired, sprinkle chocolate chips on top.
Bake muffins for 12 minutes and the loaf for 25 minutes. My loaf took about 32 minutes (I used more than half of the batter) and my mini cakes took about 20. Make sure to keep an eye on yours, based on the pan sizes you chose.
Check with a toothpick for doneness before removing from the oven.
Allow to cool 5-10 minutes before removing from the pans.

Enjoy!


Friday, June 27, 2014

June Daring Bakers' Challenge - Cinnamon Rolls

This month the Daring Bakers kept our creativity rolling with cinnamon bun inspired treats. Shelley from C Mom Cook dared us to create our own dough and fill it with any filling we wanted to craft tasty rolled treats, cinnamon not required!

Hey - no need to click that link this time - you're already here!

This month I took a turn hosting the Daring Bakers, and dared the group to make a treat that, if you've been around for a while, you know I love - cinnamon rolls. And, as you probably already know, I love getting creative with my cinnamon rolls, sometimes skipping the cinnamon altogether and going for all kinds of creative fillings.

As examples for the group, I provided links and recipes to many of the varieties I've made over the years, including Peter Reinhart's traditional cinnamon buns, roasted banana cinnamon rolls, pumpkin brown butter apple cinnamon rolls, sourdough cinnamon rolls (of course! I borrowed Jenni's here because hers came out so much better than mine!), and, for anyone nervous around yeast, I even included my unyeasted sweet cinnamon biscuits.

But those were just examples! I then asked this creative group of bakers to be... well... creative! To make whatever dough they wanted, fill it with whatever sounded good. roll it up and bake it!

Now, the more creative submissions that rolled in on the forums, the more I craved rolled goodness. So I had to make a few too.

I started with these mixed berry rolls:


(I used Peter Reinhart's dough recipe and whipped up a mixed berry compote for the filling).

A week later, at the urging of little man, I made traditional cinnamon rolls, but immediately gave half the batch to a friend.

After that, I decided to test my own creativity and made a dinner version:


Pizza! I used pizza dough (I'll share that recipe later - it's worth its own post!) and rolled it with sauce and cheese.  Messy. But super fun!

I wanted to make more. In fact, I really, really wanted to make another batch yesterday.  But I held off. For now. Trust me - another batch is coming soon.

So, if you feel like it, check out the full challenge as the group saw it (here).

And thank you to everyone who baked along with me - your creativity and excitement were contagious and it was truly an honor to see all of the deliciousness that you created this month!


Friday, June 20, 2014

June Sourdough Surprises - Tempura

This month's Sourdough Surprises was totally different and totally cool. Over the last couple of years, we have been experimenting with all of the different things that we can bake with our starters. Well this month was a little different. We didn't do any baking.

This month was all about frying.

The primary inspiration this month was onion rings, but the options were truly limitless.

It actually took me a while to figure out what I wanted to do. And then it hit me. Tempura. I tried tempura once before and we all absolutely loved it. So... given that the idea this month was to batter and fry things, why not try it again?

The batter comes together super easily, though I was a bit surprised about the ingredients.

The dry ingredients include flour, cornstarch and two leavening agents - baking powder and baking soda. I wouldn't expect any leavening agents in tempura, much less two, but I went with it.


Then just combine a bit of sourdough starter with some water...


...mix everything together...


...and you're ready to start dipping!

I chose to go simple this time and just do broccoli.


And it fried up absolutely beautifully.


And even better - it tasted amazing.  Seriously - this is totally the way to eat broccoli. Battered and fried to golden perfection, it was so tasty.


Yeah, I know the frying undoubtedly cancels out most of the healthiness of the broccoli, but this was so delicious. It was more like snack food than like a veggie.


I seriously can't wait to do this again. And considering that I generally am not a fan of deep frying, that should tell you just how good this was.


Sourdough Tempura Batter
(from Maggies Mudpies - Sourdough blog)

1/2 cup flour
1/2 cup cornstarch
1/2 teaspoon baking powder
1/2 teaspoon baking soda
2 teaspoon seasoning salt or Old Bay (I used 1 teaspoon of salt and 1 teaspoon of garlic powder)
3/4 cups water
1/4 cup sourdough starter

In a medium sized bowl, whisk together the flour, cornstarch, baking powder and baking soda.
In a 2-cup measuring cup, combine starter and water, whisking together to break up starter.
Pour the liquid mixture into the dry mixture, stirring until there are no lumps. The mixture will be pretty thin - thinner than pancake batter.
Dip veggie or meat of your choice in the tempura batter, then deep fry for 2-3 minutes until golden brown. Remove from heat and drain on paper towels. Serve warm.

*note - the recipe I was following did not list specifics for the oil for frying. I used canola oil, which I heated to 350 degrees and it worked beautifully.

Enjoy!


Monday, June 16, 2014

Banana Bread Milkshake (smoothie) - an SRC bonus

I know, I know, I just posted my Secret Recipe Club post last week.  But when I learned that a member of this week's reveal group had a family emergency and needed help with her assignment, I couldn't resist volunteering.

And I was sosososo lucky that I did, too! The blog that needed help was none other than Mangia, written by the awesome Chelsy.  Sound familiar? It should! Because I actually baked from her blog before, when I made this pumpkin cake.

Now... if you look back to that post, you'll see that I wanted to make... umm... everything on her blog. And even attempted multiple recipes at the time.

So I had the same problem this time. 

I almost tried to make coconut butter again, but, once again, I didn't have unsweetened coconut.

But then I saw this. A recipe for a milkshake made out of a banana muffin. It was so intriguing that I knew I had to try it.

Now, Chelsy made her milkshake out of these muffins. They're grain free, vegan and super interesting. I was really tempted to try that recipe. But I didn't have all of the ingredients (like... umm.. .the coconut butter...). I was also a bit worried about whether little man could eat them, because coconut flour works very differently from traditional (wheat) flour and requires more eggs when used in baked goods. Little man is allergic to eggs. And while he can eat them in the correct proportion when baked into a recipe, this version used way more eggs in proportion to the rest of the ingredients, so I didn't think they'd work for him.  So I made these instead. 

With the intention of making them into milkshakes.

Which completely amused the kids.


Yup - just pop a muffin right into the blender.

Then add the rest of the ingredients. I kept this dairy free (coconut milk) and nut free (Sunbutter instead of the almond butter called for in the recipe) so that little man could enjoy.


And then just blend!


Seriously - that easy. And seriously - I'd never have thought to make a milkshake (okay, more like smoothie - I didn't freeze the banana first...) out of a muffin.


But trust me. I will definitely do it again some day.

Because...


YUM! These were quick, easy, fun and absolutely delicious. And you can customize it however you want - change the muffin, change the sweetener, use any kind of nut or seed butter... yeah - what an awesome idea. 

Chelsy, I am so glad to have had another opportunity to play with your blog. And I promise to make the coconut butter one day. For real :)


Banana Bread Milkshake (Smoothie)
(from Mangia)

1 banana muffin (I used my crumb topped banana muffins)
½ frozen banana (for a milkshake consistency. A non-frozen banana works, but it's more of a smoothie)
1 cup unsweetened coconut milk (from a carton, not a can)
1 tablespoon pure honey
1 tablespoon all-natural almond butter (I used sunbutter to make it nut-free)
1/2 banana muffin, for topping

Place the muffin, banana, coconut milk, honey and nut/seed butter (whichever you are using) into a blender and blend on high until creamy.
Pour the milkshake into a small bowl or glass.
Crumble the last 1/2 banana muffin over the top of the milkshake and serve.

Enjoy!


Saturday, June 14, 2014

June Daring Cooks' Challenge - Haggis

Oh yes, you read that title correctly.

The June Daring Cooks Challenge was hosted by Ruth from Makey-Cakey. She brought out the Daring-est of Daring Cooks and challenged us to make real Scottish Haggis.

Unfamiliar with haggis?  It's a traditional Scottish dish, a meat pudding of sorts, made from organ meats.  Usually containing sheep heart, liver and lung. And encased in the sheep's stomach.

Yeah.

I have never wanted to try it.

Daddy actually tried it once. In Scotland. It was on the breakfast bar where he was staying. And he said it wasn't bad!

But I still have the truly American  squeamishness about organ meats, so I've never been brave enough to try it.

So when our hostess suggested that this would be the challenge she would like to host, I actually told her that it was a great idea.  I mean, we call ourselves daring, right? It's right there in the title every month!

But then... I chickened out.  And decided to make the vegetarian version.

Now... I don't know that you can rightfully call a vegetarian dish "haggis," but it is definitely inspired by the real thing, with the flavorings and process or preparing it.

It was quite simple to make, with a lot of fun flavors and textures.

It started with onion...


...then carrots...


...and then some protein. The recipe calls for ground hazelnuts and peanuts, but with little man's allergies, I substituted sunflower seeds. And there's also mashed kidney beans.


Everything is cooked together with some broth, some lentils and a delicious blend of spices...


...and then you add steel cut oats to bind everything together.  This is cooked on the stove top to soften up the oats...


...and then placed into a loaf pan to be finished off in the oven.


Little man actually loved it right at this stage, and gleefully chowed down on the bits that were left in the pot as I snapped a few photos.

The resulting dish is toasty golden brown on the outside and full of delicious flavors.


It made a very hearty side dish - it could probably stand all on its own, what with the lentils, beans and nuts (seeds for me).


This was definitely a fun dish, and I'd really like to make it again. I think it needed a bit more broth than I used, but it had tremendous flavor and was very enjoyable.

And I am seriously considering getting over myself and trying a more authentic version.

Maybe.

To see the most daring of Daring Cooks, check them out here.

And to see the full challenge, as wonderfully prepared by Ruth, check it out here.


Vegetarian Haggis
(from allrecipes.com)

1 tablespoon vegetable oil
1 medium onion, finely chopped
1 small carrot, finely chopped
5 fresh mushrooms, finely chopped (I didn't have mushrooms, so I omm=itted these)
1 cup vegetable broth (I used chicken broth, making this not truly vegetarian...)
1/3 cup dry red lentils (I used regular lentils)
2 tablespoons canned kidney beans - drained, rinsed, and mashed
3 tablespoons ground peanuts (I used sunflowers, ground in the food processor)
2 tablespoons ground hazelnuts (again, I used sunflowers, ground in the food processor)
1 tablespoon soy sauce
1 tablespoon lemon juice
1 1/2 teaspoons dried thyme
1 teaspoon dried rosemary
1 pinch ground cayenne pepper
1 1/2 teaspoons mixed spice (I used salt, pepper and garlic powder)
1 egg, beaten
1 1/3 cups steel cut oats

Heat the vegetable oil in a saucepan over medium heat, and saute the onion 5 minutes, until tender.
Mix in carrot and mushrooms (if using), and continue cooking 5 minutes.
Stir in broth, lentils, kidney beans, nuts (seeds), soy sauce, and lemon juice. Season with thyme, rosemary, cayenne pepper, and mixed spice.
Bring pot to a boil, reduce heat to low, and simmer 10 minutes.
Stir in oats, cover, and simmer for another 20 minutes.
While this simmers, preheat oven to 375 degrees and lightly grease a 9x5 inch loaf pan.
Quickly stir the egg into the saucepan, then transfer the mixture to the prepared baking pan.
Bake 30 minutes, until firm.

Enjoy!

Thursday, June 12, 2014

Banana Crumb Muffins

The weather has been absolutely crazy this year.  I mean, aside from the fact that we had the coldest weather that I've ever seen (I'm in the Northeast US and we had temperatures and storms comparable to those seen in the Midwest - we are NOT used to that here!). As you can imagine, we were very excited for Spring to come.

But this Spring has  been so bizarre. We've had crazy drenching storms, record high temperatures, record low temperatures, and huge swings in between. Including one 80 degree day that ended up in a hailstorm. Seriously bizarre.

So this week has been super rainy. So we've been inside a lot more than I'd like to be in June.  As a result, I've been in the mood to bake. A lot. 

Today I was in the mood for muffins, and I had a few bananas in perfect baking condition in the fruit bowl.  Perfect!

Little man was super helpful, too.  First he helped me measure dry ingredients.


Then he helped me mash the bananas.


Then he helped me mix up the wet ingredients.


While he was doing all of that, I mixed up a crumb topping for the muffins. I mean, I had to do something while he was doing all the work, right??


I also scooped the muffins into the muffin tin. I probably should have let him do it. I will next time.


And then they baked! And the house smelled so good that I forgot to be upset about not being outside.


And let me tell you - they were delicious. Super moist, super flavorful, super delicious. They made a great after school snack for little miss. And her friend. And I even sent some home with her friend so he could share with his mom.

Now I need the sun to come back out. At least for a few days to give me time to finish up all the baked goods that have been keeping me busy!


Banana Crumb Muffins

For the Muffins:
1 1/2 cups all-purpose flour
1 teaspoon baking soda
1 teaspoon baking powder
1/2 teaspoon salt
3 bananas, mashed
1 teaspoon vanilla
1/2 teaspoon nutmeg
3/4 teaspoon cinnamon
1 egg, lightly beaten
1/3 cup canola oil
1/2 cup granulated sugar
1/4 cup packed brown sugar
1/2 cup chopped pecans (I omitted these)

For the Brown Sugar Crumb:
1/2 cup light brown sugar, packed
2 tablespoons all-purpose flour
1/4 teaspoon ground cinnamon
1 tablespoon butter, room temperature
1/4 cup pecans for topping, optional (I actually used 1/4 cup rolled oats instead and it was great!)

Preheat oven to 375 degrees. Lightly grease 10 muffin cups, or line with muffin liners. I actually got 12 muffins out of this recipe, so be prepared for that!
In a large bowl, mix together 1 1/2 cups flour, baking soda, baking powder, cinnamon, nutmeg and salt. 
In another bowl, beat together bananas, sugars,vanilla, egg and canola oil. 
Stir the banana mixture into the flour mixture, mixing just until moistened. 
Fold in pecans (if using).
Spoon batter into prepared muffin cups.
In a small bowl, mix together brown sugar, 2 tablespoons flour and cinnamon. 
Cut in 1 tablespoon butter until mixture resembles coarse crumble. 
Sprinkle topping over muffins.
Bake for 18 to 20 minutes, until a toothpick inserted into center of a muffin comes out clean. 
Sprinkle remaining pecans on the top of each muffin, if you chose to use them.
Store muffins at room temperature in an airtight container for up to 5 days.

Enjoy!
Related Posts with Thumbnails