Monday, June 27, 2011

June Daring Bakers' Challenge - Baklava

Every once in a while, when the Daring Bakers' Challenge is announced, I get the brief thrill of thinking "hey - I have made that before!" Which is usually followed by realizing that what I made was the short version. The easy version. Like when we made tiramisu. I'd layered up a tiramisu before, but the challenge had us making our own, well, every single component of a tiramisu. I had a similar experience this month, when the announcement came for this month's challenge.

Erica of Erica’s Edibles was our host for the Daring Baker’s June challenge. Erica challenged us to be truly DARING by making homemade phyllo dough and then to use that homemade dough to make Baklava.

At first reading, I though, cool! Baklava! It's delicious, and I've actually made it before. Then I read the part about homemade phyllo dough. In case you are not familiar with phyllo dough, it is a very, very, very thin, very, very, very delicate pastry. When I made baklava in the past, I'd purchased a frozen package of phyllo dough. The pastry sheets were so fragile, tore so easily, and dried out so quickly if not handled correctly that I pretty much figured that making them at home would be out of the question.

Until now.

And you know what? I was excited. Nervous, too, but mostly really excited.

Making the phyllo dough is a very straightforward process. Actually, making the dough itself is surprisingly easy. The only "surprise" ingredient (to me, at least, for a pastry dough...) was apple cider vinegar. But the process, especially employing the assistance of a trusty KitchenAid mixer, is very easy. Sift dry ingredients, add wet ingredients, knead, knead, knead and, voila! A beautiful, soft, smooth dough.

At this point, the dough was sprayed with oil, wrapped in plastic wrap and left to rest for a couple of hours. Which was good, because I used that time to hit the hardware store to buy the appropriate tool for rolling out the dough later. Yes, you read that right - the hardware store. For a kitchen tool.

You see, Erica had shared with us a description, photos and even a video demonstrating the best way to roll out super thin sheets of phyllo dough. And the best tool for the job is a wooden dowel. So off to Lowe's we went, and after a little sanding (and a lot of subsequent washing and drying), I had my new rolling pin, er, dowel.

In case you didn't watch the video, the process involves wrapping the dough around the dowel, vigorously rolling it back and forth, unrolling it, rotating it slightly and repeating. In the video, the lovely older woman makes this look amazingly simple. She barely pays attention to what she's doing, chats with her friends, and effortlessly turns out sheet upon sheet of beautifully rolled out dough.

That is not how the process went here. I tried, I really did. I wrapped. I rolled. It stuck to itself, making it impossible to unwrap. I added flour. It still stuck to itself. Try as I might, I am no old Macedonian woman. A video of me attempting this process would not have been pretty. Or appropriate for young viewers. I managed to roll out a couple of sheets after, well, quite a while, which all then managed to stick together. Yeah. I was a bit frustrated.

I then decided to figure out my own method for rolling out the dough. One that involved lots of flour, lots of rotating of the dough, lots of patience, and even a little bit of help.

And this time we put a sheet of waxed paper between each rolled out sheet of dough.

Between me, daddy and little miss, we managed to roll out twelve rather large (around 11" x 17") sheets of beautifully thin phyllo pastry. So thin, in fact, that I could clearly see the waxed paper box through my rolled out pastry. How cool is that? Which just told me what a great dough this was, and that my initial difficulties rolling it out were 100% due to, well, me.

Dough prepared, it was time to work on the filling. Traditionally, baklava is filled with chopped nuts, and walnuts usually play a very strong roll in the filling. Daddy is allergic to walnuts, so that was out. Knowing that I would have to make that one substitution, I asked the family if they had any preferences for my filling. Little miss immediately requested chocolate. "Mommy, can you make chocolate baklava? It can be choc-lava!" Seriously, how in the world do you say no to that?

So, into my mini food-processor (a cool attachment for the awesome immersion blender I received for Christmas - have I mentioned how much I love that thing???) went some pecans:


And then some chocolate chips:


A little sugar, a few shakes of cinnamon, and we had our baklava filling.


Then came the fun part - actually constructing the baklava. We actually had quite a process in place. I'd put a sheet of rolled out pastry onto the cutting board, put the pan over the pastry, use my pizza cutter to cut the pastry to the size of the pan, then carefully place the now-correctly-sized pastry sheet into the pan.

In addition to the pastry sheets and filling, the other ingredient required for the construction of the baklava is butter. Melted butter. Lots and lots of melted butter. First the pan, and then each individual sheet of phyllo pastry, is brushed with melted butter, a process that little miss was more than happy to help with.

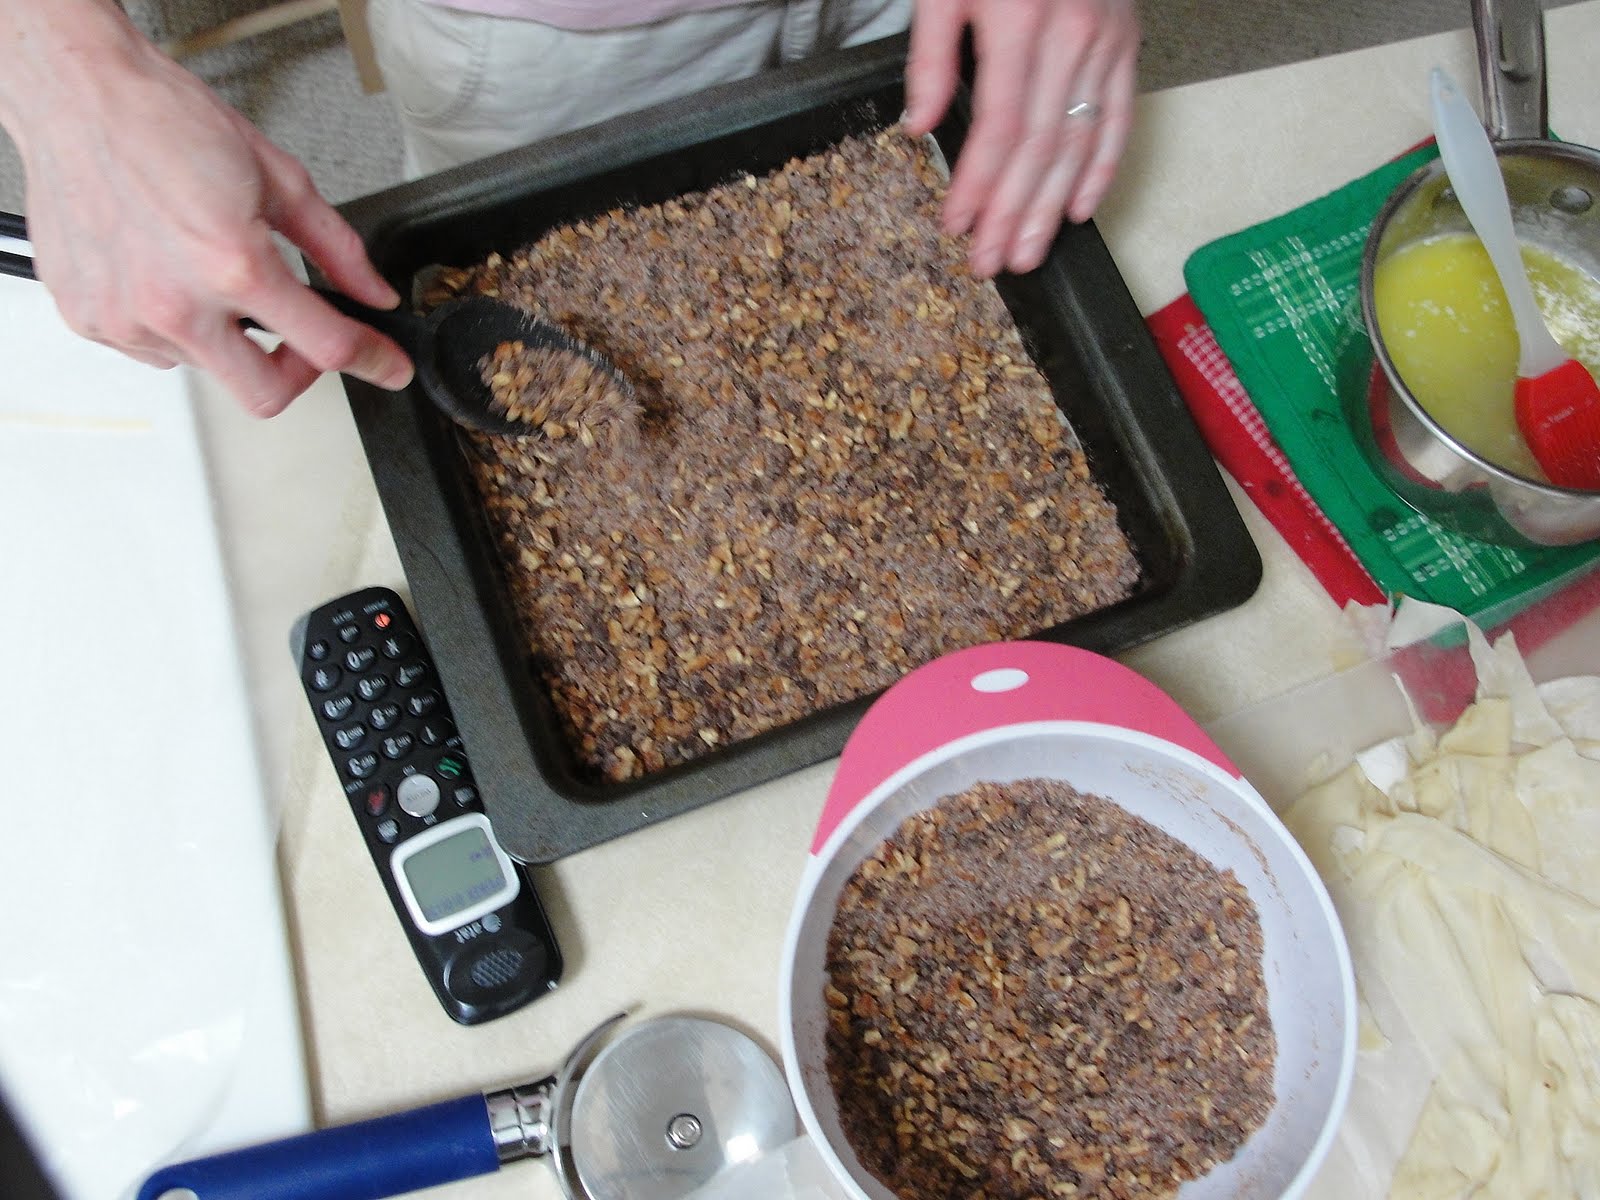
After four sheets of pastry, one third of the filling mixture was sprinkled on top, and then the process was repeated. Four sheets of phyllo, filling, four sheets of phyllo, more filling, four sheets of phyllo, the rest of the filling, then four more sheets of phyllo. And don't forget the butter. Definitely don't forget the butter. For anyone keeping count, that is 16 layers of phyllo. And if you remember, I said I'd rolled out 12 sheets. The good thing about having rolled out such large sheets of pastry is that, once the 11" x 17" sheets were cut to fit the 9" x 9" pan, I could piece together additional layers (which I hid in the middle, where they wouldn't show!), giving me enough dough to make so many layers to this dessert.

The baklava was then cut and put into the oven, during which time I prepared the final element of the dessert - the sweet syrup that would be poured onto the baked baklava. The syrup was a simple combination of honey, water, sugar, a cinnamon stick and a piece of lemon peel. The whole thing was brought to a boil, then allowed to cool.

As soon as the baklava came out of the oven, the cooled syrup was poured onto the piping hot baklava, and, well, that was it! At this point, the dessert rests overnight to absorb the syrup and, well, attain its full yumminess.

Having planned for this wait period, I made the dessert on a Saturday, so that I could bring it as dessert to dinner at my in-laws' house the next n
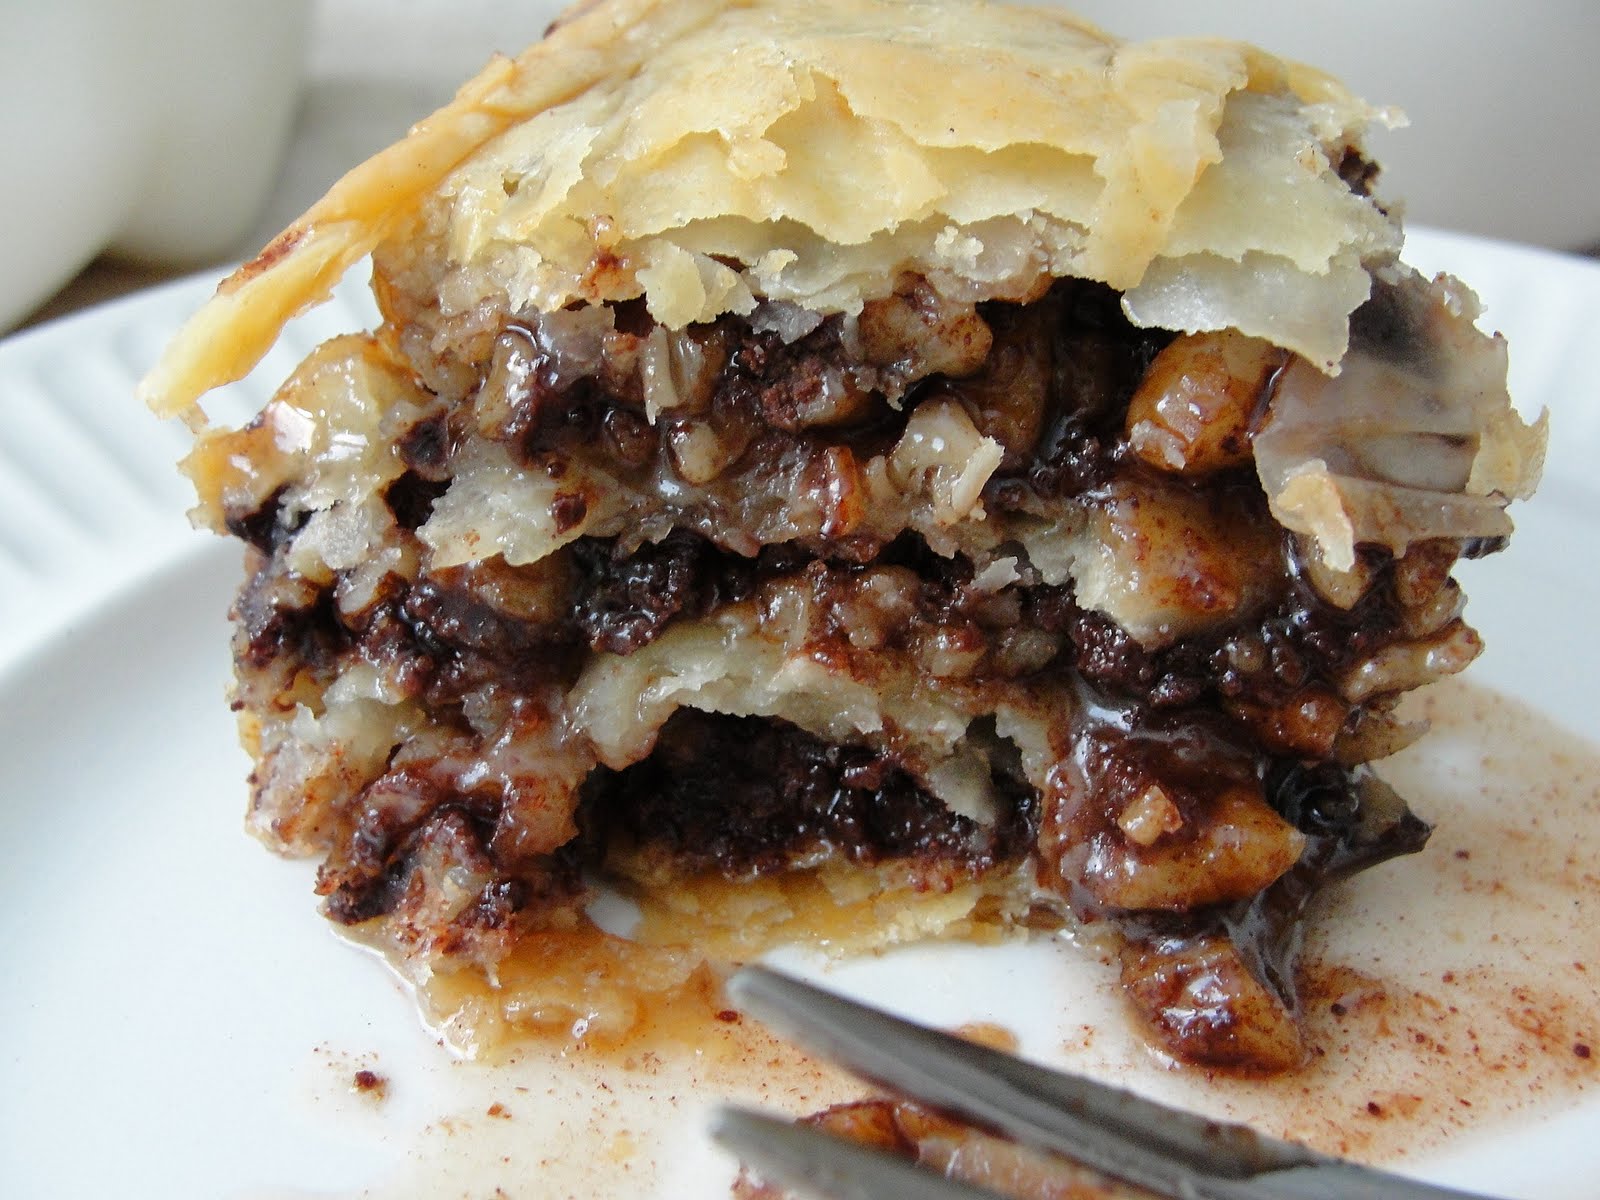
ight. See, my mother in law loves baklava, so I was super excited to share this challenge with her. And it did not disappoint. The addition of the chocolate to the filling made this a super rich dessert, but the combination of the chocolate, nuts and cinnamon was delicious. The syrup was very sweet, but worked really well with the dessert. And the phyllo sheets were awesome. I was amazed with the flakiness of them, and so proud of myself for having rolled them out so thin.

The baklava was enjoyed by all. And the leftovers definitely did not last long.

It was so delicious that I'd actually hoped to make a second during the challenge month, but the rolling process was very time consuming, and I didn't have the opportunity to do that again this month. But I promise, I will be making this again.

Erica, this was an absolutely amazing, awesome challenge. Thank you so much for providing me with the opportunity to make a real baklava and to make my own delicious, flaky phyllo dough!

I highly recommend checking out the beautiful creations of the other Daring Bakers this month - I have never seen so many beautiful, tasty baklava variations!! Take a look here.

I can't wait to see what next month's challenge is!

Sunday, June 19, 2011

Chocolate-Swirled Peanut Butter-Banana Bread

When I first came across this recipe, I just knew that I was going to make it.

See, I love banana bread.

And I love the combination of peanut butter and banana.

And the combination of chocolate and peanut butter.

So a recipe for chocolate-peanut butter-banana bread just sorta screamed my name and yelled "HELLO?!?! Why haven't you tried me yet???"

And the fact that this recipe came from one of the food bloggers who has never ever let me down, well, I just had to.

The recipe has several components, so requires a little bit of coordination (not something in huge supply around here these days, what with a teething baby and out-of-school five year old...), but was very fun to put together.

The first step of the recipe is to make a basic chocolate syrup. The recipe says to use a rich, dark cocoa powder, so this was a great opportunity for me to try the black cocoa powder I'd recently purchased. Seriously dark cocoa powder.

The syrup was mixed and brought to a boil, then allowed to cool while the rest of the batter is prepared. Little miss really wanted to help stir the syrup. She knew the rules (no touching the pot, let mommy hold the pot's handle, if mommy asks you to step back, do it...), so I let her stir. It's hard for me to get used to the fact that my baby girl is big enough to be so involved in so many of my kitchen adventures. And always amazing to me how amazingly she does...

Anyway, once the syrup was moved to the back burner to cool, little miss helped me pull together the peanut butter banana bread batter. While I put together the base of the batter, creaming together peanut butter and butter, adding eggs and sifting together the dry ingredients, little miss mashed a couple of bananas and helped me mix them with sour cream and vanilla.

The banana mixture was added to the butter mixture, then the flour mixture was added in. Then came the chocolate chips. Oh yes, there are chocolate chips, too. And of course, little miss had to taste test them for me. The recipe calls for two thirds of a cup of chocolate chips. Honestly, I don't measure chocolate chips. I just add them until it looks right to me. Luckily, in our house, there is no such thing as too many chocolate chips, so this method works out really well.

About one third of the batter was scooped into a separate bowl and mixed with the reserved chocolate syrup. The syrup was still warm and melted the chocolate chips, creating a smooth, thin chocolate batter. See how dark that syrup is? That's that black cocoa. Seriously dark.

Next came the fun part.

Half of the banana peanut butter batter was spread into the loaf pan, then half of the chocolate batter. Then, using a spoon, I scooped and swirled the two carefully and gently together. Then repeated the process with the second half of both the banana peanut butter batter and the chocolate better. Little miss wanted to help, but, well, honestly, I was making enough of a mess all on my own with this part, so she agreed to supervise and let me know when the marbling looked done.

This smelled delicious baking, which is good (well, for many reasons...), as this loaf actually bakes for quite a long time. It was out of the oven and cooled just in time to be our snack that afternoon. I love the look of the marbled bread, and the flavor combination was delicious. The dark cocoa almost made the bread look burned, but made for a very cool swirl. The loaf ended up with a thicker crust than I'd expected, but otherwise was really delicious. I will definitely be keeping this recipe.


Chocolate-Swirled Peanut Butter Banana Bread

For the chocolate syrup:
1/4 cup sugar
1/3 cup dark unsweetened cocoa powder (the darker the better)
1/4 cup hot water
1/3 cup agave nectar or light corn syrup
1/8 teaspoon salt

For the batter:
2 cups all purpose flour
3/4 teaspoon baking soda
3/4 teaspoon salt
1/3 cup creamy peanut butter

4 teaspoons unsalted butter at room temperature
1/2 cup granulated sugar
1/4 cup light brown sugar
2 large eggs at room temperature
1 cup mashed ripe banana (about 2 large)
1/4 cup sour cream
1 teaspoon pure vanilla extract
2/3 cup bittersweet or semi-sweet chocolate chips

Position a rack to the lower third of the oven and preheat it to 350 degrees. Spray a 9" x 5" loaf pan with non-stick cooking spray and line it with a strip of parchment paper or foil about eight inches wide to create a "sleeve" of sorts that will make removing the loaf from the pan much easier later.

To make the chocolate syrup, whisk together the sugar, cocoa powder, hot water, agave nectar (or corn syrup) and salt in a pot. Set the pot over high heat and bring the syrup just to a simmer, stirring occasionally until the syrup is smooth. Remove the pot from the heat and set it aside for the syrup to cool.

In a medium bowl, whisk together the flour baking soda and salt.

In the bowl of an electric mixer, beat together the peanut butter and butter on medium speed until creamy. Add the sugars and beat until light and fluffy, about 2 minutes. Beat in the eggs one at a time, making sure to scrape down the bowl.

In a small bowl, whisk together the mashed bananas, sour cream and vanilla, then beat that mixture into the butter mixture.

Reduce the mixer to low speed and stir in the dry ingredients until just combined. When just a few streaks of flour remain, stop the mixer and add in the chocolate chips. Fold the batter with a spatula until everything is incorporated.

Transfer about a third of the batter (at most) to a medium bowl and add the cooled chocolate syrup. Stir until well blended.

Spread half of the banana batter into the bottom of the prepared pan. Top with half of the chocolate batter. Use a spoon or knife to swirl. Repeat this with the second half of both batters.

Bake the loaf for about 75 - 85 minutes, until a toothpick inserted in the middle comes out clean but not dry (a few moist crumbs is ideal). Let the loaf cool in the pan on a wire rack for about 15 minutes before removing it from the pan to the wire rack to cool completely.

Enjoy!

Tuesday, June 14, 2011

June Daring Cooks' Challenge - Potato Salad

This month's Daring Cooks' Challenge was a little different than usual, and you will partially see why with the blog check lines...

Jami Sorrento was our June Daring Cooks hostess and she chose to challenge us to celebrate the humble spud by making a delicious and healthy potato salad. The Daring Cooks Potato Salad Challenge was sponsored by the nice people at the United States Potato Board, who awarded prizes to the top 3 most creative and healthy potato salads. A medium-sized (5.3 ounce) potato has 110 calories, no fat, no cholesterol, no sodium and includes nearly half your daily value of vitamin C and has more potassium than a banana!

Now, I love potatoes. I think they are versatile, tasty and easy to incorporate into all kinds of meals. We eat them baked, boiled, mashed, pan fried, oven fried, plain, topped, hot, cold... you get the point. So you would think that this challenge would have been right up my alley. And, in a way, it was - a chance to showcase the potato and be creative all at the same time.

But I also was a little... well... uninspired. Another contest challenge.

See, one of the reasons that I joined the Daring Kitchen was for the fact that the challenges were non-competitive. That the community is one that is completely supportive of all members, and where cooks and bakers of all levels could come together and learn every month. To have two challenges with a competitive/contest aspect to them so close together (remember the edible container contests?), well, it took a little of the steam out of my enthusiasm for the challenge.

Not to say that I didn't have ideas - I did! I just dragged my feet a bit on actually attempting to execute any of those ideas.

As a result, I actually only made one potato salad during this challenge month, despite the fact that I'd really wanted to try two or three (meaning, I actually had three specific ideas, not just that I'd wanted to try three at random...).
Since the focus of this challenge (contest) was to try to create a healthier alternative to the traditional mayonnaise-heavy potato salad, I decided to make a salad chock full of fresh, colorful vegetables. And, to make the salad as flavorful as possible with as light a dressing as possible, I decided that my potatoes (and veggies) would be roasted, rather than boiled, since boiling can remove some of the flavor and nutrients.

I started with red potatoes, which I cut into medium sized chunks and tossed onto a baking sheet. I then roughly cut a red onion and added it to the oil-sprayed pan. Then, going through the fridge to see what looked good, I added roughly cut fresh broccoli, green beans and baby carrots, as well as some smashed garlic cloves. I have to say, at this point, my pan looked pretty, well, pretty. And tasty!

I tossed all of the vegetables in a very light drizzle of olive oil, then added a very light sprinkling of coarse salt and pepper. And a touch of paprika. Because we like paprika in our house.

The pan then went into a 350 degree oven, where it stayed until the potatoes were well roasted and easily pierced with a fork.

As the veggies cooked, I concentrated on the dressing for my salad. Again, with a focus on the fresh flavors of the vegetables, and knowing that the goal here was to create a healthy salad, I decided to try a basic vinaigrette as my dressing. I started with some balsamic vinegar, into which I whisked a drizzle of extra virgin olive oil. I didn't measure anything, just went by feel and by taste. I then added a little sprinkle of ground mustard, just for some extra kick.

Once the vegetables came out of the oven, I transferred them to a bowl and carefully tossed the still warm (okay, hot!) veggies with the dressing. And then... well, I was done! The result was pretty good, though not anything outstanding. I enjoyed it, daddy thought it was okay and, well, little miss had no interest in tasting it. At all.

This warm roasted potato salad made a nice combination starch/veggie side dish to dinner, but won't soon replace the standard potato salad at a picnic or barbecue.

I will definitely try some of the other ideas that had floated around in my head (including a sweet, almost dessert-y sweet potato salad idea...), and appreciate the spirit of this challenge, even if my motivation due to the contest aspect was not where it usually is.

Jami, thank you so much for being such a supportive, helpful and enthusiastic host for this month's challenge!

To see some of the creative potato salads cooked up in the Daring Kitchen this month, check the out here.

Wednesday, June 8, 2011

Strawberry Fruit Leather

I have often seen recipes for fruit leather, and have been somewhat intrigued by them. I don't know why, but, no matter how intrigued I was, I was just as skeptical, and never actually seriously considered making any fruit leather.

Until last week.

After our strawberry picking outing last week, I was looking for new and interesting ways to use my pounds and pounds of strawberries. And that is when the idea of preserving them hit me. I have a few jars of strawberry jam canned and in the pantry from the last time that strawberries went on super-sale at the grocery store (and yes, I know that jam with hand-picked berries would be better), so I wanted to try something different. So what are alternative preserving methods for fresh berries, other than jams or freezing them? Drying them. And if I am going to go the drying route, why not re-think the fruit leather idea?

I looked up several recipes, and landed on this one, mostly due to its simplicity.

I cut up enough berries to fill my two cup measuring cup twice (so, you know, four cups of cut berries) and cooked them down with half a cup of water. You can multiply or divide the recipe however you want, but the basic formula is half a cup of water for each four cups of fruit.

Once the berries were cooked and soft, I used my potato masher to, well, mash them up. I could have (and, arguably, should have...) used my immersion blender to really get a good, fine puree, but I was going low-tech this time. To the mashed berries, I added a little bit of vanilla sugar (seriously, I think I used about a tablespoon or so for the whole thing - the berries themselves were deliciously sweet) and a splash of orange juice. The recipe called for the juice of a lemon, but I had no lemons in the house. Or limes. But still wanted to give it the touch of citrus. So a splash of OJ it was.

Once the sugar and juice were mixed in, the mixture was again simmered until it began to thicken slightly. Mine didn't thicken all that much, but I wasn't overly concerned about that. The cooked berry puree was then carefully poured (I ladled mine, actually) onto a plastic-wrap-lined rimmed cookie sheet.

Then comes the long part.

I preheated my oven about as low as it can go:


Hi there! See me?

As you can see, I chose to go just a bit about the lowest setting, as my oven doesn't reliably hold it's temperature that low. The pan then went into the oven and, well, stayed there all day. Aaaaallllllll day. The fruit leather is done when it is dried out and not at all sticky to touch. Then just pull the pan out, let it cool for a bit (it cools quickly), and roll it up in the plastic wrap. Then you can cut the plastic wrap roll into shorter widths for individual sized portions.

I have to say, I was really happy with how this turned out! It had more texture to it than commercial fruit leather (fruit roll ups), but that can be corrected (if you want - I actually liked the texture...) by using a blender and, if desired, by straining out the strawberry seeds. And I felt good about letting little miss eat this (she thought it was candy!), whereas I don't at all like her to have the sugar, high fructose corn syrup and fake food dye heavy commercial versions.

I can't wait to try this with other fruits. I think, at the very least, raspberry and peach fruit leather are in our summer plans!


Strawberry Fruit Leather

4 cups strawberries, stemmed, hulled and cut
1/2 cup water
lemon juice (to taste)
sugar (to taste)

Bring the berries and water to a simmer in a covered pot over medium heat. Allow the fruit to cook for 10-15 minutes until fully soft. Using a potato masher, mash the fruit until smooth. (You can use an immersion blender for this, or, if you wait until the mixture cools, you can use a blender or food processor). Add sugar one tablespoon at a time for taste (it probably won't need much) and a touch of lemon juice if desired. Simmer the mixture for another 5-10 minutes until it begins to thicken.
Spray a baking sheet with non-stick cooking spray, then line the sheet with plastic wrap. Pour the mixture evenly onto the plastic wrap until it is about 1/8 of an inch thick. Bake the fruit mixture for 8-12 hours at your oven's lowest temperature.
Allow the fruit leather to cool before rolling and cutting.

Enjoy!

Thursday, June 2, 2011

Strawberry Cobbler

Hooray for Summer!

Yes, I know that Summer doesn't officially begin until later this month, but tell that to the heatwave we've been having around here. And anyway, we've officially hit the unofficial start of Summer. No, not Memorial Day, the beginning of strawberry season at our local orchard!!

Today little miss, little man and I were joined by friends at the farm for our first picking of the season. Of course I forgot my camera at home, but suffice it to say that a good time was had by all, and all of the kids (except for the one not eating solid foods yet) left with fingers and faces much redder, juicier and stickier than they when they arrived.

We left with a pretty good haul of these beauties. I actually think that the strawberries were even better than last year's crop. Something about the drenching rains followed by blistering heat really worked for them, I'd say. I couldn't wait to get them home and make something with them.

My first thought was pie. But we didn't pick any rhubarb this time, and I didn't feel like making a crust. Then I remembered my "Bisquick" sitting in the fridge, and knew there had to be something yummy I could make with that. At first I was thinking of simply making sweetened biscuits and turning them into strawberry shortcakes. But we actually had strawberry shortcakes just a couple of weeks ago, and I wanted something different. But, you know, the same enough that I could use the "Bisquick..." So I set out looking for a cobbler recipe. I figured that finding a Bisquick-based cobbler recipe would be simple. Yeah. I figured wrong. Not that I couldn't find any, but it was actually surprising how many recipes appear when googling "Bisquick strawberry cobbler recipe" that do not contain Bisquick. Or strawberries... Oh well.

I finally found one that was so simple that I was quite shocked. Fruit, then a batter made of equal parts Bisquick, sugar and milk. Seriously? Yeah, I can handle that.

The most time consuming part of the recipe was stemming, hulling and cutting all of the strawberries. I just layered the bottom of my 9" x 13" cake pan with them until it was well covered.

Little miss helped me make the batter. I measured the "Bisquick" (from it's fancy schmancy zip top bag, where it's been sitting in the fridge) and she took charge of the bowl and spoon. The recipe called for one cup each of baking mix, sugar and milk. I was afraid that might be a little too sweet, even for me, so I under-filled my measuring cup of sugar, probably by about a quarter cup. Little miss mixed and stirred, then we poured the (thinner than I'd expected) batter over the berries. Then we sat and looked at it for a moment... Considering the recipe specified a 9" x 13" pan, I'd kind of expected the batter to, you know, cover all of the berries. Which it didn't. At all. So I quickly measured out another half portion of each ingredient (again, kind of under measuring my half-cup of sugar). A little more mixing and stirring, we poured our additional batter over the berries, and we were both much more pleased.

Half an hour later, here's what we saw:


All bubbly and strawberry-juicy-oozey. And it smelled fantastic.

So as I did the dinner dishes, I actually popped the cobbler back into the oven to re-heat and brown up a teeny bit more, and we had a very delicious dessert tonight. We each topped our piece with some whipped cream, and then each proceeded to devour our piece. And one or more of us may have licked our plates...

Not that I will discard my previous cobbler recipe, but this is a definitely keeper. I can't wait to try it with each fruit as it comes into season!


Strawberry Cobbler
(from Cooks.com)

2 quarts strawberries (or whatever fruit you choose for your cobbler)
1 cup milk
1 cup sugar
1 cup Bisquick baking mix (or homemade substitute)

Preheat oven to 350 degrees. Spread the fruit into a greased 9" x 13" pan. In a mixing bowl, combine the milk, sugar and Bisquick until slightly lumpy. Pour mixture over fruit. Bake about 30 minutes, until golden brown on top.

Enjoy!
Related Posts with Thumbnails