Tuesday, January 31, 2012

Moms That Blog: Interview with Adventures-In-Mommy-Land

My friend is doing a series of interviews on her blog with moms that blog, and today's interview features, well, me!

I am so honored to be a part of this great series.

You can see the post here.

If you are visiting from there, welcome! I hope you enjoy what you see and visit again soon.

And if you've never checked it out, Adventures-In-Mommy-Land is always full of fun and creativity. Stop by and share some blog-love!

Sunday, January 29, 2012

No-Bake Granola Bars

So, I was tooling around foodgawker today and saw a picture of granola bars that looked interesting. I mean, they looked like granola bars, which are yummy, but I've never described them as interesting. The interesting part came when I saw the caption - no bake. That instantly made them interesting enough for me to click through to the post.

Upon reading the recipe, my first thought was "wow, those look good and easy!" Then my next thought was "Man, I bet I could make those right now!"

So you know what?

I did.

The first step was to melt together honey, butter and brown sugar.


While those melted and cooked together on the stove, I grabbed two heaping cups of granola. Apparently, while the version I was reading about in the blog post used a combination of quick-cooking oats and Rice Krispies, the original recipe (read: the recipe on which the person whose blog I was reading based her posted recipe) called for using prepared granola. Which I actually had. Remember the granola I made? I had some of that, so I decided that this would be a great use for it.


To the granola, I actually added a couple of hands-full of dried cranberries, too. Because, well, why not?

Once the mixture on the stove came to a boil and cooked for two minutes, I stirred in a bit of vanilla and was ready to coat my granola.


Stir well to make sure all of the granola gets coated, then simply press the mixture into a medium sized pan. Mine was about 12" x 8", which worked out perfectly. If you have a bigger pan, simply don't fill the pan all the way - push the mixture to one side and press it flat (about 3/4" thick).


And then came the hard part.

The waiting.

Which was only hard because this actually smelled really good. So good that little miss, head stuck in her book and not paying a darn bit of attention to what mommy was doing in the kitchen, suddenly looked up and asked "What is that delicious smell??"

Two hours of setting later, we cut.


And voila.

Easy, no-bake granola bars.

They were very gooey. Almost a bit too gooey, so I think next time I will use a little more than two cups of granola. Actually, next time I'll use something without nuts so that little man can have some too. Regardless, these were so quick and easy, and so absolutely delicious, that I will definitely keep some variation of them on hand as snacks as often as possible.


No-Bake Granola Bars
(lightly adapted from Lauren's Latest)

1/4 cup butter
1/4 cup honey
1/3 cup brown sugar
1/2 teaspoon vanilla
2 heaping cups of prepared granola
about a half a cup (a couple small hands-full) dried cranberries

In a small saucepan, melt the butter, honey and brown sugar over medium-high heat. While this is melting, pour the granola into a large bowl and mix in the cranberries. When the mixture on the stove begins to bubble, reduce the heat and cook it for two more minutes. Remove the pan from the heat, add the vanilla (it will bubble up a bit!) and stir. Pour the hot syrup carefully over the granola mixture and mix well, making sure that everything is well moistened. Carefully pour the granola mixture into a lightly greased small jelly roll pan and press it out to be about 3/4 of an inch in thickness. Press it well so that everything will stick together well.
Allow the bars to cool for about two hours at room temperature before cutting and serving.
These can be stored at room temperature, wrapped in plastic wrap or parchment paper.

Enjoy!


Friday, January 27, 2012

January Daring Bakers' Challenge - Scones (Biscuits)

As much as I love being challenged each month to make something new and exotic, this month's challenge was just as daring, but for a total different reason. Rather than being something new and fancy, this month's challenge had us going back to basics.

Audax Artifex was our January 2012 Daring Bakers' host. Aud worked tirelessly to master light and fluffy scones (a/k/a biscuits) to help us create delicious and perfect batches in our own kitchens!

Now, there was a bit of discussion about terminology, as the words "scones" and "biscuits" have slightly different meanings depending on your geography. See, Audax is in Australia, and so when he challenged us to make scones, he clarified for us North Americans that we were actually to make what we refer to as biscuits, rather than what we think of as scones. But then he clarified for any British/European Daring Bakers that he wasn't referring to cookies, rather to the baking powder raised flaky bread-type goods, usually served with a meal. So funny how the same words have slightly different meanings based on geography...

So Audax provided us with a basic recipe for biscuits, as well as a ton of information regarding ingredients and methodology, and recommended that we practice on as many batches as we could in order to learn how we could each get the best results as possibly in our own kitchens.

So I got started darn near right away.

The basics of the recipe are easy.

Whisk (well, sift, but I whisk) together flour, baking powder and salt.


Add in cold butter, cut into small pieces.


Cut or rub the butter into the dry ingredients.


Add in a liquid, milk or buttermilk, usually, to create a dough.


Cut the dough into shape.


(I just cut with a knife, as I don't have a biscuit cutter, and it also meant less handling of the dough on my part...)

Then bake!


They should rise in the oven and be light and flaky.


See? A little flaky... not perfect, but not bad for a first batch, right?

For this batch, I actually added a little bit of sugar with the dry ingredients, as I'd planned them to be our dessert, rather than to go with dinner.

Biscuits are wonderful for blueberry (or any fruit...) shortcakes!


Woo hoo! Challenge off to a great start!

But that's all it was - a start.

Because I had many more ideas.

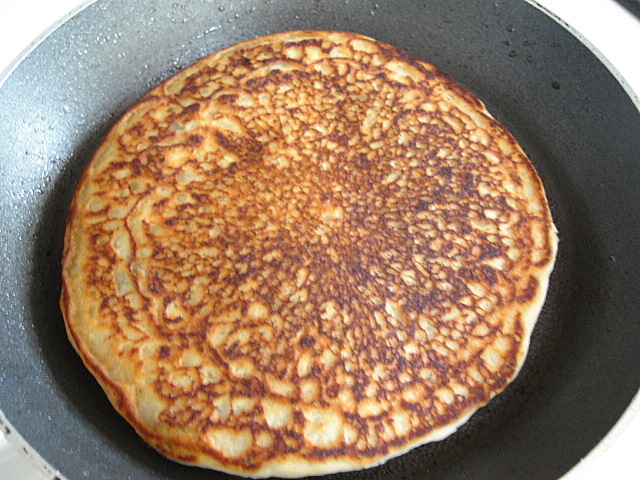
When I'd first read the challenge, my first thought was that this would be the perfect opportunity to try a breakfast that I'd heard about many times, but had never myself tasted - biscuits with sausage gravy. While looking for a recipe for the sausage gravy, I came across a variation on the biscuit recipe, as well, so figured I might as well try that out. You know, for comparison purposes.

The ingredients were the same, thought the quantities were a bit different, and the resulting dough was, by design, much wetter.


And rather than cutting the biscuits, they are basically rolled, then placed into a springform pan.


They baked up beautifully, but were very different from the challenge recipe.


And they were delicious with the biscuit gravy.


My next attempt was a spur of the moment decision. We were having soup for dinner one night, and about an hour before dinner, I realized that I didn't have bread or rolls to go with the soup. It wasn't enough time to make dinner rolls (even my quick recipe for those requires an hour and a half), so I decided to give the challenge biscuits another try.

I followed the recipe word for word, and was very careful about how I handled the dough.

And I think the results spoke for themselves.


I was amazed when I opened the oven and saw theses toppling biscuit towers. And talk about flaky. Now that is a biscuit! (and it went great with our soup, too!) (In case you are curious, the biscuits rose so high on the cut side of the dough - the side that didn't rise as high was the un-cut side from the way I'd shaped the dough before cutting them into shape.)

But did I stop there? Not at all! The next week, with my next soup, I actually planned on biscuits! But not the plain biscuits, this time I wanted to to spice them up, and try garlic cheddar biscuits.

All that this required was two additions.

Garlic powder whisked into the dry ingredients.


And grated cheddar cheese mixed in after the milk.


And this time, I used a drinking glass as a biscuit cutter, as I wanted to see how the biscuits would rise if they had a cut edge on all sides.


That worked really well.


A much more even rise, and deliciously flaky biscuits.

I may just have to invest in a biscuit cutter.

And, just for good measure, I decided to try one last batch. Chocolate. I can't believe I didn't think of it myself, but the credit for that goes to one of my fellow Daring Bakers (thank you, Korena!!). It was as simple as replacing a quarter of the flour with cocoa powder. And adding a bit of sugar.


Somehow, my batter wound up a bit too wet and sticky.


(see those chunks of butter? yum.)

So the biscuits didn't rise as much, but it certainly made for a fun dessert!


Audax, thanks so much for this challenge - I have really enjoyed practicing, and am feeling so much more confident in my biscuit skills as a result!

To check out all of the delicious, flaky goodness baked up in the kitchen this month, check them out here.


Basic Biscuits
(from the challenge)

1 cup flour
2 teaspoons baking powder
1/4 teaspoon salt
2 tablespoons cold butter, cut into small pieces or grated
approximately 1/2 cup cold milk (have a bit more ready, just in case)

Preheat oven to 475 degrees. It is a good idea to put your baking pan in the oven at this point, too, to allow it to preheat as well.
Sift or whisk together the flour, baking powder and salt in a medium bowl.
Rub the cold butter pieces into the dry ingredients until it resembles very coarse bread crumbs, with no pieces bigger than small peas.
Add most of the liquid and mix well until it forms a sticky dough. (Using a dinner/butter knife works really well for the mixing here. Don't ask why, it just does.)
At this point, you can rest the dough in the fridge. I had the best luck resting the dough for about half an hour before proceeding with the rest of the recipe.
Turn the dough out onto a lightly floured work surface. Knead the dough gently, without pressing too hard, just a few times until the dough is smooth. Rather than regular kneading, I had luck with more of a "folding" movement on the dough.
Pat the dough into a rectangle roughly 4 inches by 6 inches and approximately 3/4 of an inch thick. Cut the biscuits, either using a knife (cutting into squares) or a biscuit cutter (or drinking glass), carefully gathering together and pressing out the dough scraps to cut as many biscuits as the dough can make.
Place the cut biscuits on the (preheated) baking pan (carefully! it's hot!) and bake for 8-10 minutes, until the biscuits have risen and are lightly colored on the tops. The biscuits are ready when the sides are set.
Transfer the biscuits to a cooling rack.
These are best served warm.

There are countless variations to this recipe, from using buttermilk or cream in place of the milk to using shortening or lard to replace some or all of the butter. You can add sugar and/or spices to alter the flavor or mix in herbs, fruits or cheese to make different kinds of biscuits.

Try as many variations as you can and have fun with it!!

Tuesday, January 24, 2012

Crock Pot Lasagna

Lasagna in the crock pot? Yeah, sounded a little weird to me.

But with little miss's busy activity schedule, the crock pot is a necessity in order to have meals on the table at the right time on some nights.

So when daddy chose lasagna as our crock pot meal this week, I was willing to give it a shot.

There is really not that much of a difference between "regular" lasagna and crock pot lasagna, at least as far as the preparation is concerned.

I made a meat sauce the way I always do and prepared the ricotta filling the way I always do. All I didn't do was boil the noodles (though I know there are recipes for lasagna that don't require boiling the noodles first, but I digress...).

Then I built the lasagna right in the crock.


Small layer of sauce, uncooked noodles, ricotta mixture, a generous sprinkling of cheese.

Repeat a couple more times, top with a final layer of sauce and sprinkling of cheese, then just put the lid on the pot.


Then turn the crock pot on to low and, well, that's it.

Five hours, a few chores and one ballet class later, here's what we came home to:


Well look at that! It's an oval shaped lasagna!

It was a little tough to serve it out cleanly, but other than that, there was no difference between this and my "normal" lasagna, I just didn't have to be home at a specific time to get it into the oven. Pretty convenient!


This got good reviews all around, so I think we have a new crock pot meal to add to our arsenal!


Crock Pot Lasagna
(just the way I usually make lasagna, adapted for the crock pot... no recipe source)

for the sauce:
1 - 2 tablespoons olive oil
1 medium onion, chopped
1 medium green pepper, chopped
1 - 1 1/2 lb ground beef
salt/pepper/garlic powder/Italian seasonings to taste
1 26-ounce jar of your favorite pasta sauce
1 14-ounce can diced tomatoes or tomato sauce (or another half a jar of pasta sauce - your choice. I've done it both ways.)

for the cheese layers:
3 cups ricotta cheese
2 eggs
1 teaspoon garlic powder (or to taste)
1 teaspoon Italian seasonings (or to taste)
1 cup shredded mozzarella cheese
1/2 cup grated Parmesan cheese
(you can adjust the mozzarella and Parmesan amounts if you like your lasagna ooey-er and gooey-er!)

1 1-lb box lasagna noodles, uncooked

to make the sauce:
In a large pot, heat the olive oil over medium high heat, then add the chopped onion and green pepper. Cook until the onions are translucent and the peppers have softened. Add the ground beef and brown until cooked through, breaking it up so that it is in crumbles. Drain any excess fat. Add the sauce, tomatoes (or, well, the more-sauce) and spices and simmer for 15 minutes. Set aside to cool a bit.

to prepare the ricotta:
In a medium bowl, combine the ricotta cheese, eggs and spices. Beat with a spoon until smooth and creamy.

to construct the lasagna:
In the stoneware of your crock pot, spoon a small amount of sauce - just enough to cover the bottom.
Layer in noodles, barely overlapping, to cover the bottom of the pot as well as you can. Mine took three to three and a half noodles per layer - don't be afraid to break the noodles to fit your crock.
Spread one third of the ricotta mixture over the uncooked noodles, then sprinkle with about one third of each of the other cheeses.
Top the cheese with one third of the remaining sauce, then another layer of noodles, another layer of ricotta and another sprinkling of mozzarella and Parmesan.
Repeat with another layer of sauce, noodles, ricotta and shredded cheeses.
After your third layer of cheeses, add a top layer of noodles, then cover generously with your remaining sauce, making sure that all of the noodles are covered with sauce. Sprinkle with the remaining mozzarella and Parmesan.
Set crock pot to low and cook for about five hours.

We served ours with broccoli and garlic bread, and this was a delicious dinner.

Sunday, January 22, 2012

Egg-Free Pancakes

I know that this will be hard to believe, but we ran out of eggs this week.

Not only did we run out of eggs, but I didn't run out to the grocery store as soon as it happened.

Weird.

It even snowed, and we still didn't run out to buy eggs! (Why is it that as soon as the forecast calls for snow, the entire world needs milk, eggs and bread??)

The egg-less state of our refrigerator didn't cause any real problems... until today. Because you need a big, fancy breakfast at least once over the weekend, right? Usually, in our house, that means eggs and some kind of breakfast meat, or maybe French toast or pancakes or waffles... each of which, as far as my experience has shown, requires at least one egg.

Rather than turning to cereal, I turned to Google, and found this - a recipe for egg-free pancakes with rave reviews from those who had tried it. Woo hoo! We can still have a very weekend-y breakfast!

The recipe is actually very easy.

In one bowl, mix together the dry ingredients - flour, sugar, a bit of salt, and a bunch of baking powder.


In another bowl, mix together the wet ingredients - milk, vegetable oil, melted butter and, of all things, orange juice. Which, by the way, I was also out of (what the heck was up in my house this week???), so I substituted with cranberry-pomegranate juice.


Which is why you can see traces of purple in the bowl.

The resulting batter is pretty much like normal pancake batter, just a little thinner (though it was a little lumpier than my usual pancake batter... and it did thicken a bit as it stood...)


Because the batter was a little thin, I decided to use my little pan and make the pancakes one at a time, rather than the big one I'd planned to use, as I thought that if I made multiple pancakes at a time, they'd spread into each other and become a bit sloppy looking.


These actually cooked up really well. Something about the reaction between the baking powder and the juice allows them to be fluffy and light and hold together really well, even without any egg.

I decided to make half of our pancakes with blueberries.


And I topped them off with a yummy drizzle of maple syrup.


And then it was time to see if they'd pass the kid test.

First up, little miss.


She loved them. Gave them two thumbs up.

Next, little man.

He'd have given them a thumbs up if he could have stopped shoving pancake pieces in his mouth. You know he likes it when more ends up in his mouth than in his high chair seat. Or on the floor.

And, in case you are curious, daddy and I liked them too. We may just make them again, even when we have eggs.

Which, by the way, we finally went and bought.


Egg-Free Pancakes

2 cups all-purpose flour
1/4 cup sugar
1 1/2 tablespoons baking powder
1/2 teaspoon salt
2 cups milk
1/4 cup vegetable oil
1/4 cup orange juice (I substituted cranberry-pomegranate juice and it worked beautifully)
1/4 cup melted butter

In a medium sized bowl, sift (or whisk) together the flour, baking powder, sugar and salt. In a separate bowl, whisk together the milk, oil and juice. Slowly add in the melted butter, then mix the wet ingredients into the dry ingredients and stir together until incorporated.
Note that this batter tends to bubble up and then thicken due to the baking powder. You can gently stir it to break down some of the bubbles, which will also thin it out again for you, if you need to.)
Pour 1/3 - 1/2 cup of batter onto a hot griddle or non-stick pan. Cook each pancake until you see a few bubbles rise to the surface and the edges begin to dry, then flip them over to cook the other side until it is lightly browned.
I added a few blueberries to some as they cooked on the first side. Little miss suggested chocolate chips, which you could try, too.

Enjoy!

Note - the Art of Dessert blog is written by a woman who has children with a variety of food allergies, and the recipes on her site always indicate which allergens are contained in each recipe. She also has great recipes that exclude specific allergens. If you have food allergies, know someone with food allergies, or cook for someone with food allergies, I recommend checking out her blog.


Tuesday, January 17, 2012

English Muffins - Challenger Number One

And we have our first challenger in the English Muffin Off!

My first attempt at English muffins was so successful, that I mentioned trying a couple of other recipes, just for fun.

Today I tried challenger number one - Peter Reinhart's recipe from The Bread Baker's Apprentice. I've had the book for a while, and I love every recipe I've tried so far, so it seemed only fair to have this one be first up to compete against the Alton Brown recipe I made before.


While the ingredient list is fairly similar, the process was different between the two recipes. In the Alton Brown recipe, the yeast was activated first, but otherwise, everything was just mixed together with a wooden spoon, and the dough only rested for half an hour. It is a very quick recipe, as far as yeast bread recipes are concerned.

This one? Not quite as quick.

First, the dry ingredients were whisked together, including the dry yeast.


Then, using the KitchenAid, butter and milk were mixed in.


At this point, the paddle attachment is switched for the dough hook, and the dough is kneaded for eight minutes. The dough, while soft and silky smooth, is much more of a bread dough than the Alton Brown dough, which is more of a batter.

At this point, the dough rests. In my normal dough-resting spot.


And it rests for much longer than the previous recipe. This rest, during which the dough ferments, is 90 minutes long.

After which the dough is shaped into balls, something that was impossible with the other dough. Though this does eliminate the need for those trusty English muffin rings...


Then the tray of shaped dough balls is rested. Again. In my normal dough-resting spot.


And this is another 90 minute rest.

Then it is time to cook the muffins. Like the previous recipe, these are cooked on a pan.


The idea is that, once they hit the pan, they'll flatten out a bit... umm... after the recommended 5-8 minutes on the first side, the bottoms were golden brown, but they hadn't flattened much...


5-8 minutes on the second side, and here was the other difference... they needed to be put into the oven to finish cooking through.


So after 5-8 minutes on each side, then another 5-8 minutes in the oven, they were finally ready.


The cornmeal and color gave them the look of real English muffins, but they were definitely rounder and taller than I'd expected. They didn't quite stack like the others had.


But the test isn't in how they stack, it's in how they stack up!

I ate my first one straight off of the cooling rack - no splitting, no topping, no spread, I just ate it. And it was delicious, and pretty light. But very different from the other ones. A bit more bready and definitely less sweet.

Later tonight we actually split one open to do a real comparison.


Well, the crumb was beautiful, but not quite nook-and-cranny looking. But toasted with some butter, daddy said that these tasted more authentic, more like the store-bought English muffins you think of. And little miss liked these more than the others.

Me? I think I like the other ones a little bit more, but they are both absolutely delicious, and I am glad to have a couple of options available to me now!

So if you are keeping score, we actually have a tie right now... I prefer the Alton Brown English muffins, little miss and Daddy have these slightly ahead. You'd think that would put these in the lead, two votes to one, but this is my blog, so my vote carries extra weight... or something like that... Little man likes them both.

So if you have some extra time, definitely give these a shot - they are worth the wait.


English Muffins

2 1/4 cups bread flour
1/2 tablespoon granulated sugar
3/4 teaspoon salt
1 1/4 teaspoon instant yeast (I used active dry, as that is what I have)
1 tablespoon shortening or unsalted butter at room temperature (I used unsalted butter)
3/4 to 1 cup milk or buttermilk at room temperature (I used milk)
cooking spray
cornmeal for sprinkling

Stir together the flour, sugar, salt and yeast in the bowl of an electric mixer.
Using the paddle attachment, stir in the butter and 3/4 cup of milk on low speed. Mix until the ingredients form a ball. If there is still loose flour in the bowl, dribble in some of the remaining 1/4 cup of milk. The dough should be soft and pliable, not stiff. (I needed about 1/8 cup of the remaining 1/4 cup.)
Switch to the dough hook and knead the dough for about 8 minutes.
Cover the dough in the bowl with plastic wrap and allow it to rest (ferment) at room temperature for 60-90 minutes, until the dough doubles in size.
On a clean work surface, divide the dough into six equal pieces, and shape each piece into a ball.
Place all six dough balls on a baking sheet, which has been covered with parchment paper, sprayed lightly with cooking spray and sprinkled with cornmeal. Then mist the tops of each ball with more cooking spray and sprinkle them with a bit more cornmeal. Cover the pan loosely with plastic wrap. (I use the same piece as before.)
Proof the balls of dough for 60-90 minutes, until they nearly double in size.
Heat a skillet or griddle over medium heat and preheat your oven to 350 degrees.
Spray the pan lightly with cooking spray then transfer the rounds to the pan, with the rounds about an inch apart and not touching. You may need to work in batches (I did three at a time). Keep the rounds not being cooked covered with plastic wrap.
Cook the rounds on the pan 5-8 minutes, or until the bottoms cannot cook any longer without burning. The bottoms will be a rich golden brown. Carefully flip each muffin and cook on the other side for another 5-8 minutes as before.
Transfer the muffins, once cooked on both sides, to a baking pan and bake them at 350 degrees for 5-8 minutes. It is important that you transfer each batch right from the stove top pan into the oven and not wait for the second batch to come off of the griddle, as they will not respond as well to the final cooking if they cool down from the pan.
Transfer the baked muffins to a cooling rack and cool at least 30 minutes before serving.

Enjoy!

Related Posts with Thumbnails