Showing posts with label Mexican. Show all posts

Friday, March 20, 2015

March Sourdough Surprises - Choose Your Own Adventure!

You know what's awesome? Sourdough Surprises has reached their third anniversary! That's thirty six months of sourdough deliciousness - and you've stuck along with me for the ride!! How cool is that??

To celebrate the third anniversary, Sourdough Surprises offered participants a chance to choose any recipe we wanted from all those we've made over the last three years - try one we missed, repeat one that we wanted a do-over on... whatever the reason, just choose your own sourdough adventure this month!

With thirty six amazing and varied recipes to choose from, you can imagine how difficult it was to make my final selection. But I based my decision on what my family liked best, and that happened to have been a very recent challenge - steamed buns!


Last time I made bacon cheeseburger buns. This time, I tried chicken enchilada buns. The filling was made from shredded chicken smothered in delicious, tangy enchilada sauce.


I made two varieties - without cheese, for little man, and with... for the rest of us. Aside from the fact that the buns lost their shape during the steaming process, these were a fun and delicious take on the Mexican meal.

I can't wait to see what meal I'll turn into a bun next!


So what did you choose? Which sourdough surprise did you attempt this moth? Link up and share!!


Saturday, September 20, 2014

September Sourdough Surprises - Cornbread

I love cornbread.

With chili. With butter or jam for breakfast or snack. As a quick treat. It's just delicious.

So when Sourdough Surprises chose cornbread as the September challenge, I was super excited.

I first thought I'd make a somewhat traditional cornbread, since, well, it's so delicious.

But then I saw a really fun looking alternative called a Johnnycake.  Johnnycakes are kind of like cornmeal pancakes, cooked on a griddle, and they look like a super fun treat.  I decided to take it one step further and turn my Johnnycakes into... Johnny-waffles.

The batter comes together super easily.  And, of course, it all starts with the sourdough starter.


The starter is quickly refreshed with flour... and, in this case, cornmeal! I used more cornmeal than flour, to really kick up the cornbread inspiration.


I was a bit worried that the cornmeal would inhibit or slow the starter's ability to do its job, but it didn't seem to at all!

The rest of the ingredients are mixed in, and then, just to really ramp up the corn flavor, I added... corn kernels!


Then onto the pre-heated waffle iron...


...to produce golden delicious corn-filled goodness!


We actually made these for dinner, and I couldn't resist adding a bit of Mexican flare to these, so I sprinkled mine with shredded cheddar, then added a healthy scoop of sour cream, salsa and a some fresh avocado on top.


The results were colorful, fun, and, best of all, delicious!


So how was your sourdough cornbread experience this month?? Link up and share!


Sourdough Johnnycake Waffles
(inspired by King Arthur Flour's Corn and Scallion Sourdough Pancakes)

1/2 cup sourdough starter, fed or unfed
3/4 cup cornmeal
1/2 cup all purpose flour
1 cup milk
1 tablespoon vegetable oil
1 teaspoon baking soda
1/2 teaspoon salt
1 large egg
1 cup fresh/cooked or frozen/thawed corn kernels

Combine starter, flour, cornmeal and milk. Cover and allow to rest for 30 minutes.
To the starter mixture, add the oil, baking soda, salt and egg, stirring to combine.
Preheat waffle iron according to manufacturer's instructions.
Fold in corn kernels.
Cook the batter in your waffle iron according to manufacturer's suggestions (regarding amount of batter and time).
You can keep these warm on a baking sheet in a low oven if you would like to serve them all at once. The batter can hold in the fridge for a day or two, as well.
Enjoy!

Monday, May 12, 2014

Mexican Cinnamon Cookies

Happy Monday! I hope everyone had a wonderful Mother's Day yesterday - all you moms, all you friends of moms, all you teachers and nurses and doctors and amazing folks who help moms do what we do.  I hope you all gave yourselves a big hug yesterday, realizing what an amazing job you do every day, growing the next generation.

Being the second Monday of the month, today's post is the reveal for the Secret Recipe Club.  And doesn't really have to do with Mother's Day.  Actually, it has to do with last week's holiday, Cinco De Mayo.

My assigned blog this month was Jane's Adventures in Dinner, written by the amazing Jane.  She's a chef, a teacher, a mother and an absolute wonder. Her blog is a real delight and her recipes all look absolutely delicious.

But, I kind of knew what inspiration I'd be looking for this month, regardless of what blog I was assigned - I knew I'd use this month's SRC as a way to find something new and fun to make for Cinco De Mayo.

And Jane didn't disappoint. She had several recipes to choose from, but I wound up choosing these, delightful looking Mexican style cookies that looked like they'd be the perfect Cinco De Mayo treat.

They came together super easily. 


Like other Mexican style cookies (called Mexican wedding cookies) that I've seen, these use powdered sugar as the sugar, rather than granulated. And these have a lovely helping of cinnamon, making them spicy and delicious.

I mixed the batter...


...and little man mixed up some cinnamon-(powdered) sugar, which we then used to coat balls of the dough.


 Little man got a big kick out of helping me make sure each of the dough balls was thoroughly coated. He used a fork to, as he put it, give each dough ball a hat of the powdered sugar/cinnamon mix. I know it's a blurry photo, but it was seriously adorable.


The prepared cookies were then placed on a cookie sheet...


...and baked to light-golden perfection.


And we all loved them! They're light and crisp, with a slightly spicy sweet taste from the cinnamon - the perfect end to our Cinco De Mayo meal!


And, by the way, I also tried one other recipe from Jane's blog. Well, sort of.  She has this delicious sounding Black Bean Soup recipe that just looked amazing. But I knew I'd be the only one in the house to eat it, no matter how good it was. So I used it as the inspiration for a black bean side dish that I served with our Navajo stack tacos.


Definitely repeating that - so delicious. And I also want to try the slow-cooked pork taco recipe she has at that same link with the black bean soup. As I said - there was no lack of inspiration this month!

Thanks, Jane, for the delicious recipes, the awesome inspiration, and for your super fun blog!


Mexican Cinnamon Cookies
(from Jane's Adventures in Dinner)

1 cup butter
1/2 cup confectioners’ sugar
1/2 teaspoon ground cinnamon
1/4 teaspoon salt
1 teaspoon vanilla extract
1 1/2 cups all-purpose flour
1 cup confectioners’ sugar
1 teaspoon ground cinnamon

Preheat oven to 350 degrees and grease cookie sheets, or line them with parchment paper.
In a medium bowl, cream together the 1/2 cup confectioners’ sugar and butter until smooth. Stir in the vanilla.
Combine the flour, salt, and 1/2 teaspoon of cinnamon, then stir the dry ingredients into the creamed mixture to form a stiff dough.
In a separate bowl, mix together the 1 cup confectioners’ sugar and 1 teaspoon cinnamon.
Shape the dough into 1 inch balls and roll each ball in the powdered sugar/cinnamon mixture, then place on prepared cookie sheets.
Bake for 15 to 20 minutes in preheated oven, or until nicely browned. Cool cookies on wire racks.

Enjoy!

Monday, May 5, 2014

Navajo Fry Bread

You know what I love?

Any reason to celebrate something with food.

And today being Cinco De Mayo, well, it was a perfect excuse for a foodie celebration. Now, I know that Cinco De Mayo is actually not celebrated much (read: at all) except in the one area of Mexico that was involved in the vicotorious fight against the French, but for some reason, we gringos have latched onto it as a reason to celebrate all things Mexican. So... I go with it.

I have been in something of a creativity rut with food and cooking and blogging... so I was pretty sure I was going to go simple with my Mexican dinner celebration... but I still looked around for potential inspiration... and found some!

My original plan, boring as it is, was tacos. (I say boring... I just mean uncreative. We love them.)

Then I saw these. Navajo Tacos. Meaning... same taco "stuff," but instead of using either a hard or soft tortilla shell, you use Navajo fry bread - a fried, crisp, golden, puffed kind of flatbread.  I know they're not authentically Mexican, but hey - neither is making a big deal out of Cinco De Mayo!  So I went for it.

The process is simple, but takes a bit of time and concentration.

Flour, baking powder and salt are mixed together, and then you dump in one cup of water.


This is then mixed together loosely to form a ver sticky dough.


Very. Sticky.

But you don't want to knead this - it's not "real" bread where you want to strenghten the gluten and develop strong bonds and all that scientific bread-making stuff. You just want to be able to work with it, to shape it into rounds.


Umm... kind of rounds. Close to rounds. You get the idea.

And then, the time consuming and must-be-careful part - you fry.


And they become beautiful and puffy and golden.


And then we just treated them like taco shells!  Well, ones you can't roll up... so... taco bases.


And let me say - they were delicious! SO worth the frying time (and minor burn... who said being a food blogger wasn't hazardous??). Even daddy, who is still doing his low-carb thing, snuck a taste and loved it. I actually am curious what else I can put on these... I bet they'd make a great base for, say, a breakfast sandwich (eggs, cheese and bacon, anyone?) or even for egg salad or something. Or just with some butter next to a salad!

So I hope you had a lovely day, whether you celebrated the faux-Mexican holiday or not. But I'll keep celebrating.

Navajo Fry Bread
(from Tips From A Typical Mom)

2 cups flour (all purpose)
1/2 teaspoon salt
2 teaspoons powdered milk
1 teaspoon baking powder
1 cup water
extra flour for hands and dusting surface
vegetable oil for frying

Whisk all of the dry ingredients together in a large bowl.
Pour the water all at once into the dry ingredients and stir with a fork until combined.
Flour your hands and continue to squeeze the dough until it’s mixed well. Do not knead the dough or it will be heavy.
Cut the dough into 8 equal pieces and on a floured surface and press each piece into a flat, circle shape.
In a deep heavy pot, heat about 2 inches of vegetable oil on medium high heat until it reaches 350 degrees (you can test it by adding a small pinch of dough and see if it bubbles).
Fry the bread one or two at a time until browned on one side, then flip over and repeat.
Remove from oil with tongs and place on double layer paper towels to cool. You can keep the finished breads on a baking sheet in a 200 degree oven to keep warm while frying the rest of them and waiting to eat.

Monday, April 14, 2014

April Daring Cooks' Challenge - Pathiri

I am so sorry I haven't posted in a while! But look at this - two posts in one day? What??

Yup - that's what happens every few months when the posting dates for the Secret Recipe Club and Daring Kitchen collide. I mean coincide.

The April Daring Cooks Challenge was brought to us by Joanna from What’s On The List. She taught us all about Pathiri and challenged us to create our own version of this inspirational Indian dish!

Pathiri was something completely new to me. Pathiri are a type of crepe-like pancake, usually rice based, which can then be used to create all kinds of savory dishes. Our challenge this month was to use these crepes to create a sort of savory crepe cake. Fun!

The given recipe was for a traditional Indian style dish.  Which looked outstanding.

But I only followed the recipe for the crepes.


For my filling, I went with what I had on hand - which happened to be Mexican inspired.  I had some leftover cooked Mexican-style chicken. I chopped the chicken, along with the tomatoes and onions that had cooked with it, and mixed everything together.

To construct my "cake," I spread each crepe with a thin layer of refried beans, then spread on some of the chicken filling.


I repeated these layers until I ran out of filling.


I then smothered the whole thing with a Mexican-spiced tomato sauce, then smothered the whole thing in cheese.


Which baked up...


...perfectly.

The results were super fun to cut into...


...and absolutely delicious to eat.


Well, for me. The kids didn't like it because of the tomato sauce (I made a cheese-free mini-version for little man). But I thought it was really fun and delicious.

Now, I have been wanting to make a (sweet) crepe cake for quite some time, so this challenge  has re-inspired me to try my hand at it, and I definitely want to try another version of the savory version, too, to see if I can find one that is a winner for everyone in the family!

Joanne, thank you so much for introducing me to this fun, delicious dish!

To see the challenge as Joanne presented it, check it out here.

To see the delicious varieties of pathiri cooked up in the kitchen this month, check them out here.


I know I usually put the recipe that I used here at the bottom, but I really just winged my final recipe (and used leftover chicken from a chicken dish that I'd... yeah... totally winged...), so I'll put here the crepe recipe, from the challenge, that I used, and give you a basic overview of the finishing steps.

Pathiri-inspired crepes
(from April Daring Cooks' Challenge)

2 large eggs
1 cup milk
1 teaspoon white vinegar
1 tablespoon grape-seed oil or neutral-tasting oil (I used vegetable oil)
1 cup all-purpose flour, sifted
pinch of salt
oil for crepe pan (I used non-stick cooking spray)

In a jug or mixing bowl add vinegar to milk; allow to sit for 5 minutes.
In a bowl (or larger jug), combine milk mixture with remaining ingredients; refrigerate for at least one hour.
Heat pan coating pan lightly with oil; remove excess oil with paper towel.
Pour batter to desired size; flip when edges start to lift.
Cook second side until just cooked.

For the final dish, prepare a cooked filling of our choice and allow it to cool. Also prepare a coordinating sauce of your choice.
Preheat the oven to 350 degrees.
Spoon a bit of sauce onto a baking dish (so the final product won't stick), and alternate layers of crepes and filling. There is no rule for how many layers you need to use, so go with what works for you. Cover all of the layers with sauce.
Bake in preheated oven until heated through.

Enjoy!

Monday, November 12, 2012

Mexican Fried Rice

For this month's Secret Recipe Club, I was assigned the blog Jen's Journey. Jen is pretty much a super mom. She has two fantastic teenage kids, she homeschools, she reads, she crafts... oh, and she cooks really, really well! She is also really honest about her life and the paths that it has taken, and uses her blog to share her journey with the world. Talk about a strong woman!

I had some trouble choosing what to make, and let me tell you - there were some terrific options. My first thought was to try her homemade ketchup, since I have been wanting to try my hand at that for some time. Then I saw this amazing looking chocolate cream pie. Yum. I may just try that one for Thanksgiving! Then I saw this delicious looking honey mustard BBQ chicken. Oh my gosh. But I was worried about allergy boy having it with the mayonnaise. But I am definitely going to try an allergy-free version of it.

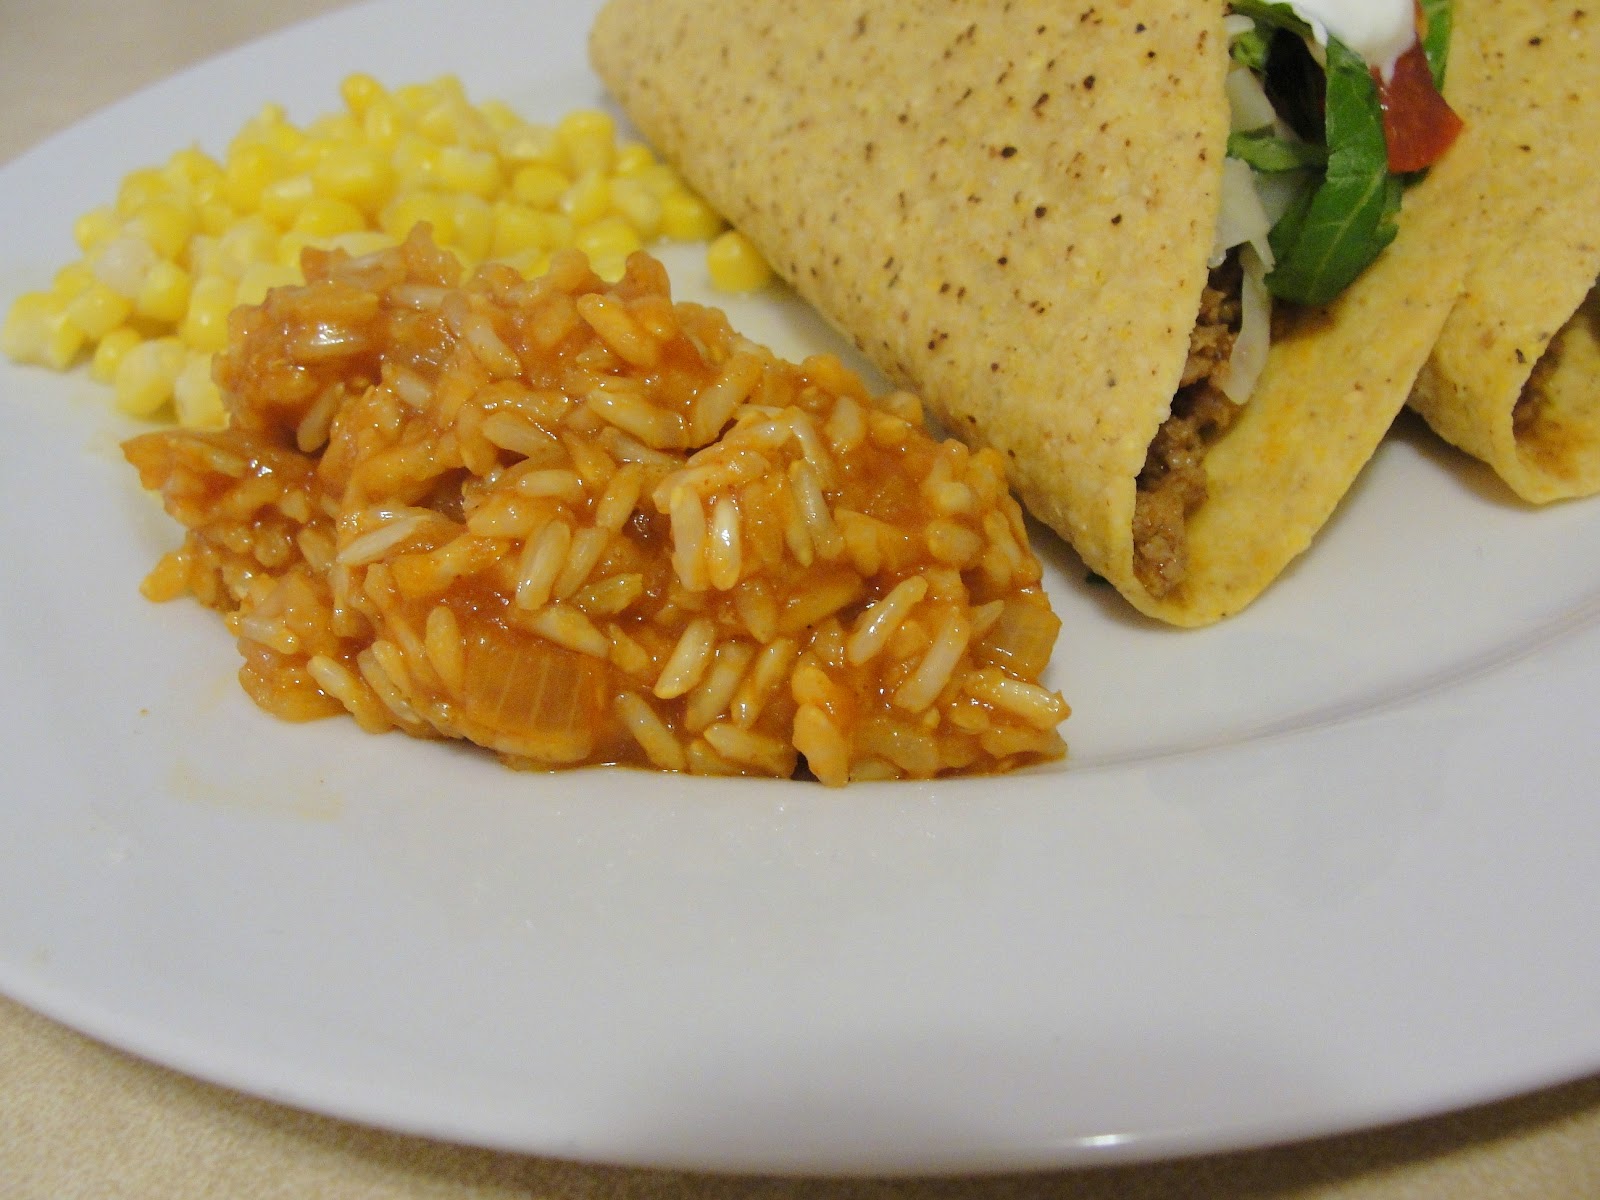
Then daddy asked me if we could have tacos for dinner one night and my decision was made. In perusing the blog, I'd seen her posting for Mexican Fried Rice, and as soon as I heard "tacos," I knew what we'd be having as our side!

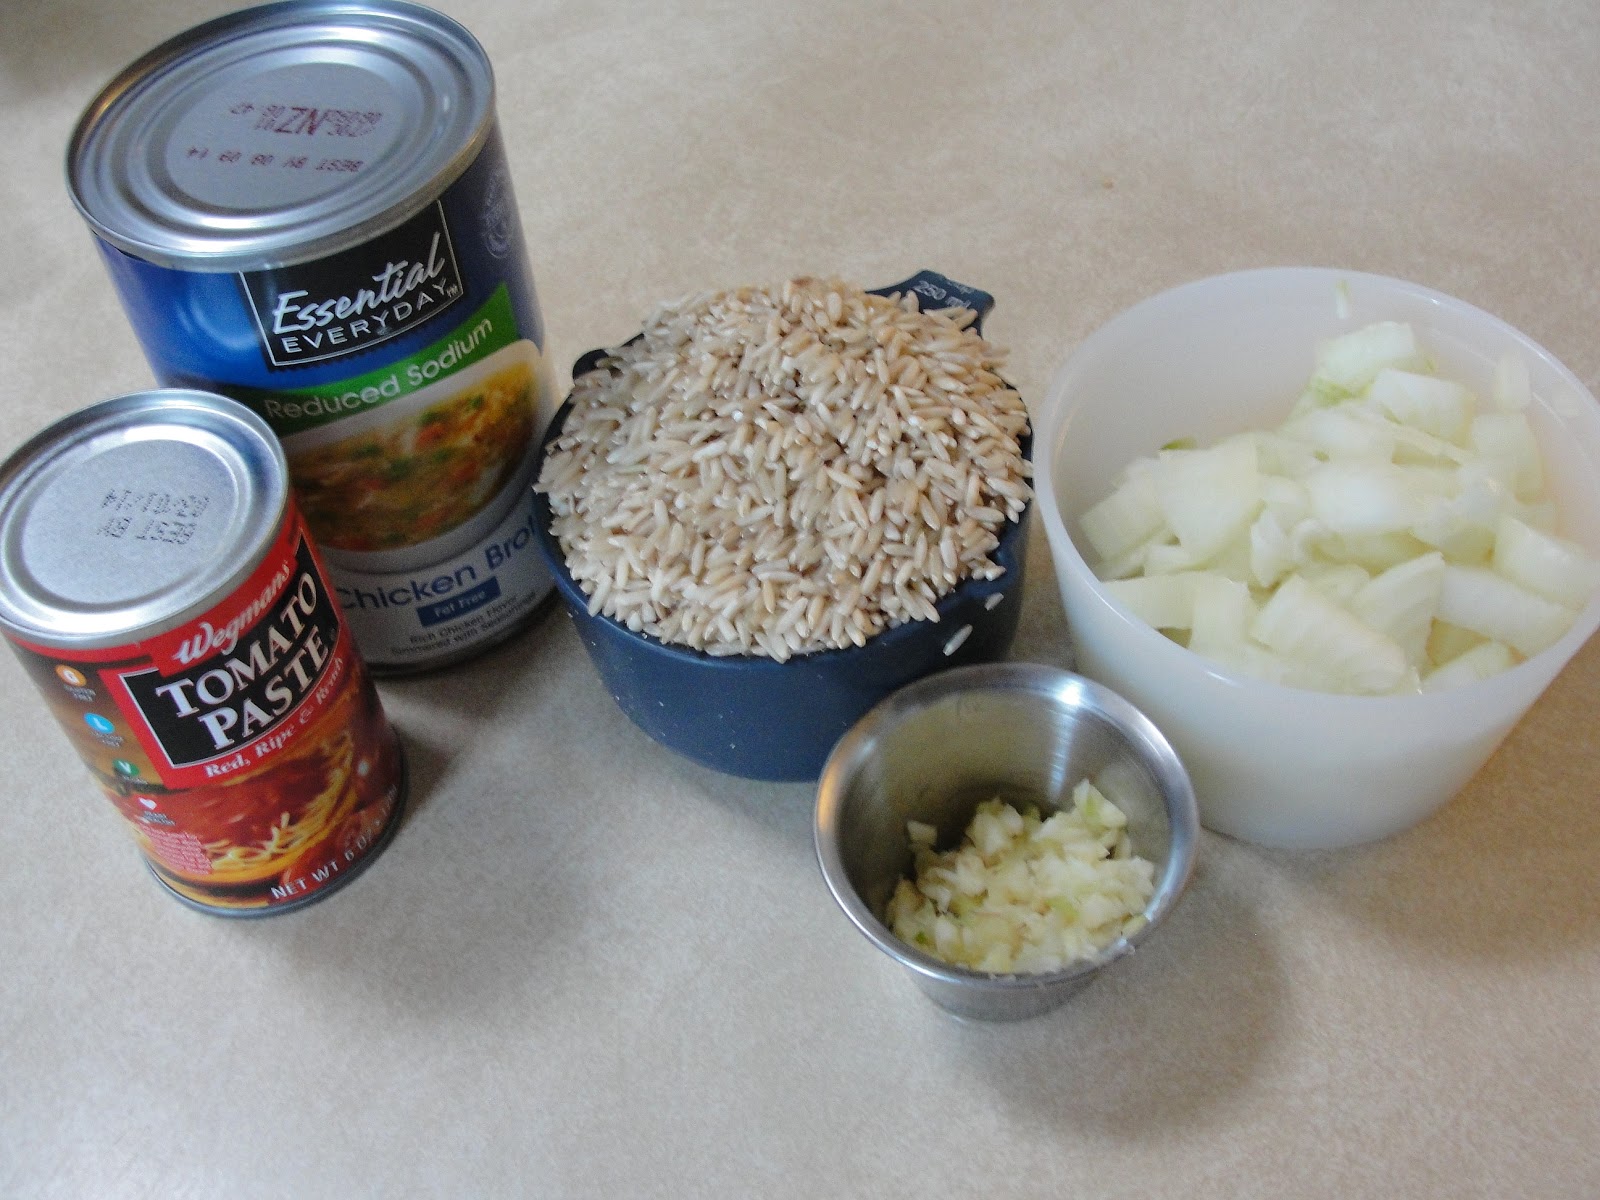
I started by gathering the ingredients and chopping my onions and garlic.


The rice, onion and garlic were then sauteed in a little bit of olive oil...


...and then the tomato paste and chicken broth (along with any spices you are using - I used cumin and a dash or paprika) are added to the pot and the whole thing is stirred up.


Once the mixture comes to a boil, you cover it, lower the heat, and let it simmer (covered) for half an hour. Now, it is not uncommon for me to have bad luck with one-pot rice dishes, so, when timing out my dinner, I timed it to give the rice 45 minutes, rather than 30. Just to have a buffer.

And it's a good thing I did that, because when I removed the lid at 30 minutes, this is what I saw...


Soupy rice that was still pretty crunchy. NOT the idea.

I let it cook for another 15-20 minutes while we served up our tacos and corn, then gave it another try.


The flavor was fantastic. But my rice still had... umm... a bit more bite than I wanted. I have no idea what I did wrong, whether it was the style of rice or some sort of weird one-pot-rice-dish curse I seem to have... BUT I will definitely try this again, because, as I said, the flavor was delicious, so, even though it didn't work out perfectly, I would not call it a fail.

And I look forward to making many more dishes from Jen's blog!

To see the other dishes cooked up for this week's Secret Recipe Club revel, click on the links below:


Mexican Fried Rice
(only slightly adapted from Jen's Journey)


1 tablespoon olive oil
1 cup long grain white rice (I used brown basmati rice)
½ cup finely chopped white onion (I used a whole onion, decent sized)
1 clove garlic, minced (I used four cloves... I like garlic!)
2¼ cups chicken broth
3 tablespoons tomato paste
1¼ teaspoon kosher salt

In a large heavy saucepan, heat the olive oil on medium-high heat. Add the rice, onions and garlic.
Saute until the rice has an opaque color and is fragrant, about 2 minutes.
Add the chicken broth, tomato paste and salt. Mix well to incorporate evenly.
Cover, reduce the heat to low, and simmer until rice is ready, about 30 minutes.
Fluff with a fork and serve immediately.

I needed to simmer my rice for much longer, but I am not sure if that is due to the type of rice that I used or not. Jen had luck with this recipe, so I'd like to keep trying!

Enjoy!

Wednesday, October 10, 2012

Chicken Taco Braid

I am sorry that I haven't been posting much this week.  Things around here have been... well... crazy. 

It started when little man, who has had the nickname "stunt-baby" for a while, broke his leg. Yeah. Smallest cast I've ever seen in my life.

Then little miss got a stomach bug over the weekend. Yuck.

Then, in a twisted case of "you're never going to believe this...," Daddy broke his leg, too.

That's right. The boys in the house are sporting matching blue casts.

Luckily little miss is feeling better.

In the middle of all of this, Julie over at Willow Bird Baking announced her second baking challenge. I had so much fun with the first one (these cinnamon rolls) that I really wanted to participate. But with the reality of taking care of everyone, I was worried that I wasn't going to be able to.

But today I decided that I wasn't going to let anything stand in my way, and I just went for it.

This week's challenge was to make a braided bread of some sort, using this dough recipe. It's not a yeasted dough. In fact, it is a super simple, very quick dough. It's usually used for sweet or breakfast-y treats, but we were challenged to innovate, and to choose a filling and glaze/topping of our choice.

I first thought I'd just punt and go with a simple jam filling.  But then I figured, if I am going to bother participating in the challenge, I couldn't cop out.  So I decided to make a dinner braid, using what I had on hand.  

The dough is super simple. It's supposed to be made in the food processor, but, not having a full-sized one, I used my KitchenAid mixer.  The key is to only mix the dough until the ingredients are just incorporated, being careful not to overwork it.  And, seeing as I was going for a savory braid, I chose to omit the flavoring extracts called for in the breakfast version of the recipe.


The dough is then carefully rolled out and sectioned and cut to be filled and braided.


And what did I choose for my filling? I went easy. But tasty. I had a couple of boneless, skinless chicken breasts in the refrigerator, so I boiled them, shredded them, and simmered them in taco seasonings.  The shredded meat was topped with grated cheddar cheese, and I started "braiding."


My braid turned out a little uneven, but not too bad.


And it baked up super quickly. 15 minutes and dinner was ready.


I mean, almost ready. Remember that we were supposed to choose not only a filling, but a glaze, too. With a taco filling, I decided on salsa and sour cream as "glazes."


Oh. My. Gosh.

This was so delicious. Everyone loved it. And had seconds. And little miss requested that I send the leftovers with her as lunch for school tomorrow.

With how easy this dough is, I see many more braids in our future.

Julie, thank you, thank you, thank you for another awesome, inspiring and truly delicious challenge!! I can't wait for next week!!


Chicken Taco Braid
(inspired by Willow Bird Baking)

for the dough:

2 cups all-purpose flour, sifted
1 teaspoon baking powder
1/2 teaspoon salt
1/2 cup unsalted butter
3 ounces cream cheese
1/2 cup milk, minus 1/2 teaspoon (I used coconut milk)

Preheat oven to 425 degrees F. In the bowl of a food processor (or stand mixer), mix the flour, baking powder, and salt. Add the cream cheese and butter into the flour mixture and pulse (or mix on low speed with paddle attachment) to cut the fat into the flour (about 6 pulses). Add the milk and blend (mix on medium speed) into a loose dough.

Turn the dough onto a floured surface and knead VERY LIGHTLY for 4-5 strokes. (note: This is the step at which you can ruin the braid. If you overwork the dough, the pastry will be tough. Just gather the dough together and don’t worry about making it smooth. It will still look a little rough. That’s perfect.)

Between two sheets of waxed paper, roll the dough to a rectangle approximately 8" by 12". Turn dough out onto a lightly greased baking sheet and remove the waxed paper. (note - I rolled my dough between one piece of parchment paper and one piece of waxed paper, then just peeled off the waked paper and transferred the parchment paper to my baking sheet - worked like a charm!) Measure and mark the dough lengthwise into thirds.

Make 2¾-inch slight diagonal cuts at 1-inch intervals on each the long sides. Do not cut into the center area, where the filling goes.


for the filling:
2 boneless, skinless chicken breasts
1/2 packet taco seasonings
1/2 cup water
1 cup shredded cheddar cheese (more or less to taste)

Boil chicken breasts for about 25 minutes until cooked through. Remove from water and shred the meat.
Add the shredded meat to a skillet, sprinkle taco seasoning on top and add water to the pan. Bring the mixture to a boil, reduce heat and simmer for at least 10 minutes.
Allow the chicken to cool before filling dough.


to prepare the braid:
Spread the seasoned, shredded chicken along the middle section of the rolled out dough. Top the chicken with the shredded cheddar cheese.  Fold the cut strips, first one from one side and then one from the other side in a rotating fashion, over the filling. It will now resemble a braid.

Bake in a 425° oven for 12-15 minutes, until the dough is cooked through and the top is lightly browned.

As a topping, spoon or pipe (if you want to make it look like glaze) salsa and sour cream over the top of the finished braid.

Enjoy!

Tuesday, August 14, 2012

August Daring Cooks' Challenge - Cooking With Cornmeal

This month's Daring Cooks' Challenge was a little different. It was not a recipe, not a method of cooking, not some new technique... it was all about one ingredient.

Rachael of pizzarossa was our August 2012 Daring Cook hostess and she challenged us to broaden our knowledge of cornmeal! Rachael provided us with some amazing recipes and encouraged us to hunt down other cornmeal recipes that we’d never tried before – opening our eyes to literally 100s of cuisines and 1000s of new-to-us recipes!

Now, I love cornmeal. I have made cornbread several different ways, I have made polenta, and I am not afraid to use cornmeal where ever it might fit.  Rachael provided us with some pretty cool recipes (some of which I still really want to try!), but I wasn't exactly sure where to begin.

Well, where is better to begin than, well, breakfast!

Little miss happened to ask for pancakes the morning after this challenge was announced.  So I told her sure, and that we'd try something fun. I substituted half of the flour in my basic pancake recipe (the one in my head... I don't even know where I got it anymore!) with, you got it, cornmeal!


Batter mixed, they went right onto the griddle (pan). They cooked up beautifully...


And little miss even helped me flip some of them!


Going with the cornmeal theme, rather than cover our pancakes with maple syrup, we served ours with strawberry jam.


And they got a pretty good review from the peanut gallery.


But I wasn't ready to call it quits on the challenge yet.  I still wanted to try something savory. Something different.

I decided to use cornmeal as a breading for some chicken. As the cornmeal has a different feel and taste than a usual flour or breadcrumb coating, I wanted to try to come up with a meal that would be different. My first go-to, easy thought for breaded chicken was chicken parmesean. But the cornmeal didn't feel like chicken parm to me. It felt more... Mexican.  But chicken parm is yummy. That's when I came up with the idea of Mexican cornmeal chicken... not parm...

Now, I will full well admit that I winged this. I came up with an idea in my head and just went for it in my normal "go with it" kind of way - didn't measure, just went by feel.

I started with a pile of cornmeal and chose some spices - garlic powder, cumin and cajun seasonings.


The spices were combined, then the chicken pieces (boneless, skinless breast, cut thin) were generously coated, then pan fried in olive oil.


The chicken was fried until just golden, then placed into a baking pan, on top of a bed of pinto beans.


Once all of the chicken was cooked and in the pan, I spooned some salsa over each piece, then popped the whole thing into the oven. About ten minutes before we were ready to eat, I took out the pan and topped each piece with sliced queso blanco.  The pan went back into the oven for about 8 minutes, and then I switched the oven to the broil setting for the final minutes to really melt that cheese.

The results...


...were delicious. We will definitely be repeating this meal. Which I never would have come up with if it were not for this challenge.

Rachael, thank you for encouraging me to think outside the box and try some new things with cornmeal! It's great to look at an "old" ingredient with a new eye, and that's just what you did for me.

To see the other creative cornmeal dishes cooked up in the kitchen this month, check them out here.


Cornmeal Pancakes

1/2 cup all purpose flour
1/2 cup cornmeal
2 teaspoons baking powder
2 tablespoons sugar
1/2 teaspoon salt
1 cup milk (I used coconut milk)
1 egg
2 tablespoons vegetable oil (or canola, or melted butter)

In a medium sized bowl, whisk together the flour, cornmeal, baking powder, sugar and salt. In a two-cup measuring cup, measure out your milk, then add in the egg and oil, and combine well.
Pour the wet ingredients into the dry and mix until fully combined.
Cook pancakes on a hot skillet, about one to two minutes per side.
Serve with your favorite jam and enjoy!


Mexican Inspired Chicken not-Parm

3 boneless skinless chicken breasts, each cut into about three thin yet evenly sized pieces
1 1/2 cups cornmeal
garlic powder, cumin and cajun seasonings, to taste
1 can pinto beans
1/2 - 3/4 cup salsa (I use mild, use what you'd like)
4 oz (about) queso blanco, sliced thin (or shredded)

Cover a 9" x 13" baking dish with foil and spray with non stick cooking spray. Preheat the oven to 350 degrees.
Empty the can of pinto beans over the bottom of the covered pan, spreading them out evenly.
On a shallow plate or dish, combine the cornmeal and spices.
Heat a skillet over medium high heat, and add a few tablespoons of extra virgin olive oil.
Generously coat each piece of chicken in the seasoned cornmeal, then place each piece into the pan, being careful not to crowd the pan (work in batches).
Cook the chicken until each side is golden brown, turning so that both sides are equally golden.
As each piece is done, place it in the pan, over the beans.
Once all of the chicken is in the pan, spoon a generous tablespoon of salsa (or as much as you would like) over each piece.
Cover the pan with foil and bake for about 30 minutes.
Remove the foil and top each slice with the sliced (or shredded) queso blanco.
Bake for another 10 minutes (times are approximate, depending on the size and thickness of your chicken. Mine were still a little thick, even after cutting...), changing the oven setting to broil for the final two minutes (watch it carefully once you switch it to broil!).
I served this over multi-colored vegetable rotini pasta, but you could go with rice or whatever you prefer.

Enjoy!

Related Posts with Thumbnails