Sunday, October 27, 2013

October Daring Bakers' Challenge - Savory Pot Pie

This month's Daring Bakers' Challenge was a little different from the norm.  Usually the challenges have us baking up all kinds of sweet goodies. Or breads.  This month, that wasn't the case.

Hannah of Rise and Shine was our October 2013 Daring Bakers’ hostess and she challenged us to bake our own double crusted savory pot pies. Using any from-scratch crust and filling we choose, we were allowed to get completely creative with our recipe, showing off the savory flavors and fillings from our own home or region.

What fun - a savory baking challenge!  I pondered long and hard as to what kind of filling to choose. But I kept coming back to our old standard - chicken pot pie.  Yes, yes, I know that there are so many more pot pies, that I really should have been more creative... but we really, really like chicken pot pie. In fact, I've even shared other versions with you before - here, here and here.  But what can I say? It's good!

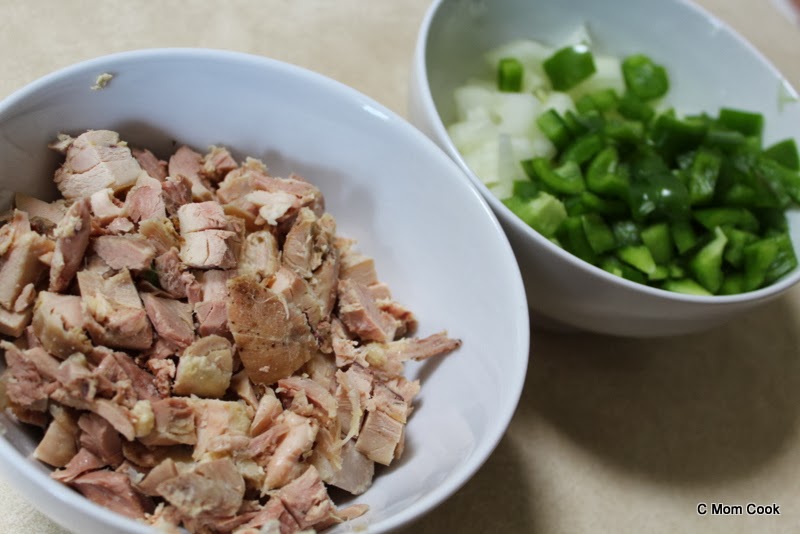
The version I chose to make for this challenge was slightly Mexican inspired.  And it started with the prep work - chopping sweet onion, green pepper and pre-cooked chicken.


I made my pot pie completelly dairy free so that little man could enjoy it. Usually, the sauce of a pot pie starts with some kind of roux, which is generally made with a combination of butter and flour. I started by sauteeing the onions and peppers in olive oil, then added a bit more oil, then my flour.


I then poured in chicken stock, which thickened up beautifully with my improvised roux.  And then all that was left to do was add in the rest of the goodies - corn kernals, black beans and the chicken.


And for my crust? Sourdough, of course!


And then it's just a matter of putting everything together...


...and baking it up!


It was awesome to see how well the crust baked up on all sides of the pie - golden delicious and crispy on all sides!


But the most important part is how it tasted.  And it tasted delicous. Little miss even asked for seconds. Which, if you know seven-year-olds and dinner, is not an everyday occurance.


Hanna, thank you so much for giving me a fun opportunity to make a delicious meal for my family. I hadn't made a pot pie in a while and now I know I'll be making them a lot more often.

To see the challenge as Hannah prepared it, with all of her delicious inspiration recipes, check it out here.

To see the other delicious pot pies baked up in the kitchen this month, check them out here.


Sourdough Pie Crust
(from The Bojon Gourmet)

2 cups flour (you can use all purpose, whole wheat or a combination)
1 teaspoon salt
2 teaspoon sugar
1 cup (2 sticks) butter, cold, cut into cubes
about 1 cup 100%-hydration sourdough starter


In a large bowl, whisk together the flour(s), salt and sugar. Add the butter and rub it in with your fingertips until the mixture looks like gravel, with some butter worked in and some 1/4" chunks remaining. Gradually add the starter, folding the mixture with a spoon or your hands until it just starts to come together into large clumps.

Turn the dough out onto a lightly floured surface. Divide roughly into 8 portions. Fraisage the dough: using the heel of your hand, scrape a portion of dough across the surface. Repeat with the remaining dough. Gather the dough into a ball. Flatten the ball into a disc and wrap in plastic wrap. Chill for at least 30 minutes, and up to a few days. (Or freeze for up to a couple months. Defrost before proceeding.)


Mexican-Inspired Chicken Pot Pie Filling
(made it up as I went along!)

4 tablespoons extra virgin olive oil
1 sweet onion, chopped
1 green bell pepper, chopped
1/4 cup flour
2 cups chicken stock
1/2 can corn kernals (drained)
1/2 can black beans (drained)
2 cups cooked chicken, chopped
salt, pepper, cumin, paprika, to taste
2 tablespoons salsa

In a large sauce pan,  heat one tablespoon of oil over medium  high heat. Add chopped onion and and pepper and sautee until softened and fragrant. Season with a touch of salt and pepper.  Add remaining oil, then sprinkle in flour. Mix well to fully incorporate the flour. The mixture will be thick, almost like a paste. This is okay.
Pour in the chicken stock and mix it well until there are no lumps from the flour.
Stir in the corn, black beans and chicken. Season to taste with your spices.
Remove the pan from the heat and stir in the salsa.
Allow the mixture to cool.

To prepare the pot pie:
When you are ready to proceed with your pie, preheat your oven to 375 degrees and remove the dough from the fridge. If it is very firm, you may need to let it soften at room temp for 15 minutes or so. On a lightly floured surface, roll half the dough out into a round large enough to line the bottom of the dish you are using for your pot pie. I used a 1 1/2 quart casserike dish. Fit the crust into the pie pan leaving a slight overhang.

Pour cooled filling into the prepared bottom crust.

Roll the remaining dough into a round just slightly larger than the dish and place it on top of the filling.  Trim the bottom crust to approximately the size of the top crust, tuck the edges under all the way around and crimp the edges (with a form or your fingers - whatever look you are going for). Cut a few vent slits in the top crust.

Bake pie for 45 minutes until the crust is golden brown.

Allow to cool for a few minutes before serving.

Enjoy.


Sunday, October 20, 2013

October Sourdough Surprises - Quick Breads

This month's Sourdough Surprises challenge was the perfect choice for how busy things have been around here - quick breads! You know, muffins or other breads that can be started, baked and completely finished in darn near no time flat.

We love muffins in our house, and I've made plenty of varieties over the years. And have made quite a few sourdough quick breads, too, from sourdough beer bread to a sourdough chocolate banana loaf.  So despite sourdough's reputation for requiring lots of time, there is so much that you can do with it quickly, too!

I couldn't decide what to make for this challenge, since there are so many options to choose from, but decided, on a whim one afternoon, to whip up some muffins as an after school snack for little miss.

I started with my go-to site for quick sourdough recipes, then took inspiration from my favorite fall flavor - pumpkin!

With a hint of cinnamon and a swirl of pumpkin-y goodness, I quickly threw together sourdough pumpkin swirl muffins!


It's amazing how easy these are to make. So easy, in fact, that I completely forgot to take in-process photos. Oops!

But the most important part is that the kids loved them, and so did us parents. And they made a perfect after-school snack, and even a pretty good breakfast the next morning!


So what kind of quick bread did you make this month? Link up and show us!


Sourdough Pumpkin Swirl Muffins
(based on Smart Sourdough Mama)

1 cup flour
1/4 cup sugar
1 teaspoon baking powder
1/4 teaspoon soda
1/2 teaspoon salt
1 teaspoon ground cinnamon
1 well beaten egg
1 cup sourdough starter (100% hydration)
1/4 cup oil
1/4 cup pumpkin puree

Preheat oven to 400 degrees and spray a 12-well muffin tin with non-stick cooking spray.
Sift flour, sugar, baking powder, baking soda, salt and cinnamon into a bowl and mix to combine. Make a well in the center. Combine egg, starter and oil. Add all at once to the dry ingredients. Stir quickly just till dry ingredients are moistened. If your starter is thicker you may need to add a little milk.  Once the ingredients are just combined, spoon in the pumpkin puree and stir just a few times, only to swirl the pumpkin evenly through the batter. Make sure not to fully incorporate the pumpkin or you will lose the swirl.
Fill greased muffin pans 3/4 full.
Bake at 400 F about 17-20 minutes. Makes 9-12 depending on the size of your muffin tins (I got 11).
Allow the muffins to cool for a few minutes, then transfer them to a wire rack to cool completely.

Enjoy!

Monday, October 14, 2013

October Daring Cooks' Challenge - Dumplings

This month's Daring Cooks' Challenge, like the Daring Bakers' Challenge back in July, an "eeny meenie miny moe" challenge - each cook was challenged to go through all of the past challenges, both on the cooks' and bakers' side of the daring kitchen, and choose a challenge that spoke to us.

In a "celebration" of past Daring Cooks and Daring Bakers challenges, Lisa challenged all of us to search through the Daring Kitchen archives and pick any one we'd like! The REAL challenge was picking which delicious recipe(s) to try!

Oh yes, it definitely was a challenge choosing which, well, challenge to choose. I wanted to stay on the cooks' side, as I'd stayed on the bakers' side with the bakers' choose-your-own-adventure challenge, and I wanted to try something from before I joined the Daring Kitchen myself.  At least that narrowed things down!

I finally settled on making Chinese dumplings, the Daring Cooks' Challenge from June 2009.

While the recipe was a bit intimidating at first, I wound up being surprised by how simple (though a bit time consuming...) these delicious morsels are to make.

There are two components to dumplings - the dough and the filling.  The dough is, quite simply, a combination of flour and water. That's it.

The filling, however, has a few more ingredients than that.


I started with ground pork, to which I added minced napa cabbage, minced green onions, minced garlic, soy sauce, sesame oil, a sprinkle of ginger and a bit of cornstarch.

In order to help me stay organized, I prepared both the dough and the filling earlier in the afternoon. Then, when it came time to prepare for dinner, it was simply a matter of putting the dumplings together.


This, however, is the time consuming part.  And I got a bit of help from my fun dumpling press.  I simply divided the dough into about 24 sections, rolled each one flat, laid it in the press and added the filling.


Then... just... press!


And then I got to use my bamboo steamer. Which may or may not have been a factor in my choice of this recipe this month...

The dumplings were placed on a bed of napa cabbage leaves in the steamer...


...and six minutes later, we were ready for dinner!  (okay, 12 minutes later... I had to steam them in two batches so that the dumplings would lay in a single layer in the steamer baskets...)


I also prepared a quick dipping sauce, using soy sauce, rice vinegar, a pinch of brown sugar and a sprinkling of each garlic powder and ginger powder.


The result was absolutely delicious. Everyone loved them, and everyone ate very well that night. I will definitely have to make these again.

Lisa, thank you so much for giving me the opportunity to go back and try this delicious challenge!!

To see what the other members chose this month, check them out here.


Chinese Dumplings
(from the June 2009 Daring Cooks' Challenge)

For the Filling:
1 lb ground pork
4 large napa cabbage leaves, minced
3 stalks green onions, minced
1 garlic clove, minced
1/4 teaspoon ginger powder
3 tbsp soy sauce
2 tbsp sesame oil
2 tbsp corn starch

For the Dough:
2 cups all-purpose flour
1/2 cup warm water
flour for work surface

(note: these proportions make enough dough for half of the filling, but it is the proportions that are easiest to work with. Either double the recipe, make two single batches, or, as I did, cook up the remaining filling separately as delicious meatballs!)

To prepare the filling, simply combine all of the ingredients until well mixed. Set aside until you are ready to make the dumplings. I covered my filling with plastic wrap and placed it in the fridge.

To prepare the dough, place the flour in a large bowl, then mix 1/4 cup of water, stirring until the water is absorbed. Continue adding water one teaspoon at a time and mixing thoroughly until dough pulls away from sides of bowl. We want a firm dough that is barely sticky to the touch.
Knead the dough about twenty strokes then cover with a damp towel for 15 minutes.

When you are ready to prepare the dumplings, take the dough and form a flattened dome. Cut into strips about 1 1/2 to 2 inches wide. Shape the strips into rounded long cylinders. On a floured surface, cut the strips into 3/4 inch pieces. Press palm down on each piece to form a flat circle (you can shape the corners in with your fingers). With a rolling pin, roll out a circular wrapper from each flat disc. Take care not to roll out too thin or the dumplings will break during cooking - about 1/16th inch. Leave the centers slightly thicker than the edges. Place a tablespoon of filling in the center of each wrapper and fold the dough in half, pleating the edges along one side (see images in post for how to fold pleats). Keep all unused dough under damp cloth.

The prepared dumplings can be boiled (until they float), fried (as potstickers) or steamed - in a single layer in a steamer basket, covered, for about 6 minutes.

Enjoy!

Granola Bars

I have to apologize. Again. I have not been a good blogging friend. Life has been busy and I have not been keeping up with the blog, and I am sorry about that.

But today is a crazy blog day - it's reveal day for two different challenge, so two posts are coming your way.

The first is this one, for this month's Secret Recipe Club.

This month, my assigned blog was Little Bit of Everything, a super delicious blog written by Julie, a super talented, fun and creative cook and baker.

There were so many recipes that I wanted to try from Julie's blog, but the one that stood out to me was her granola bar recipe.  I mean, it's a healthy food that can be breakfast on the go, easily adaptable, and it's totally kid friendly, to boot! Perfect choice for me!

Granola bars are pretty simple to make, and these were no exception, although there were a number of steps involved, as well as a whole bunch of dishes.

First, rolled oats, coconut and nuts (or, in my case, sesame seeds - wanted to make sure little man could enjoy these, too!) are mixed together.


The mixed ingredients are then quickly toasted in the oven until they get nice and toasty-golden brown.


The toasted oat mixture is then mixed with wheat germ and cinnamon, and I also added a tablespoon of chia seeds, just to give a bonus power boost to the bars.


Then, finally, a quick syrup of butter (okay, coconut oil for me - again - keeping it little man friendly), honey, brown sugar and vanilla is boiled and then mixed into the dry ingredients.


Once the mixture has been evenly moistened, add some dried fruit (craisins, for us)...


...then press the whole thing into a pan and bake!


The finished bars smelled super, and looked pretty darn good, too.  And I baked them in time to have them perfectly cooled and ready to go fr when little miss returned home from school.


I mean... how's that for an after school snack??


Julie, thank you so much for the delicious inspiration and for all of the wonderful recipes on your blog. I can't wait to come back and try many more of your recipes!


Granola Bars
(only slightly adapted from Little Bit of Everything)

2 cups old fashioned oats
1 cup sunflower seeds
1 cup shredded coconut
1/2 cup toasted wheat germ
1 tablespoon chia seeds (optional)
2 teaspoons cinnamon
3 tablespoons coconut oil
2/3 cup honey
1/4 cup light brown sugar, lightly packed
1 1/2 teaspoons pure vanilla extract
1/4 teaspoon kosher salt
1/2 - 1 cup dried cranberries (or other assorted dried fruit) (to taste)

Preheat oven to 350 degrees. Spray an 8 x 12 baking pan with cooking spray and line it with parchment paper.
Toss the oatmeal, sunflower seeds and coconut on a sheet pan and bake for 10 - 12 minutes, stirring often for even browning. Toss the mixture into a large mixing bowl, add the wheat germ, cinnamon and chia seeds (if using). Mix well.
Reduce the oven temperature to 300 degrees.
Place coconut oil, honey, brown sugar, vanilla and salt into a small saucepan. Bring to a boil over medium heat. Cook, stirring for a minute. Pour over the oatmeal mixture. Add the dried fruit and mix well.
Pour into a prepared pan. Using a small piece of parchment or wax paper, lightly press the mixture into the pan. Bake for 25 to 30 minutes or until light golden brown. Cool at least 2 to 3 hours before cutting into bars or squares.
Store in an airtight container.
Enjoy!


Related Posts with Thumbnails