Monday, June 21, 2010

Pierogi

Perogi? Pirogi? Pierogi? No matter how you spell it, these potato-filled dumplings of Eastern European origin (I though they were Polish, but, according to Wikipedia, they are traditional in Hungary and Slovakia, too, just with different names) are delicious. But I had never considered actually making them. My few experiences with any kind of pasta making, specifically, gnocchi and ravioli, have been messy, time consuming and somewhat frustrating. So when my husband told me that he found a pierogi recipe online that he wanted me to try, I was a little nervous. But today I decided that I was up for the challenge.

The pierogi consist of two main components - the dough and the filling. I started with the dough, since it needs to rest in the refrigerator for a while. Using the measurements given in the recipe, I was expecting, as indicated, that the dough would be sticky, and might require additional flour to come together correctly. I am not sure if I mismeasured something, but this was not the case for me - my dough was very dry, to the point that I couldn't even bring it together in a ball. It was a slight give and take game of adding drops of water and sprinklings of flour, but soon enough, I had a beautiful ball of very stiff dough ready to head into the fridge.

Dough resting, it was time to switch gears to the filling. Making the filling was very straightforward - boil potatoes and mash them with grated cheddar cheese. A little salt, a little pepper, season them to taste, and there you have it. It was very odd for me to mash potatoes without, you know, butter and milk, but the goal here wasn't mashed potatoes, it was pierogi filling, so thick was good. All ingredients mashed and mixed together, it was time to let the filling cool to room temperature.

Both main components done, I was feeling pretty confident. Then I realized that the real work was all ahead of me. So here comes the picture-heavy part of the process.

The dough ball was rolled out into a long snake and cut into 24 pieces. At first I was nervous that my little ball of dough wouldn't make 24 pieces big enough to make good pierogi, but it really surprised me. The fun aspect of this part of the process, as well, was getting in some counting practice for little miss. Each time I cut a section of dough, she counted the pieces for me, and helped me to know when we had reached our goal of 24. See? It wasn't just a cooking project, it was a math lesson, too!

Once we had the proper number of almost-equal-sized pieces cut, it was time to roll them into balls. Yes, we both washed our hands very well first. Little miss loves any cooking project that involves using her hands, so this was right up her alley. This also made the next step of the process even more exciting for her. The recipe called for each of these 24 balls to be flattened out... by hand. Oh yes, this gave little miss the opportunity to squish those balls of dough flat however she saw fit. Some she squished with her palm, others she beat down more with the side of her fist, and we used our fingertips to help shape the flattened balls into the right-sized circles to be filled with the potato and cheese filling and folded over into semi-circles for our pierogi.

Once the pierogi were filled and folded, the edges had to be crimped with a fork. Little miss was fascinated to see this done, and even more excited to help me do it. She got the hang of it super quickly, too, and this soon became her job, as I worked on shaping and filling the dumplings.

I soon found that flattening the dough by hand, while definitely fun, was not the most efficient way to get the job done. We soon graduated to rolling pins, which helped speed the process a bit, not to mention produced a slightly more even circle of dough for the filling. The process was, as with my other pasta making endeavors in the past, a bit time consuming and a little bit messy, but once we established a rhythm, we were able to produce 24 decently rolled, filled, folded and crimped pierogi.

*phew*

Wait.

We're not done.

Now these have to be cooked. Cooking these pierogi is a two step process. First, they are boiled. I'd love to give you exact times, but really, you just put them, in small batches, into the boiling water and wait for them to rise up to the top of the pot. Then they are removed from the pot to drain, to await step two:

Browning in butter. Yes, pan frying them. Again, I would love to give exact timing, but really, I just watched them as they cooked and waited for each side to turn slightly golden. I cooked them in batches, since there was no way that 24 pierogi would fit into the pan at one time. By the time I had them all lightly golden, I set 12 aside and returned the other 12 to the pan with carmelized vidalia onion to finish cooking while I made everything else we would be having for dinner.

So after all that work, how did they turn out? Well, I was nervous at first, when little miss ate, literally, everything else on her plate before even touching hers, but after the first bite, she turned to me and said "Mmmmmm!!! Mommy, these are delicious!!!" And daddy said pretty much the same thing. So these were definitely worth the work. I will definitely make these again, and I am really looking forward to playing with different flavors and ingredients for the filling, too. Yum.

Friday, June 18, 2010

Jalapeño Poppers

Last month, as you may recall, I had a little pepper mishap when preparing for the enchiladas for the Daring Cooks Challenge. I wound up with a nice, big bag of jalapeños instead of poblano peppers, and was a little unsure as to how to use them, considering that neither I nor little miss are big fans of really spicy foods. But in an effort to not waste, I was determined to make use of at least some of them.

Always a fan of bar foods (I mean, who isn't??), daddy requested jalapeño poppers. You know - to use up the peppers. Even never having made them before, I had a pretty good idea as to how these come together. My biggest question was about bake time and temperature. Simply googling "jalapeño poppers recipe" brought up a lot of recipes for fried poppers, which look and sound delicious, but I am not a big fan of deep frying. I mean, at home. I'll leave that to those with, well, deep fryers. A few links down, though, I found this one, which I used as my guideline for time and temp, but didn't use all the spices recommended, since I knew the jalapenos would be plenty spice for this house... at least for a first go-round.

The filling for these, as confirmed by most of the recipes that I found, is amazingly simple - a simple mix of cream cheese and cheddar cheese. Little miss loves to work the rotary grater, so her job was taking care of the cheddar. I cleaned, cut, de-seeded and de-ribbed the peppers while she took care of the grating.

Cheese grated, all I had to do was mix it into the softened cream cheese. That was it. Then the mixture was spread into the pepper halves. Which was difficult to photograph.

Once all of the peppers were stuffed, it was time for the bread crumb coating. I happened to have some whole wheat panko bread crumbs in the house that I have been searching for a use for, so this was the perfect opportunity to try them out. Even doused in egg-wash, the bread crumbs stuck much better to the cream cheese side than to the pepper side, but soon enough they were all coated and ready to go into the oven.

By the time these came out, the filling was pretty ooey-gooey and the coating was nice and crispy, so I was pretty sure that I had done a decent job. The only glitch? I kinda didn't want to try them. Even without the seeds and ribs, even stuffed with two kinds of cheese, I had a feeling that these might be a little spicy. So I left them to daddy to enjoy. And enjoy he did. The entire batch was gone within two days. I'll take that as a good thing.

And I wasn't totally left out of the tasting process - there was some leftover filling that I was able to find and alternate use for. See that baked potato on daddy's plate with those poppers? The filling is absolutely delicious on those. So pretty good all around!

Monday, June 14, 2010

June Daring Cook Pate Challenge - part two

Okay, so I know that I never do a "part two" for a Daring Kitchen challenge, but I was a day late on finishing the second pate that I really wanted to make, but I still wanted to share it. In case you missed it (and don't feel like scrolling down), part one can be found here.

After seeing some of the really interesting, intriguing and absolutely delicious looking dessert pate variations that the other Daring Cooks came up with, inspiration struck me - I wanted to make a dessert pate, and I knew exactly what I wanted it to be: s'mores.

I mean, think about it - pate is essentially a spread, that is spread on some kind of bread. Graham crackers as the bread, chocolate-marshmallow spread - what could be better? And I knew exactly how I wanted to make it.

I started with the marshmallows. I have been making my own marshmallows for a little while now. The only difference was that I needed to cut them much smaller for this project. Little miss was happy to help, though soon realized how much work it was to coat such tiny, sticky marshmallows in powdered sugar. But she persevered, and it was so worth it.

For the chocolate portion of the pate, I started with the recipe that I use for a most delicious Bailey's-chocolate cheesecake. Minus the Bailey's. After all, this was a family dessert. Once the cheesecake mixture was prepared, the mini marshmallows were folded in, where they remained pretty much suspended throughout the mix.

The "pate" was then poured into a bowl and put into the refrigerator to set until dessert time. And, yes, little miss still has impeccable timing regarding my food-photography attempts. That's okay - as usual, it's the best part of the picture.

Anyway, once dessert time came around, it was interesting to see little miss, daddy and me prepare our individual s'mores pate servings. We each grabbed a graham cracker and layered it with the chocolate-marshmallow pate, fresh whipped cream and raspberries. The results? All of them, no matter which of us constructed them, were absolutely amazing. Now this is the way to have pate!

And in case you are curious, that is daddy's dessert that is shown here. He does a good job. :)

So thank you, again, Evelyne and Valerie, for a challenge that inspired this fantastic dessert. This is a definite keeper.

June Daring Cooks Challenge - Pate and Bread

Let me just start by saying I am sorry I haven't been posting as much. Things have been a little busy around here, with little miss being done with preschool for the year and the getting her ready for last week's ballet recital (so cute!!). I promise I will be better about posting again soon. But now it is Daring Cook time, so you are guaranteed a post.

It is always so fun and exciting to try to guess what the food challenges will be each month. Doesn't matter how many of these I've done (not that I've done ALL that many so far...), the anticipation is always exciting. I love expanding my food horizons each month.

Our hostesses this month, Evelyne of Cheap Ethnic Eatz, and Valerie of a The Chocolate Bunny, chose delicious pate with freshly baked bread as their June Daring Cook’s challenge! They’ve provided us with 4 different pate recipes to choose from and are allowing us to go wild with our homemade bread choice.

I will admit that I had mixed reactions when I read this. Pate would be a tough sell in this house. And, despite the fact that I know for a fact that I ate (and liked) chopped liver as a kid, the thought of actually handling and preparing liver... wasn't overly appealing to me. However, our hosts provided us with four different recipes, as well as leeway to find a recipe that would fit each cook's personal tastes. And anyway - any challenge that includes making fresh, homemade bread just has to be good.

I started with the bread, since the baguette recipe provided by our hosts required plenty of time to complete. The first step was to make a starter - a simple combination of flour and water that cultivates natural yeast and gives the finished bread a really great rise and flavor. I have made starters before, but never quite like this. This starter had a much higher proportion of flour to water than what I had made in the past, and thus made for a very thick "dough." I made the starter before going to bed the night before I planned on actually making the baguettes and pate, and was curious as to what this "dough" would look like in the morning. Well guess what flour + water + time does? Exactly what it is supposed to - creates a natural, flavorful yeast. Just look at all those bubbles! The starter was so sticky and elastic, too. Definitely fun to watch nature at work.

The biggest challenge, then, was deciding which pate recipe to go with. I knew I was going to go veggie on this one, and thought that simple would probably be best. I chose to make a simple vegetarian (vegan, actually) mushroom pate based a combination of many different recipes that I found online by simply searching for "vegetarian pate."

My pate had three main ingredients: mushrooms, garlic and vidalia onions. I started by sauteeing the garlic and onions in a little bit of extra virgin olive oil, then added the sliced mushrooms to the pan. Salt and pepper to taste, and once the mushrooms began to caramelize, I added a very little bit of water to the pan, lowered the heat and covered the whole thing to let everything soften and come together.

Once the vegetables were cooled a bit, it was time to turn them into pate. A whirl in my trusty mini blender did the trick, and then the pate was packed into ramekins to set in the fridge until dinner time. We did give the fresh (and still warm) pate a taste test, and it was pretty tasty, so I was pleased with my choice.

In the meantime, however, the baguettes needed plenty of attention. The starter was turned into a dough that needed what I call the magic ingredient in bread making - time. The dough is set to rise for there hours, with only minimal interference throughout that time. After three hours, the dough is then shaped and allowed to rest yet again.

But all of the waiting was more than worth it for the smell in the house when these finally went into the oven. And the crisp crust and delicious flavor of the baguettes were even better.

So how did everything come together? Deliciously. The fresh flavor of the mushroom pate was great, and the crusty, chewy, delicious bread was fantastic. Especially considering my initial reservations about this challenge, I was very pleased with the results. And the pate makes a great sandwich spread for lunch, too.

Now, I had planned on making a second pate - a dessert one - prior today's posting date, but time was not on my side for getting that done. Expect another post, either later today or tomorrow with that one. Because I promise you - it will be made, and I am 99.9% sure that it will be delicious. :)

Evelyne and Valerie, thank you very much for this challenge - I can honestly say that it is something I would not otherwise have tried, and I am so glad that I decided to step outside of my comfort zone and participate in this month's challenge.


To see the amazing variety of concoctions that were created by the other Daring Cooks this month, check them out here.

Edited to add: I posted my dessert pate! Check it out here!

Monday, June 7, 2010

Barbecue Ribs

We love barbecue in this house. All of us. Nothing beats the taste of food cooked outside. Unfortunately, we can't grill every day. Or even all that often, actually. So we make barbecue-style food inside. Which means barbecue sauce.

We usually buy bottled barbecue sauce. Recently, though, I haven't wanted to. I have been trying really hard to eliminate high fructose corn syrup from our diet, and if you look at the ingredient list of almost any commercial barbecue sauce, well, it's darn near the top of the list. Not to be deterred from our barbecue fare, we have decided to venture into the world of making our own barbecue sauce.

Today we planned on making ribs for dinner, so I knew it would be the perfect opportunity to make a first attempt at homemade barbecue sauce. Or, more accurately, Kansas City Rib Sauce.

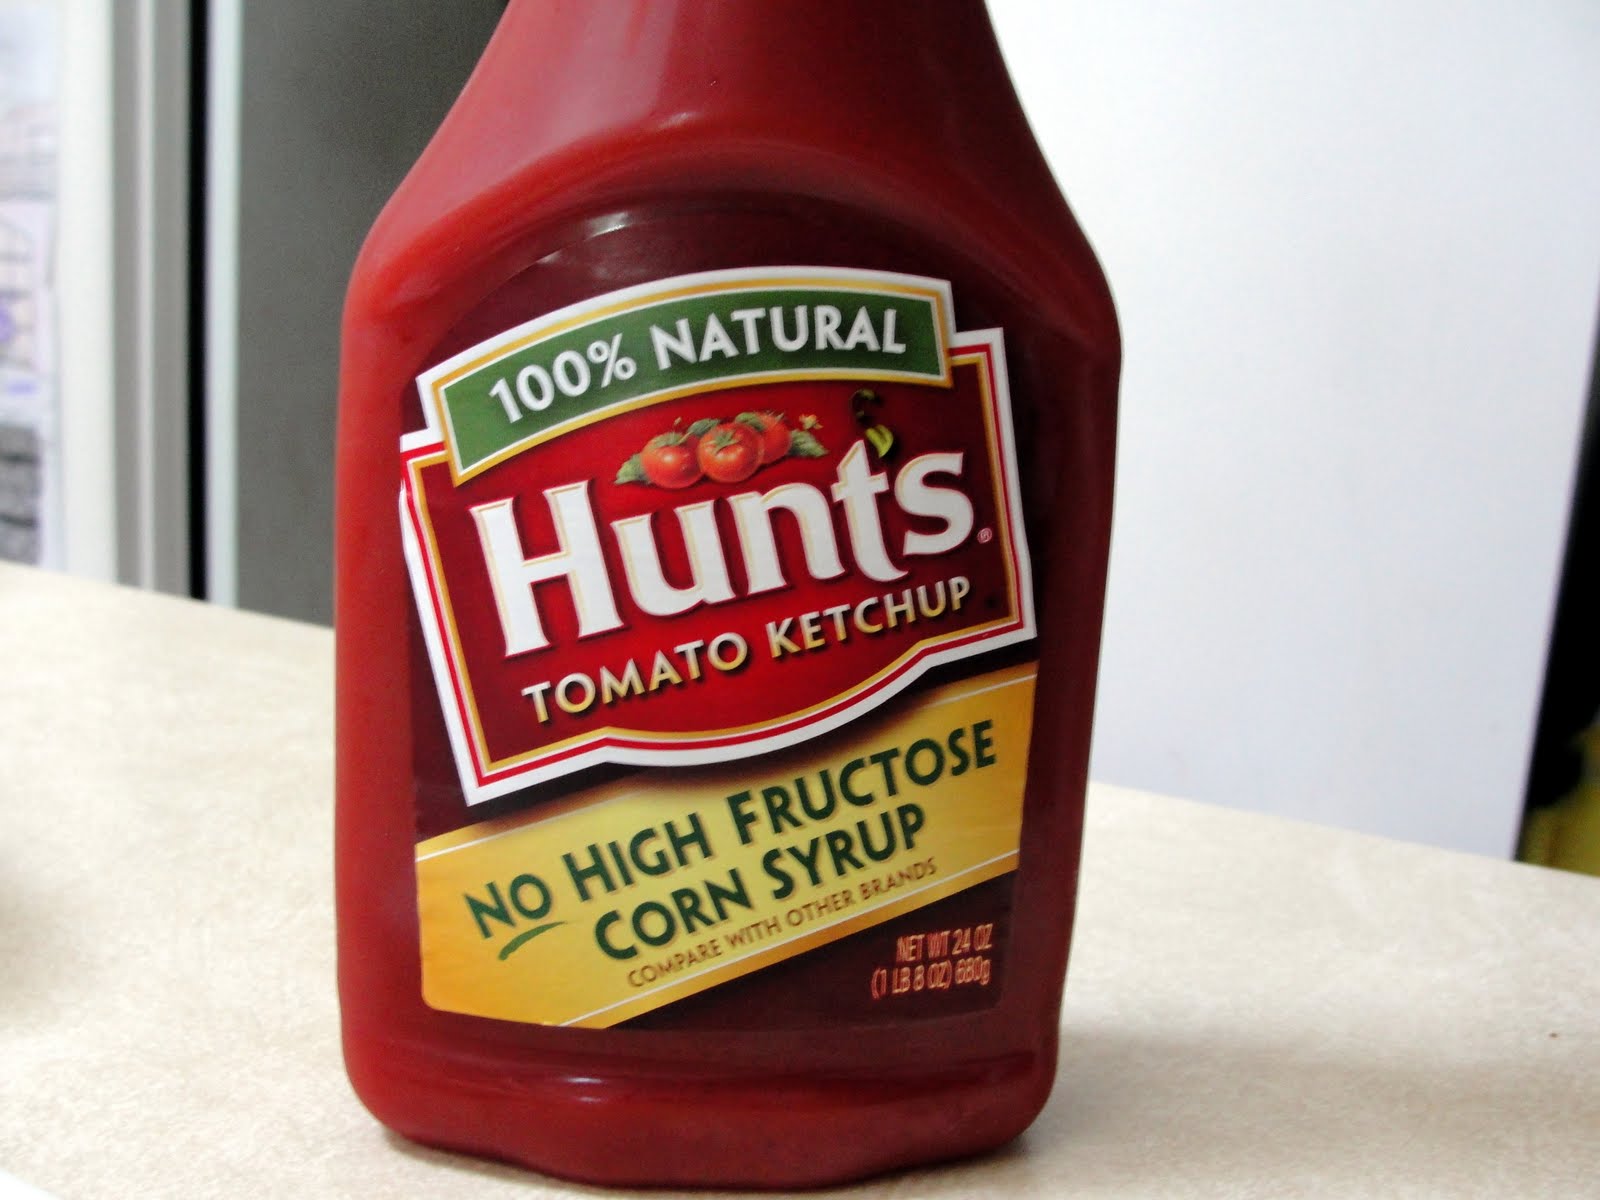
The funny thing is that one of the first ingredients in many barbecue sauce recipes, this one included, is ketchup. And guess what? Most commercial ketchups are ALSO made with high fructose corn syrup. Was I going to be stalled out before I even started? Was I going to have to shell out three times what I usually pay for bottled ketchup? Nope! Apparently food manufacturers are beginning to catch on, because look what I found:


Score!

This recipe came together really easily. There was absolutely nothing complicated about it, other than trying not to make too big a mess while measuring, mixing, and simmering everything. Little miss helped with everything that didn't involve either a knife (mincing) or heat (stirring the sauce over the burner). I did make a couple of minor changes to the recipe as written, something I usually don't do the first time I try a recipe, but I felt that the changes I made were safe ones to attempt. First, I cut the spiciness by reducing the amount of cayenne pepper that was called for in the recipe. Secondly, I used apple cider vinegar instead of white vinegar, just for added flavor. Finally, I followed the advice of several of the people who had commented on the recipe by adding a few splashes of Worcester sauce for a little extra depth (so they said). The finished product had a great color and smelled so good that little miss could barely wait for it to cool enough to taste.

Sauce done, it was time to prepare the ribs. Actually, truth be told, the sauce, though it was my first priority for this endeavor, it was actually the second step - the ribs were step one. I prepare my ribs in the crock pot, so they'd been cooking since the morning. I prepare a quick and easy rub for them, primarily using brown sugar, garlic powder and paprika, then little miss drizzles honey over the whole pot. These then cook on low all day, until they are not only cooked through, but are so tender that it is difficult to remove them from the crock without them falling apart. YUM.

Once the ribs came out of the pot, it was time to put the sauce to the test. Little miss did the honors of making sure that all of the ribs were adequately sauced, then the ribs went under the broiler for a few minutes.

By the time these came out, the sauce was bubbling, and it looked and felt like it was practically infused into the meat. They looked and smelled fantastic, and were so tender that they cutting them to serve barely required a knife.

So how did they turn out? Pretty darn good, if I do say so myself. I definitely need to play with the flavor a little, as the dominant flavor, despite the spices, was still the ketchup, but considering how much better and fresher this is than the bottled stuff, we were all really happy with it. So this will now become my "base" recipe, and I will play with variations until I find the perfect flavor combination. But I highly recommend this to anyone looking for a good alternative to bottled barbecue sauce.


Kansas City Rib Sauce

1 cup ketchup
1/4 cup water
1/4 cup vinegar (I used apple cider vinegar)
1/4 cup brown sugar
3 tablespoons olive oil
2 tablespoons paprika
1 tablespoon chili powder
2 cloves garlic, minced
1 teaspoon cayenne

(I adjusted the spices to cut the heat a little)

Heat oil in saucepan. Add garlic and sautee until brown. Add remaining ingredients and reduce heat. Simmer for 15 minutes, until thickened.

Use sauce to baste ribs, or use as BBQ sauce as desired.

Enjoy!


Tuesday, June 1, 2010

Strawberry Rhubarb Pie

I love summer. I love the weather, I love being outside, and I love the delicious fresh fruit that is in season during the warmer weather.

The best fruit, though, is that which is hand picked. By a four year old. Little miss and I eagerly await the beginning of the picking season at our local orchard. Lucky for us, opening week was last week, and we were able to pick loads of strawberries and several beautiful stalks of rhubarb. Perfect for making the quintessential welcome-to-summer dessert - strawberry rhubarb pie!

Little miss was involved in every aspect of making this pie, which made it even more fun for both of us.

We started off making the pie crust. My usual pie crust recipe calls for shortening, which I happened to be out of, and I know some crust recipes are very picky about using shortening vs. butter, so the first thing I had to do was pick a new crust recipe. Luckily for me, the pie recipe I had selected included an all-butter crust recipe that sounded delicious, so I didn't even have to change sites. You can check out both recipes here. The other different thing about this crust recipe is that it said that it can be made in a stand mixer. This was great news for me. Usually pie crust recipes call for a food processor (which I don't have) or for the butter to be cut in with either a pastry cutter (which I also don't have) or with two knives (my usual method). I was very excited to give my KitchenAid the chance to pull this one together. Little miss added in the cubes of cold butter, the mixer did the mixing and guess what? We got a pretty good crust dough!

The next step was to prepare the fruit (and veggie) for the filling. I gave little miss a chance to help with the cutting, but mostly just for the fun of it, since both strawberries and rhubarb both tend to just be squished when cut with the kind of knives I let her use. She was persistent, though, and more than happy to eat any and all berries that were "accidentally" squished rather than actually cut. Isn't she helpful?

I did make one change to the recipe. As written, it calls for two thirds of a cup of white sugar to be added to the cut berries and rhubarb. I opted to substitute brown sugar for half of the white sugar, to give a little more flavor. Because I love brown sugar. Little miss mixed everything together for me while I took the pie crusts, which had been chilling, out of the refrigerator.

The next step was to roll out the dough. Little miss loves to roll out any dough, so she was waiting with her rolling pin before I even had the waxed paper out. She is pretty good at it, too, though rolling out the chilled dough was a little harder than she expected. So she let mommy help just a little. Bottom crust rolled, filling poured in, I decided (inspired by a friend's recent peach pie) to try something I have never had the patience to do before - a lattice top. Little miss was intrigued by the process, as I carefully cut strips using my pizza cutter and wove them over and under. A quick coating of egg-wash, the whole pie placed onto a cookie sheet, and our pie was ready to go into the oven.

We had been planning on having this pie for dessert that night, but timing wasn't on our side that night (daddy had to work late and neither of us wanted to cut into it without him having at least seen it first), so I made a deal with little miss - since she worked so hard to help make the pie, she could have it for breakfast the next morning. I mean, seriously, is it really that much worse than some of the other breakfast treats out there? And this made a delicious breakfast. And dessert. And snack.

I love the taste of summer.

Thursday, May 27, 2010

May Daring Bakers Challenge - Piece Montee

The May 2010 Daring Bakers’ challenge was hosted by Cat of Little Miss Cupcake. Cat challenged everyone to make a piece montée, or croquembouche, based on recipes from Peter Kump’s Baking School in Manhattan and Nick Malgieri.

As you can imagine, when the Daring Bakers saw that this month's challenge would be hosted by a baker who blogs about cupcakes, many of us were expecting this challenge to be, well, cupcake based. Imagine our surprise, then, when she announced that it would be a piece montée. What, you may as, is a piece montée? You may know it by it's other name, croquembouche. Or that might not help at all. The short version, then, is that we were challenged to make cream puffs. Not just to make them, though, but to then pile them into a lovely presentation, usually a pyramid of some sort, held together with either chocolate or caramel.

I had actually heard of croquembouche before, and am almost embarassed to admit where. It was mentioned on an episode of Desperate Housewives, where it was used as an example of a really hard, impressive recipe that the two (then) rival domestic goddesses were trying to use to prove their, well, domestic goddessness. So, despite the fact that I have actually made cream puffs of various sorts before, I was a little nervous.

The hardest part of this challenge for me, aside from getting over my own nerves, was figuring out just when to make it. It seemed like the kind of dessert that needed some kind of an occasion. As luck would have it, such an occasion arose last weekend, when a neighbor decided to host a dessert-only deck party to welcome the family who recently moved in next door to her. Now it was time to get to work.

There are three basic components to the croquembouche - the puffs, made from pate a choux, the cream, and either the chocolate or caramel "glue" to hold the finished piece together. I decided to tackle the pastry cream first, to allow it plenty of time to cool in the fridge while I worked on the other components.

We were given freedom to choose any flavor pastry cream we wanted. I considered several options, but decided on vanilla, since I was making this for a group of people, half of whom I had never met. To kick up the vanilla flavor, I added the seeds of a vanilla bean to the mix, and let the pod steep in the cream to infuse as much of the vanilla flavor as possible. The trickiest part of pastry cream is incorporating the eggs and cooking then completely without actually scrambling them or turning the cream into vanilla flavored breakfast. Consequently, I don't have many pictures of the process, but the cream came together and thickened beautifully.

Once the cream was safely cooling in the fridge, it was time to tackle the puffs themselves. Pate a choux is interesting dough to make, as it is cooked before it is baked. Confused? So was I the first time I made it. The dough is actually put together in a pot over medium heat, cooking the ingredients as the batter comes together. So while my butter, water, salt and sugar were slowly coming to a boil, I gathered up my remaining ingredients - eggs and flour, knowing that when it was time to add each, I would need both hands for mixing and making sure not to burn or overcook anything. The flour is added to the pot and mixed in while still on the burner, effectively cooking the flour as it is being incorporated into the other ingredients. The dough came together very quickly at this point into a cohesive ball. At this point, I transferred the dough to my trusty KitchenAid mixer, where, one at a time, four eggs are added and fully incorporated, resulting in a shiny, sticky dough.

In order to shape the puffs, the dough is supposed to be piped onto a parchment papaer covered cookie sheet. Not having a piping bag, I used the next best thing - a plastic bag with the corner snipped off. This worked really well for about half of the dough. At which point my bag split along one of the seams. Oops. No problem - I scooped out as much of the dough as I could into as close an approximation of rounds as I could. Using clean, wet fingertips, I was able to re-shape or fix up the puffs as much as possible, and they all looked okay. A quick coating of egg wash, and these were ready to go into the oven.

Let me tell you, these puffed SO well. So much better than when I made them in the past, which means that the next time I find myself needing to make any kind of puffs, this will absolutely be the recipe I use.

Puffs cooling, pastry cream in the fridge, it was time to start thinking about how my finished piece would be put together, and what I would use as the "glue" to hold the whole thing together. Many a traditional croquembouche uses spun, hard caramel as its garnish. It is beautiful and very impressive, but not something I realistically considered for my piece. I do, after all, have a four year old sous chef. Somehow, the idea of hot, melty sugar being spun into beautiful designs seemed a little more scary and dangerous that I was prepared for that afternoon. So I then thought to make a chocolate ganache, since, well, everyone loves chocolate. But I couldn't get the idea of caramel out of my mind, especially paired with my vanilla bean pastry cream. I decided to search for a middle ground.

This is what I came up with. A vanilla-infused caramel sauce that could serve as glue and glaze, yet did not require actual manipulation of the hot sugar. Caramel is a fascinating thing to observe. Still scary, since it is essentially sugar in various stages of burning, but really quite interesting to watch progress. It starts as sugar. As it cooks, it transforms into something much more. You have to watch it very carefully, because the transition from perfect caramel to horrible burnt sugar occurs very quickly, but when timed right, the results are fantastic.

At this point, I finally had all three of my components ready. Time to put them all together. First came the filling of the cream puffs. This task is most easily accomplished using a pastry bag fitted with a small, plain tip - this leaves an almost undetectable hole and allows each puff to be filled evenly. Unfortunately, as I mentioned before, I don't have a pastry bag. Instead, I once again used a plastic baggie with a corner snipped off. The cut corner is not nearly a sufficient replacement for a solid pastry tip, so I merely used a paring knife to make a big enough incision in the side of each puff to shoot the cream into each. It worked pretty well.

Once the puffs were filled, it was time to construct my tower. I built layers of cream puffs, and drizzled each layer with the warm caramel sauce. Working quickly, I then built the next layer of puffs, letting the cooling caramel serve as the glue to keep the structure from toppling in on itself. I was a little wary as to how this would hold up, but I was pleasantly surprised as to how well it all came together.

I have to say - for as nervous as I was to attempt this, I was really impressed with the finished product. Definitely not professional grade, but it was a very fun dessert to bring to a party. And it was a huge hit, too - especially with the kids. They loved being about to just grab a piece of the pyramid and have a complete dessert right in their hands. And little miss loved saying the word "croquembouche" whenever anyone asked what it was, so it was a fun dessert all around.

Thank you, Cat for such a truly fun challenge. I will definitely keep this one in my bag of tricks for another dessert occasion, since it was both fun to make and fun to share!


And you should definitely take a look at what the other Daring Bakers came up with this month. Click here to see some of the amazing creativity.
Related Posts with Thumbnails