Wednesday, December 12, 2012

Crock Pot Rotisserie-Style Chicken

I love my crock pot. It's hard to believe that I went so many years without it.  I love that I can prepare a meal in the morning (or even the night before), then just set the cooker and forget about it until it's time to eat.

Recently, daddy came across a recipe that promised rotisserie style chicken right in the crock pot.  In addition to the crock pot, we also love rotisserie chicken, so this looked absolutely perfect. So we gave it a try.

It was super easy to prepare - a few cloves of garlic and a bunch of spices into the mini-blender...


...then mixed with a bit of water until it forms a paste.


Not beautiful, I agree, but it smelled spicy and delicious.  This paste is then generously rubbed all over a chicken, both inside and out.

Again - not beautiful, bit it gets the job done.


Then the lid goes on the slow cooker and it does its thing all day long.

By the time dinner time comes around, the chicken is falling-off-the bone tender and ready to eat.


While the meat is tender and moist and full of flavor, I have to say, it doesn't really taste like rotisserie chicken.  The combination of spices is stronger, and the crock pot makes the crispy, delicious skin that you find on a rotisserie chicken impossible to accomplish. But, if you set aside those expectations, the results are delicious.


And when deliciousness is that easy and effortless, it's sure to be repeated.


Crock Pot Rotisserie-Style Chicken
(from busy mommy)


1 broiler/fryer chicken (3.5-4 lbs)
2 tablespoon paprika
1/2 teaspoon cayenne pepper (optional)
1 1/2 teaspoon onion powder
2 tablespoons garlic powder or 3 cloves garlic
1 teaspoon salt
1/2 teaspoon black pepper

Place all of your ingredients in a small bowl and stir in water by the teaspoon until a paste forms. Or, as I did, you can combine the garlic cloves and spices in a mini blender and blend everything together, adding water to achieve the right consistency.
Spray your slow cooker with cooking spray and place the chicken in, breast side up.
Coat the chicken inside and out with the paste. Cover and cook on low 6-7 hours or on high 3.5-4.5 hours. Make sure the thickest part of the thigh registers at 180 degrees.


Enjoy!

Monday, December 10, 2012

Sloppy Joes

Growing up, sloppy joes always meant browning some ground meat and opening up a can of sauce. Easy, fast meal.

And while I liked the meal just fine, I never quite saw what the big deal was.

And then I decided to try to make the same meal, minus the can.

Oh. My. Gosh. 

So worth the big deal. Same browned meat, same quick and easy, so much more flavor. So much more yum. 

I usually just wing it, as far as the "recipe" is concerned, but I (loosely) based the version I made today on this version from Ree over at The Pioneer Woman. Because that's always a good place to start!

The longest part of the process was chopping the veggies, but as it was just onion, pepper and garlic, that didn't even take that long.


Once the meat was browned and the chopped veggies added, it's time to create the sauce. Ketchup and spices. That's it.


Okay, add some water, too, to thin it out, and some Worcestershire sauce, too, to kick the flavor up a notch.

Then simmer until it's time to eat.

Serve on buns (baked fresh this afternoon!) and you are done!


The best part? Both kids ate it right up - score!


Sloppy Joes
(based on The Pioneer Woman)

1 tablespoon olive oil
1 pound ground meat
2 small onions, diced
1 bell pepper (I used yellow, you could use green or whatever you like), diced
2 cloves of garlic, minced
3/4 cup ketchup
1/2 cup water
1 tablespoon brown sugar
1 teaspoon dry mustard
1/2 teaspoon chili powder (more or less to taste)
Worcestershire sauce (to taste - I used a few shakes of the bottle...)

Add olive to a large skillet over medium high heat. Add ground beef and cook until brown. Drain as much of the fat as you can.
Add onions, pepper, and garlic. Cook for a few minutes, until vegetables begin to soften.
Add the ketchup, brown sugar, chili pepper, dry mustard, water and Worcestershire sauce. Stir to combine, bring to a boil, then reduce heat and simmer for at least 15 minutes. Taste and adjust seasonings as needed.
Serve on kaiser rolls.

Enjoy!
Saturday, December 8, 2012

Pan-Fried Pork Chops

As you might imagine, we enjoy cooking shows around here. Competitions, demonstrations, professionals, amateurs, cooking, baking - always fun to watch.

One of the shows that we enjoy is America's Test Kitchen.  They not only make delicious food, but the explain why their recipes work - they test all of the ingredients, equipment and processes until they come up with what they feel is the best recipe they can provide.

Recently we saw an episode where they made crispy pork chops. And if there's one thing that daddy likes, it's crispy pork chops.  So we had to try them.

I found the recipe online here. The only "issue" is that you have to register to see the recipe in print. And I've registered before, but I always have trouble signing in again... But the video was available without signing in, so I did what any crazy foodie would do - I watched the video half a dozen times, jotting down the measurements and processes as I did.

The main secret to the crispy breading on these pork chops is the breading. Which isn't bread at all - it's crushed corn flake cereal.


The other key step is that the pork chops are scored prior to being breaded, which helps ensure that the pork chops are flavorful throughout.


Then the chops are breaded with a bound breading. This process usually involves being dipped in flour, then in an egg wash, then in the bread crumb mixture being used. In this case, corn starch is used in place of the flour, buttermilk in place of the egg was, and the crushed corn flake cereal in place of bread crumbs.  But otherwise, it's your standard bound breading.

The result, though, is a even coating of crispy goodness.


The chops rest for a bit before being pan fried for about six minutes per side, enough to cook the meat throughout and create a beautiful, golden crust on each chop.


The result was a delicious, flavorful and perfectly crispy pork chop that made an absolutely delicious dinner.


I served these chops on a bed of arugula, with baked sweet potato and sauteed collard greens on the side - yum.  Definitely worth the re-watching and the effort!


Pan-Fried Pork Chops
(from America's Test Kitchen)

8 pork chops, 1/2" - 3/4" thick each
3-4 cups corn flake cereal, crushed to crumbs in food processor
1/3 cup + 1/3 cup corn starch (separated)
salt and pepper to taste
1 cup buttermilk
2 tablespoons dijon mustard
1 clove garlic, minced
canola oil for frying

Combine (in your food processor while crushing the cereal, if you want) the crushed cereal crumbs, 1/3 cup of corn starch and about a teaspoon each of salt and pepper (to taste). Set aside in a shallow dish or pie plate.
In another shallow bowl or pie plate, whisk together the buttermilk, dijon mustard and minced garlic.
In another shallow bowl, set the last 1/3 cup of corn starch.
Carefully score each pork chop, making shallow cuts across the surface of each side of each chop. Sprinkle salt and pepper over each chop.
Dip each pork chop first into the corn starch, making sure that the entire surface is lightly dusted - no clumps, but no bare spots.
Next, using tongs, dip the chop into the buttermilk mixture until it is coated all around.
Now transfer the chop to the crushed cereal mixture, coating well on all sides.
Set the coated pork chop on a rack.
Repeat with all chops and allow to rest for about 10 minutes.
Meanwhile, heat oil (about 1/3 cup - you want about 1/4" in the pan) in a large frying pan over medium-high heat until it is shimmering.
Fry the chops (in batches - don't crowd the pan) for about 5-6 minutes per side, until golden brown on each side.
Remove each chop from the oil (once done on both sides), resting on a paper towel for only 30 seconds, then to a clean rack. You can put the rack on a cookie sheet and keep the pan in a warm oven while you continue cooking the remaining chops.
Serve and enjoy!


Tuesday, December 4, 2012

Peanut-Free Puppy Chow

Would you believe I have never made puppy chow before? To be completely honest, before this year, I didn't even know what it was. And I only know this year because I finally googled it.  

Puppy chow, muddy buddies, monkey munch... whatever you call it, it looked delicious. But seeing as one of the primary ingredients in it is peanut butter, I filed it in the no-go category for our house.

But I couldn't forget about it.  And I wondered... I can't be the only person with a peanut allergy kid who wants to try this deliciousness... I bet...

Yup! Another quick google search later, and this beautiful recipe told me that you can easily substitute sunbutter for the peanut butter!  So today I went for it.

Chex cereal is what is usually used, but I used Life, since I have a huge, gigantic double-bag box of it.  The recipe called for four cups, but when I scooped out the four cups into my big bowl, I didn't think it looked like enough... so I increased everything in the recipe by 50% and used six cups. 


Cereal measured, it was time to make the coating - chocolate chips, butter and sunbutter. The recipe said to microwave the ingredients until they are all melty, but I chose to just melt everything in a medium saucepan over medium heat. It was just easier for me.


Once everything was all melted and all incorporated, just pour and mix!


And then make it snow. I mean, sprinkle liberally with powdered sugar.


Another round of mixing, and it's done!

All that's left to do is try to keep everyone's hands out of it.


Little man loved it. So did little miss when she came home from school. So did little miss's friend when she stopped over to play. This stuff is super addictive. I am glad I made the extra large batch... I can tell I'll be making this again!


Peanut-Free Puppy Chow
(from jellytoast, proportions increased from original)

6 cups of crunchy cereal (such as Life, Chex or Crispix)
3/4 cup of chocolate chips (whichever kind you like)
6 tablespoons of butter or margarine
6 tablespoons Sun Butter or other sunflower seed butter (or peanut butter if you don't have an allergy)
1 cup of powdered sugar

Place chocolate chips, butter and sunflower butter in a medium saucepan. Heat over medium heat, stirring regularly, until everything melts. Mixture should be nice and melty and well incorporated.

Pour cereal into a large bowl. Spoon melted chocolate mixture over cereal and toss to coat. This will take a few minutes to cover thoroughly. It works well to spoon the chocolate mixture on in batches and stir as you go. Once the cereal is well coated in the chocolate, sprinkle half of the powdered sugar over cereal mixture and toss gently. Sprinkle remaining sugar over mixture and toss to coat. Allow to cool. Store in an air tight container.

Enjoy!
Friday, November 30, 2012

Apple and Honey Sourdough Bread for BBD #54

I was in the mood to try a new sourdough bread this week.  Something fun, something fresh, something delicious.

After considering all of my options (including, but not limited to, all fruits and vegetables currently in the house, not to mention the idea for a chocolate sourdough bread that just won't leave my mind...), I decided to go with a classic Fall flavor - apples and honey.  And to liven it up a bit, I decided to infuse the bread with one extra flavor:

DSC04253

Green tea. Just to see what would happen.

I have made a couple of different sourdough loaves, using a couple different formulas/recipes. I referred back to my previous attempts and adapted them for this loaf.

I started by making the levain - using my 100% hydration liquid starter to create a firm starter, just by changing the usual ratio of flour and water used to feed the sourdough.  And after an overnight rest, it was time to make the bread.

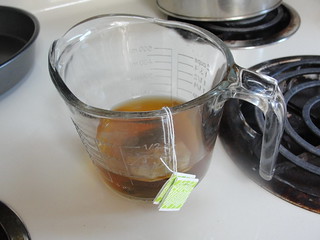
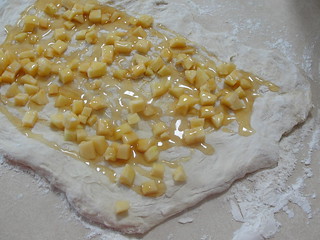
The next morning, I combined the stiff starter with additional flour, applesauce and green tea, to infuse a bit of extra freshness to the flavor of the loaf.  Once the dough was all incorporated, it was time to add the flavor - a diced apple and a generous swirl of honey.

DSC04257

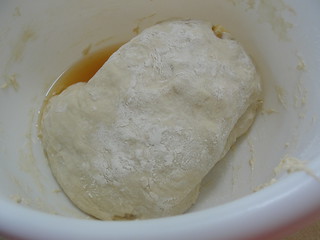
But after the first hour's rest, I saw that something wasn't quite right...

DSC04273

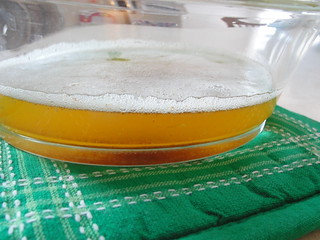
Umm.... it seemed to be leaking. Weird.

And that's when I realized what I'd done. I'd confused the two recipes that I'd been referring to. I used the firm starter measurements from one recipe and the loaf measurements from another, which may have something to do with the extra moisture that resulted here. Or it might have had something to do with the apples... I'm not sure.

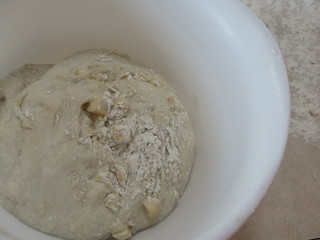
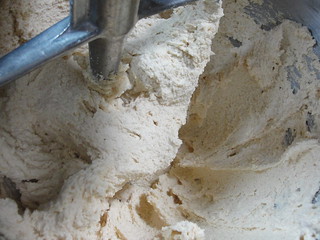
Either way, when it came time for the next set of stretching and folding, I had to use some extra flour and a clean bowl, but it still came together pretty well.

DSC04279

And after its final, longest rest, it was ready for the oven.

Now, I know I always talk about how good things smell as they bake, but it really is true. Aside from the delicious bread scent, the apples added another delicious layer to the aroma. Seriously good.

And then came the hardest part of the process. The waiting.

But the reward of cutting into this bread is definitely worth the patience.

DSC04285

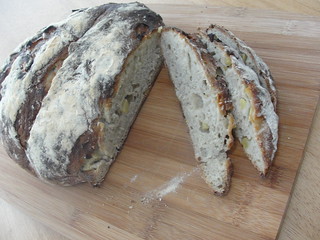
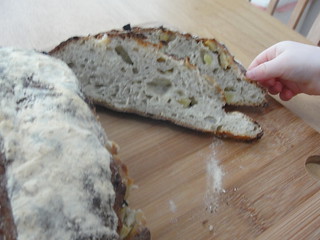
A nice, thick crumb, but a pretty open yet moist crumb - this bread is delicious, with the heartiness of the apple chunks, and the interplay of the tanginess of the sourdough with the subtle sweetness of the honey - a truly delicious combination.

So good that someone couldn't wait to get his piece...

DSC04290

Before I had the chance to write this up, I happened upon the announcement for this month's Bread Baking Day theme - overnight breads!  While the announcement indicates that most overnight breads are rested overnight at the end, at the proofing stage, I thought that this one, with its overnight fermentation of the firm starter, fit the bill, so I am sharing this bread with this month's host over at Hefe und mehr.


Apple and Honey Sourdough Bread
(my own creation, based on previous attempts)

For the firm starter:
2/3 cup sourdough starter (100% hydration)
4.5 oz. bread flour
1/4 cup water

Mix these together and let ferment at room temperature for 4 hrs. Refrigerate overnight (or even up to a few days).

For the bread:
all of the levain
9.25 ounces flour
0.125 ounces salt
3.25 ounces brewed green tea (brewed strong)
4.75 ounces apple sauce
1/4 cup honey
1 apple, diced

Combine the levain, flour, tea, salt and applesauce, and allow to rest for 20 minutes.
On a lightly floured counter, stretch out the dough into a long rectangular shape.
Drizzle the honey and sprinkle the diced apple pieces as evenly as possible across the dough, theb fold/roll the dough over top (which ever method you want to do this is fine, you just need to get it in there).
Place the dough in a large oiled bowl, cover, and allow to rest for 1 hour.
Stretch and fold the dough, place back in the bowl and allow to rest for 1 hour.
Make another stretch and fold, place back in the bowl, cover, and let sit for at least four hours.
(If you would like, you can place the dough in the refrigerator at this point to rest overnight)
When you are ready to bake, preheat the oven to 500 degrees and cover a baking sheet with parchment. Flour the parchment and turn the dough out onto it. Score the top of the loaf.
Place the bread in the oven and turn the oven down to 450.
Bake the loaf for 25-35 minutes, until nicely golden brown.
Cool for at least 1-2 hour before slicing.

Enjoy!
Tuesday, November 27, 2012

November Daring Bakers' Challenge - Cookies!

Holiday season is the time for sharing and Peta of Peta Eats is sharing a dozen cookies, some classics and some of her own, from all over the world with us.

Oh my goodness. When I read this challenge, I was so impressed with Peta. She found, tested and presented to us a well thought out challenge containing twelve mouth-watering varieties of cookies. I wanted to try all twelve. Seriously. And, over time, I still hope to.

But given how much other baking we do on a regular basis, I thought that might be overkill.

So I thought I'd try two this month. The first variety I selected was the recipe that Peta provided for brown butter shortbread.  I mean, shortbread is delicious in and of itself, as a delicious, simple cookie. Add to that the nuttiness of brown butter and the richness of brown sugar - how could I not try it??

I started by browning my butter. Last time I made brown butter I left it on a few seconds too long, so I was a bit trigger shy this time, which resulted in lightly browned butter...

DSC04130

But the smell was so nutty and delicious, I knew it would be delicious.

The browned butter was then whipped together with brown sugar, vanilla, flour and a touch of salt.

DSC04136

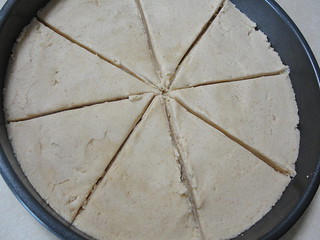
This dough was so light and airy, I was amazed. I'd intended to shape the cookies using my cookie press, but the dough kept oozing through the discs... so then I thought I'd pipe the dough into wreath-inspired rounds, but the only tip I have was way too narrow and wouldn't work well. For my third attempt, I started scooping the dough onto my cookie sheet, chocolate chip cookie style, but I wasn't happy with that either. So I went with plan "d" - a classic single, round of shortbread. I press the dough into a round cake pan, scoring the top for easier portioning once baked, and popped the whole thing in the oven.

DSC04140

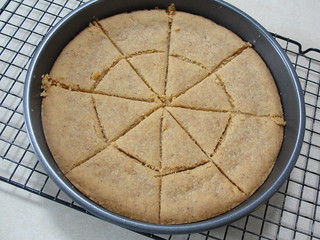
The result was well worth the effort, frustrating and dishes. It smelled outstanding and tasted even better. The crisp, flakiness of the surface and the delicious flavor of the brown butter, daddy called this addictive and I tend to agree with him.

DSC04142

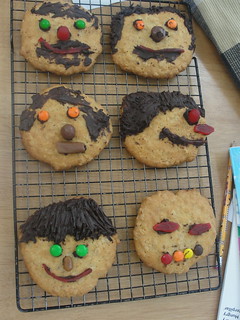
When I told little miss that we were going to be making lots of cookies this month, she chose a variety that was not included in the challenge, but I couldn't say no. She chose an activity type of cookie that was mentioned in a book she has. She wanted to make funny face cookies. The cookies themselves are simply a variety of oatmeal cookies, shaped into large rounds. The fun part is the decorating.

DSC03923

Awesome use for extra Halloween candy, I might add.

Using frosting and peanut butter as "glue" (and sunbutter for an allergy friendly one for her brother), little miss created some fun, silly and friendly cookies that were as fun to make as they were tasty to eat.

DSC03925

Daddy and I each had a turn decorating, too. Can you guess who made each one?

DSC03926

So while I didn't make twelve different varieties of cookies, we did have a lot of cookie-baking fun thanks to this challenge.

Peta, thank you so much for all of your hard work. I can't wait to try the other tasty recipes that you shared with us!

You should absolutely check out the recipes that we had to choose from this month as presented in the challenge.  And to see the other delicious cookies baked up in the kitchen this month, check them out here.

So tell me - which cookies would you have chosen??

Brown Butter Shortbread
(from November Daring Bakers' Challenge)


1 cup unsalted butter
2/3 cup dark brown sugar, firmly packed
2 teaspoons vanilla bean paste (I used 1 tablespoon vanilla extract)
1 2/3 cups all-purpose flour
2 teaspoons table salt

To brown the butter:
Cut the butter into smallish pieces and place in a saucepan over a low heat. Melt the butter and cook until it starts to brown and gives off a warm, nutty aroma. Stir from time to time to make sure the butter browns evenly. As it gets close to being browned enough it will foam up and you will see little brown bits in the foam. Remove from the heat and pour into a heatproof jug or bowl. Set aside to cool slightly and then refrigerate until it starts to set again but is not too firm. It should be the consistency of softened butter. Don’t strain out the little brown bits they taste great.

For the cookies:
Preheat the oven to 300°F.
Add the sugar and vanilla to the browned butter and beat until very light and fluffy and the sugar is dissolved.
Finally, add the flour and salt and mix for at least 2 – 4 minutes to form a soft dough.
Press the dough into a round cake pan (8" or 9") and flatten the surface. You can score the top if you would like. Refrigerate for 30 minutes before baking. Bake the large shortbread round in a preheated moderate oven for about 20 – 30 minutes.
Let the cookie cool completely in the pan and remove when cooled. Store in an airtight container.

Enjoy!
Saturday, November 24, 2012

Egg Free, Dairy Free Pumpkin Pie

Ah, Thanksgiving. The wonderful time of year where we appreciate our good fortune by overeating and watching football.

We are fortunate that we live close enough to most of our family that we see each other pretty often. But that doesn't mean that we scrimp on the holidays. Oh, no. We still do it all - turkey, stuffing, potatoes, candied yams... you name it, I bet it was on the table.  My job is usually the baking - dessert and dinner rolls.

The only problem with the most traditional Thanksgiving desserts is that we now have food allergies to contend with. Pecan pie? There's no way that little man will be able to have that. But pumpkin pie? I knew there had to be a way.

A quick google search led me to several different options. But I wasn't looking for a no-bake custard, and there's no way I would get daddy to eat it if I used tofu... and then I found this recipe, and I knew I had a winner.

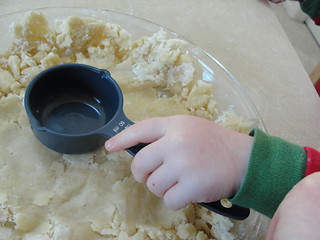
For the crust, I used my easy pie crust recipe, since it doesn't involve butter. I simply substituted coconut milk for the milk called for in the recipe. Easy enough.  And little man helped me press the dough into the pie pan.

DSC04022

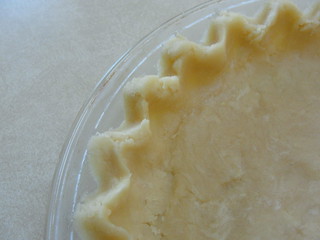
I then crimped the edges as best I could...

DSC04026

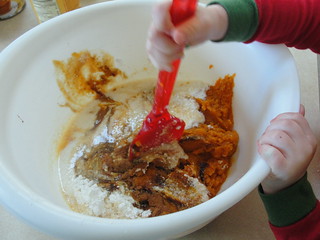
Little man wasn't done helping me, though. Once the crust was set aside (no pre-baking for this recipe), it was time to put the filling together. And it is super duper easy. Simply combine all of the ingredients...

DSC04028

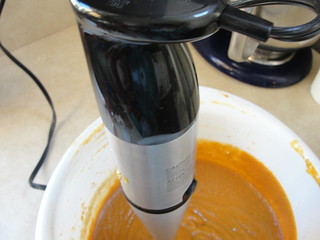
...then blend!

DSC04031

I only have a mini-blender, so I used my immersion blender. Again - easy enough!

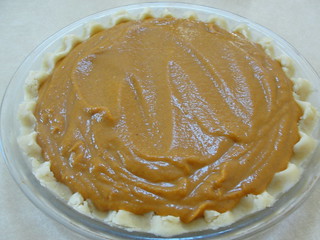
All that was left to do was pour the filling into the waiting crust...

DSC04034

...and bake!

DSC04036

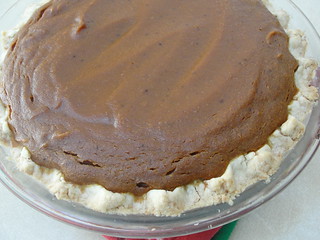
Well, the color looked decent, and it smelled good - I was hoping that it would pass the taste test with the family at the big dinner.

And the results?

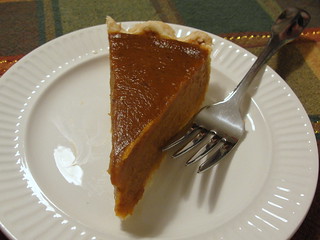
DSC04056

Awesome! Little man ate it up and so did the rest of us. The flavor was delicious, the texture was just right - no one missed the eggs or sweetened condensed milk at all, and we agreed that we now have a new go-to pumpkin pie recipe!


Egg-Free, Dairy-Free Pumpkin Pie
(from GoDairyFree)

2 cups canned pumpkin, solid-pack (you could use fresh pumkin puree, just make sure you drain it really well)
1 cup full fat soymilk (I used canned coconut milk)
3/4 cup brown sugar
1/4 cup cornstarch
1 tablespoon molasses or blackstrap molasses
1 teaspoon cinnamon, grounded
1 teaspoon vanilla
1/2 teaspoon ginger, ground
1/2 teaspoon nutmeg
1/2 teaspoon salt
1/4 teaspoon allspice or cloves, grounded
9″ unbaked pastry crust  (see recipe below)

Preheat oven to 350 degrees.
Combine all ingredients in a large bowl and blend well using an imersion blender (or combine in a blender, if you have one large enough).  Pour the filling into the unbaked crust and bake at 350 degrees for 60 minutes, covering the edges with foil if they begin to brown too quickly.
Cool on a rack, cover, and refrigerate overnight before serving (It is even better after setting overnight).


Easy Pie Crust, Dairy Free Version
(only slightly adapted from allrecipes)

1 1/2 cups all purpose flour
2 teaspoons white sugar
1 teaspoon salt
1/2 cup vegetable oil
2 tablespoons coconut milk (or other dairy milk substitute)

Place all ingredients into a 9 inch pie plate. Using a fork, stir everything together. Pat the mixture into the bottom and up the sides of the pie plate. Using the same fork, poke holes in the bottom and sides of the crust.


Enjoy!

Related Posts with Thumbnails