Wednesday, June 6, 2012

Sourdough Carrot Cake with Coconut Glaze

Holy moly, it's June already? Time is flying. So I apologize for being a little absent this past week - we've been busy! Tomorrow is little miss's last day of kindergarten (how in the world did that happen?!) and we've had lots going on around here. 

But no matter how busy we get, we still have to eat.

And we still have to have dessert, right??

I had stumbled across this sourdough carrot cake recipe a while ago, but had not had a chance (or sufficient carrots) to try it yet. 

While the recipe pairs the cake with cream cheese frosting (which is an awesome, classic combination, by the way!!), I wanted to try something new. Which is when I saw this vegan coconut frosting recipe. Most of the vegan frosting recipes I have seen call for a long list of ingredients, including things that I don't have in my kitchen, like agar agar or arrowroot powder. Nothing against those ingredients, I just don't have them. But this recipe had only three ingredients. One of which was triple sec. How bad could it be?

So we started with the cake.

The batter comes together super easily. In my stand mixer, I combined all of the wet ingredients.


And in a separate mixing bowl, I whisked together the dry ingredients.


Then, like with muffins or other quickbreads, I carefully folded the dry ingredients into the wet, until they were just combined.


Okay, a little more than that picture.

Then the batter went into the pans and the pans went into the oven.

Leaving me with quite a mess to clean up.


Holy moly.

But I got that cleaned up, and soon the cakes were ready to cool.


Once the cakes were cool, I could concentrate on the frosting.  Preparing ahead of time, I'd put a can of coconut milk into the refrigerator the night before.  I was amazed by how much of the coconut milk turned solid in the cold. It was tough not to dig right in with a spoon, actually...


The solid part of the coconut milk was put into the mixer with a cup of confectioners' sugar and some vanilla (yeah, substituted that for the triple sec...). Then I mixed. And mixed. And mixed some more. Hmm... not really frosting-y. So I added more confectioners' sugar. And mixed some more. I am not fully sure how much more sugar I added, but my frosting stayed pretty thin.


So I decided to call it a glaze instead, and didn't get upset about it.

So rather than spread the frosting, I poured the glaze.


Then I topped the whole thing with a sprinkle of toasted coconut.


The result was a very moist, very delicious cake.


Both little miss and little man loved it, little miss telling me that it is "SSSOOOOO delicious!" and little man... well... he said "mmmMMMM!" which is good by me.


Not a bad way to get your vegetable serving, huh?


Sourdough Carrot Cake
(slightly adapted from King Arthur Flour)

1 1/2 cups vegetable oil
1 cup white sugar
1 cup light brown sugar
1 cup 100% hydration sourdough starter, unfed, right from fridge
3 eggs
1 cup applesauce
2 cups grated carrots
1/2 cup shredded coconut
2 teaspoons vanilla
2 1/2 cups all-purpose flour
2 teaspoons cinnamon
1/2 teaspoon salt
1 teaspoon baking soda


Preheat oven to 350 degrees and grease and flour your cake pan. The original recipe calls for a 9" x 13" pan, but I used two 8" round pans.
Combine oil and sugar, then stir in the sourdough starter. Mix in eggs, one at a time, beating well after each. Fold in the applesauce, carrots, coconut and vanilla.
In a separate bowl, combine the flour, cinnamon, salt and baking soda.
Add the dry ingredients to the wet, stirring just to combine.
Carefully scoop or pour the batter into your prepared pan(s).
Bake until the cake(s) test done - about 45 minutes for 9" x 13", and my rounds were done after about 40-42 minutes. (It is thick batter - it needs its time!)
Remove the cake(s) from the oven and allow them to cool completely on a wire rack before frosting.


Coconut Glaze
(from gooseberry mooseberry)

1 15-ounce can of coconut milk (not light)
1 cup confectioners' sugar
1/2 teaspoon vanilla extract

Before beginning, refrigerate your can of coconut milk for several hours (or overnight). This will help separate the solids from the liquid, with the solids on top. When you are ready, scoop out the coconut milk solids from the can into a mixing bowl. Add confectioners' sugar and vanilla and mix at medium speed with an electric mixer for 2-3 minutes. The original recipe says that it will form ripples and become smooth and creamy. No matter how much confectioners' sugar I added, I could not get a real frosting-like consistency, so it remained glaze-like. But it is delicious. So go with it.

When the cake(s) have cooled completely, top with the glaze and enjoy!

Wednesday, May 30, 2012

Roasted Strawberry Banana Brown Butter Pancakes

Ever have one of those days? You know, those days where you get up on the wrong side of the bed and have serious trouble finding your way to the right one?

Today has been one of those days.

I knew it would be the second my alarm went off. Way earlier than it was supposed to. And my alarm doesn't have a snooze button. Bopping a 17-month old on the head, aside from being frowned upon, probably wouldn't make it stop making noise for 9 minutes...

So yeah... woke up early, and had a long morning.

So I decided I'd try to make something extra special for breakfast to break the funk.

My friend Jenni (you know her by now!) sent me a link to this awesome looking recipe a couple weeks ago. I pinned it, and have been trying to figure out when to make it.

Then I saw that she'd posted her version of it this morning.

So I decided that today would be the day I try my version.

Rather than roasting strawberries in olive oil as the original calls for (umm... yum??), I added bananas to the mix.


And tossed them with butter and brown sugar.


While those sat in a 375 degree oven doing their thing, I started browning my butter on the stovetop.  Browning butter isn't difficult, but it does require close attention.  If you look closely on the right side, you can see that my little alarm clock was keeping himself nice and busy while I watched the pot.


Yeah. Kept himself busy pulling out all of our trash bags. One. By. One.


But, once I got those put away, the butter was nutty and brown and my fruit was bubbly and delicious looking.


While the fruit and butter cooled, I prepared the rest of my ingredients - one bowl for the dry, the wet in the measuring cup.


And then it was time to combine everything together. The original recipe says to add only 1/4 of the roasted fruit to the pancake batter, reserving the rest as syrup for topping them when they are cooked. Jenni added all of hers, and I did the same, thinking that it would make them more flavorful, and also that it would thin the batter enough that I wouldn't need to add extra milk.


Well, the batter was still pretty thick, but I decided to go ahead and see how they cooked up...


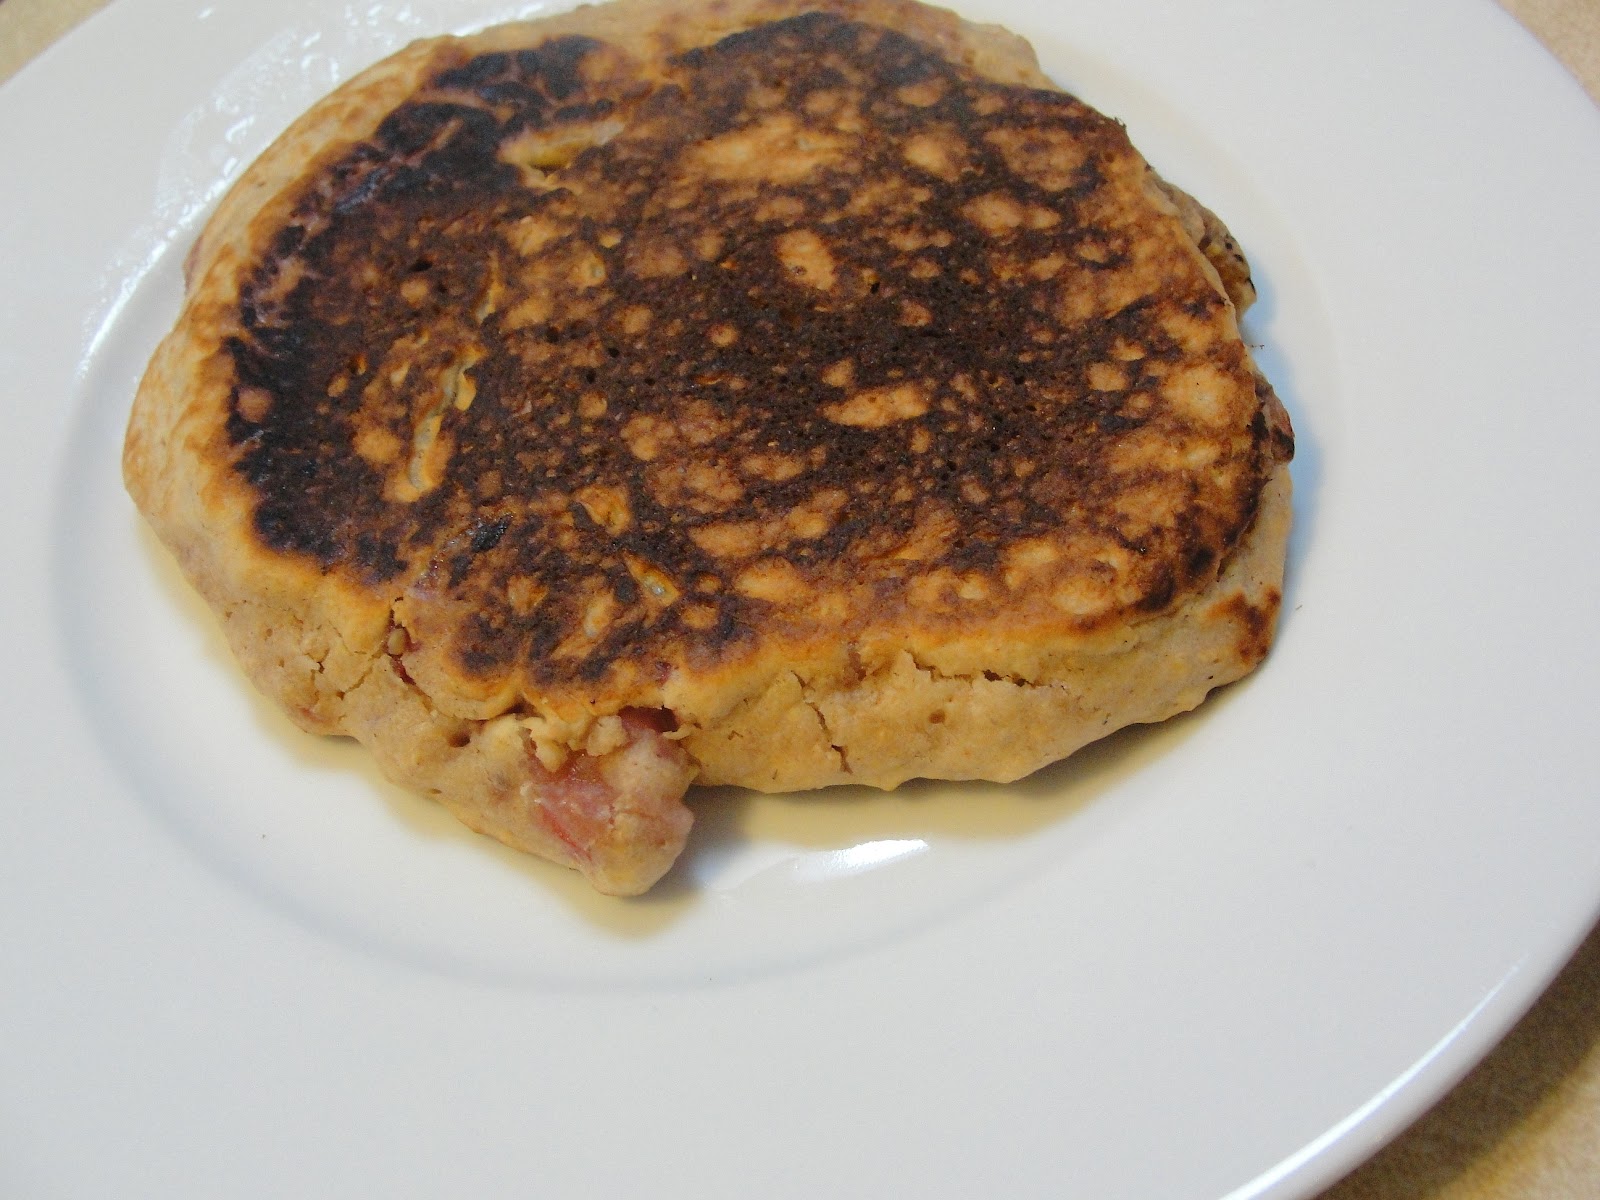
Umm... yeah, they had a little difficulty cooking up with batter that thick.


So I added more milk until I had a better consistency, and had much more success.


With a little maple syrup...


These were delicious.


Just a little ambitious for one of "those" days.


I will definitely be making these again, but probably on a weekend next time!


Roasted Strawberry Banana Brown Butter Pancakes
(inspired by The Gingered Whisk, from How Sweet It Is)


1 cup strawberries, roughly cut
1 large banana, cut into 1/2" chunks
1 1/2 tablespoons butter
1 1/2 tablespoons brown sugar


1 cup all purpose flour
1 cup whole wheat flour
1 tablespoon white sugar
2 teaspoons baking powder
1/2 teaspoon cinnamon
1/4 teaspoon salt
1 tablespoon vanilla extract
1 egg, lightly beaten

1-1 1/4 cups milk
Preheat oven to 375 degrees F. Toss cut strawberries and bananas with butter and brown sugar in a small casserole dish.  Roast for 20-25 minutes, or until juicy and caramely. While the fruit is roasting, heat butter in a small saucepan over medium-low heat. Whisk constantly until brown bits form on the bottom, about 5-6 minutes. Remove from heat and set aside.
In a large bowl, mix together flour, sugar, baking powder, cinnamon and salt. In a small bowl (or right in your measuring cup), whisk together 1 cup milk, egg and vanilla extract. Add wet ingredients to dry, mixing until just combined, then stir in brown butter (get all the brown bits from the pan!) and the roasted fruit. If batter isn’t smooth or is too thick, add additional milk. (The fruit will add liquid to the batter so you may need to add a little more milk if needed, based on your fruit. Be prepared to add more milk.)
Heat a griddle or skillet over medium heat. Add a bit of butter to the griddle and using a 1/4 cup measure, pour batter into pan. Cook until bubbles form on top, then flip and cook for 1-2 minutes more. Top with remaining roasted strawberries and syrup.
Enjoy!

Tuesday, May 29, 2012

Italian Sausage, Pepper and Onion Strata

So, after seeing this past month's Daring Bakers' Challenge, have you tried making your own challah yet? I hope so!

The only "problem" (and I use term loosely...) is what to do with the leftovers.

There are tons and tons of possibilities... slice it for sandwiches. Make French toast. Make bread pudding. Make croutons or bread-crumbs. 

I admit - for me, leftover bread (especially challah!) usually turns into breakfast (French toast) or dessert (bread pudding).

But, as a part of this month's challenge, I wanted to try something new.

Then, perusing a cookbook that I'd borrowed from the library, I saw the answer - strata.

What is a strata? 

It's a savory bread pudding.

Same bready, eggy goodness that you're used to for dessert, but instead of sugar and cinnamon and desserty/breakfasty goodness, go for savory, dinnery fillings and spices.

I used the cookbook's "basic" recipe and used a favorite standby for flavor - Italian sausage, peppers and onions.

But it all started with the challah. I used the big, huge round one that you saw on my last post and cut it into cubes.


It's a good think I cut some extra, because some people who shall remain nameless had a hard time keeping their hands out of the pan...


Once the bread was cut and set aside, it was time to work on the filling.  I diced up one sweet onion and several of these adorable, multicolored mini bell peppers.


I would up using eight of those peppers, and strove to keep a nice rainbow variety of colors.


I started by sauteeing the peppers and onions in a pan, then, after removing the veggies, I browned up about a pound of mild Italian sausage (casings removed) until it was just done (no more pink).


Add the veggies back in to finish everything up...


...and I was ready to build.

Half of the bread cubes into a 9" x 13" pan, topped with half of the sausage and veggie mix, then sprinkled with some diced up provolone cheese. Then these layers were repeated.


Once the base was prepared, it was time to hold it all together. Five eggs, some milk and a sprinkling of spices were whisked together...


...and poured on top.


About 45 minutes later, the house smelled amazing, and, when I opened the oven, I was greeted with this:


Okay, I admit, the crust pieces looked dark, which had me concerned, but those aside, it looked bright and colorful and fresh and delicious, and even ooey and gooey from the cheese.

And it tasted even better than it looked.


Oh no, bread puddings will no longer be saved for dessert.

I can't wait to try other ingredients, flavor combinations and fillings - the strata is definitely here to stay!


Italian Sausage, Pepper and Onion Strata
(inspired by a recipe in Ready when you are by Martha Rose Shulman)

1/2 pound bread, slightly stle if possible, cut into cubes (about 5-6 cups of bread cubes, enough to fill a 9" x 13" baking dish without overflowing it)
1 pound Italian sausage
1 tablespoon olive oil
8 mini bell peppers, assorted colors (or 1-2 large bell peppers - whatever you have available!)
1 sweet (Vidalia) onion
1/4 pound provolone cheese, grated or cut into small pieces (mine was pre-sliced, so I just cut it into small squares)
5 large eggs
1 1/2 cups milk (I used 1% because it was what we had)
1/4 teaspoon garlic powder
1/4 teaspoon Italian seasoning

Dice the onion and peppers and remove the casings from the Italian sausage.
In a large frying pan, sautee the onion and peppers in the olive oil (I always sprinkle my veggies with a pinch of salt to help them along as they sautee...). Set the vegetables aside. In the same pan, brown the sausage, crumbling it as it cooks, until it is cooked through (no more pink). Add the vegetables back into the pan, toss everything together, and then remove the pan from the heat.
Preheat your oven to 350 degrees and lightly grease a 9" x 13" baking pan.
Spread half of the bread cube in the prepared baking pan, then top with half of the sausage, pepper and onion mixture. Sprinkle with half of the cheese.
Repeat your layers - bread cubes, sausage and veggies, then top with remaining cheese.
In a large bowl, whisk together the eggs, milk and spices. Slowly and carefully, pour the egg mixture over the prepared casserole, trying to coat all of the bread (and meat and veggies...) evenly.
Bake for 40 - 50 minutes, until puffed and browned.
Can be served right away (hot) or warm, after waiting a bit.

Enjoy!

Sunday, May 27, 2012

May Daring Bakers' Challenge - Challah

This month's Daring Bakers' Challenge was particularly fun for me, but I am not going to lie - it wasn't a surprise to me like it was for the other members of the Daring Kitchen.

May’s Daring Bakers’ Challenge was pretty twisted – Ruth from The Crafts of Mommyhood challenged us to make challah! Using recipes from all over, and tips from “A Taste of Challah,” by Tamar Ansh, she encouraged us to bake beautifully braided breads.

You see, Ruth is my sister. And we chatted about this challenge a lot in the weeks leading up to it's announcement on the forum, planning, proofreading, photographing, video-ing different braiding techniques... but there was one thing, in all of that planning and helping out, that I didn't do.

Bake any challah.

I don't know why.

So once the challenge "officially" started, I knew I had to get down to work!

Ruth provided us with several different recipes in her challenge write-up, but the real challenge was not the recipe, rather, the creation of a beautifully braided or shaped loaf of enriched (with eggs, sometimes butter or margarine, too) bread.

For my first attempt, I wanted to try something special. So I used this recipe for a sweet challah dough, and tried my hand at making a cinnamon swirl four strand braided challah.

The recipe makes enough dough for two loaves, so, working with half of my dough, I made four (approximately) equal portions.


Meanwhile, little miss mixed up a filling of cinnamon and brown sugar for me.


I then rolled each of the four sections into a snake, then flattened each snake out to a few inches wide.

Each of these long, flat snakes was then spread with one tablespoon of softened butter and a quarter of my brown sugar-cinnamon filling.


Now, if I'd been thinking things out better, I would have made each flat strand even wider, and rolled -them up cinnamon-bun style. But I didn't think it through that well. What I did was enclose this filling into the strand, making, basically, a long, filled strand of dough. Not a bad idea, but a little messy, and, as you will see in a bit, it didn't yield me the swirls I was hoping for.

Anyway, a few minutes and a bunch of mess later, I had my four cinnamon-sugar filled strands.


Which I then proceeded to braid together...


...to create a very long, lopsidedly braided loaf of challah.


Side note here - I took many, many photographs and videos of Ruth creating many different braided loaves. I watched closely as she braided and unbraided countless strands into countless loaves. I listened as she narrated. I paid pretty close attention.  She made it look so easy.

It wasn't easy.

Fun? Yes. Easy? Not in the slightest.

With the other half of my dough, I tried creating a four-strand round loaf (again, as I'd watched Ruth do).


Not bad (for a first attempt), but it wound up lopsided!!


But the baked up beautifully.


Don't get me wrong - they're still a bit lopsided and misshapen, but they smelled delicious and I was pleased with them.

And the cinnamon swirl one was fun to cut into.


Yeah, we ate half of that one within the first afternoon. And it was a BIG loaf. It was absolutely delicious.

The round one was great too - and with this one you can really see how light and airy the bread was, even as an enriched and heavy sounding dough.


Now, I knew I'd want to try again. Not only to keep practicing (as I obviously need to...), but to try at least one of the recipes that Ruth had provided.  So, one night when I was contemplating making dinner rolls, I decided to instead use Ruth's "easy" recipe to make challah rolls!

Little miss was very hands on this time.


She loved rolling out the snakes. She actually loved pretending she was Aunt Ruth rolling out the snakes, and tried narrating her process, much as she'd heard her aunt do while we were filming before...

These snakes were knotted into rolls, and, I dare-say, I didn't do too badly this time!


I have a lot more work ahead of me before I will be able to create loaves as beautiful as many of the others created in the Daring Kitchen this month (check them out here - I promise it'll be worth your time!!), but I am still pretty happy with the results we saw (and ate!!) this month.

Ruth, thanks for including me in the preparation for this month's challenge, and for choosing something so fun and beautiful and versatile!!

And stay tuned - I made a delicious dinner using that round loaf above, and I'll share it with you in the next post!


Sweet Challah
(from Challah Recipes)


1 scant tablespoon (1 package) active dry yeast
1 3/4 cups lukewarm water
1/2 to 3/4 cup sugar (depending on how sweet you want your bread)
1/2 cup vegetable oil
4 large eggs + 1 large egg (for egg wash)
5 cups bread flour
3 1/2 cups unbleached all-purpose flour
approximately 1 tablespoon salt
Poppy or sesame seeds for sprinkling (optional - I omitted)


In a large bowl, dissolve the yeast in the warm water. Add the sugar and the oil and mix well with a whisk or a wooden spoon. Beat in 4 of the eggs, one at a time; then gradually stir in the bread flour, 2 cups of the all-purpose flour, and the salt. When you have a dough that holds together, it is ready for kneading.
To knead the dough by hand, place the dough on a lightly floured surface. Knead well, using the heels of your hands to press the dough away and your fingers to bring it back. Continue, turning the dough, for about 10 minutes, or until the dough is smooth and elastic, adding the remaining 1 1/2 cups of all-purpose flour or as needed.
To knead by machine in an electric mixer fitted with the dough hook, knead for 5 minutes on medium speed, or until smooth. You can also process half the dough at a time in a food processor fitted with the steel blade; process for about 1 minute.
After kneading, place all the dough in a large oiled bowl, cover with plastic wrap, and let it rest in a warm place for 1 hour, until almost doubled in size. You can also put the dough in an oven that has been warmed to 150 degrees for a few minutes and then turned off.
When the dough is almost doubled in size, remove it from the bowl and punch it down -- the rougher you are, the more the dough likes it. Return it to the bowl, cover it again and let it rise in a warm place for 30 minutes more. Or, if you have to go out, let the dough rise slowly in the refrigerator several hours or overnight and bring it to room temperature when ready to continue.

This makes enough dough for two loaves. When you are ready to shape your loaves, divide the dough in half, then each half into as many pieces as you need strands for braiding.
Once the loaves have been braided, let them rise another hour, uncovered. Fifteen minutes before putting the loaves in the oven, beat the remaining egg and brush it gently over them. Five minutes later, lightly brush them again. Then sprinkle with poppy or sesame seeds (if desired) and let dry a few minutes.
While the dough is rising this last time, preheat the oven to 400 degrees. Bake the loaves on the middle rack of the oven for 10 minutes. Then reduce the temperature to 375 degrees and bake for 30 minutes more. Turn off the oven and leave the loaves in 5 minutes longer to get a dark-golden crust. Remove and cool on a rack.


Easy Challah

(from templedavid.org, as provided by Ruth in the challenge)

4 cups all purpose flour

1 cup warm water
1 package (2¼ teaspoons) package rapid rise yeast (I used active dry)
½ cup sugar
2 large eggs
1 tsp. salt
1 egg beaten with 1 tsp. water


Measure flour, sugar and salt into a large mixing bowl.
In a separate bowl (or in the bowl of your stand mixer) combine water and yeast, allow to sit 5 minutes until foamy.
Add 1 ½ cups of the flour mixture to the water and yeast mixture, beat until well combined. Cover with a dish towel, let stand 30 min.
Add two eggs to the dough, beat again.
By hand or with your dough hook knead in the remaining flour mixture (as needed - I didn't need all of it). Knead approximately 10 minutes.
Transfer to oiled bowl, cover, let rise one hour.
Punch down dough, knead approximately 3 minutes.
Divide dough in two. Shape each half as desired (3, 4, or 6 strand braid).
Place loaves on parchment covered or greased cookie sheets, cover with a towel, allow to rise one hour.
Preheat oven to 400 degrees.
Brush loaves with egg wash.
Bake at 400 degrees for 10 minutes. Reduce oven temperature to 375 degrees, bake until golden crust forms (about 25-30 minutes).
Transfer to a wire rack to cool.


Enjoy!

Friday, May 25, 2012

Roasted Banana Cinnamon Buns with Maple Glaze


I was recently very honored to be asked by my dear friend Jenni of The Gingered Whisk if I'd like to provide a guest-post on her blog, as she was moving, and wanted to continue to provide new content to her readers, even while in transition between homes and, thus, kitchens.


I automatically said yes - I mean, who wouldn't want to be a part of her awesome blog??

But then I panicked a little.


Her blog is beautiful, and full of amazingly delicious recipes.  I needed to come up with something special for her. 


And that is when I came up with these.  Overnight cinnamon rolls had been intriguing me for quite some time, and I had even found a recipe for sweet dough that looked fantastic. And then to add the sweet deliciousness of roasted bananas to them, and a maple glaze on top... I knew I had something special enough for my guest post.

And I wanted to share them here, too, in case you hadn't seen them yet.


In case you missed their original posting over on The Gingered Whisk, you can check that out here. And be sure to check out all of the other amazing recipes she has while you're there!


Roasted Banana Cinnamon Buns with Maple Glaze

For the Dough:
(from allrecipes)

1 cup milk
1/3 cup white sugar
1/3 cup butter
1 tablespoon active dry yeast
4 cups all-purpose flour
1/2 teaspoon salt
2 eggs
2 tablespoons vegetable oil

In a small saucepan over medium heat, combine the milk, sugar and butter. Heat until slightly warm to the touch then remove from heat and stir in the yeast. I found that I had to let the milk mixture cool a bit before adding the yeast, as the milk got pretty hot in order to dissolve the sugar. Once the yeast has been added, let stand until foamy, about 10 minutes.
In a large bowl, stir together the flour and salt. Mix in the eggs, oil and the yeast mixture. Mix until dough pulls away from the sides of the bowl. Turn dough out onto a floured surface and continue to knead until the dough is smooth and elastic, about 10 minutes. Grease a large bowl with 1 tablespoon of oil. Place the dough into the bowl and turn once to coat. Cover and let stand in a warm place until double in size, about 1 hour.


Roasted Bananas:

3 bananas, cut into 1/2" - 1" chunks
2 tbsp brown sugar
1 1/2 tbsp butter, cut into small pieces

Preheat oven to 400 degrees.
Spread the banana chunks into a 1 1/2-2 quart baking dish. Sprinkle with the brown sugar and dot the top with the butter pieces.
Roast the bananas at 400 degrees for 40 minutes, stirring after about 20 minutes.
When the bananas have cooled a bit, mash them with a fork.


For the Filling:
(based on Picky Palate)

1/2 cup brown sugar
1 1/2 tbsp cinnamon sugar
All of the mashed roasted bananas

Mix together all filling ingredients until well combined.


To prepare the buns:

Risen dough
Prepared filling
4 tablespoons butter, room temperature (almost melty is great)

Once the dough has risen, gently deflate it.
Roll the dough into a big rectangle.
Spread the butter over the dough.
Spread the banana/brown sugar mixture over the butter. It will most likely mix right in with the butter, and that is totally okay.
Starting with one long end, roll the dough into a log.
Cut the log into 12 pieces, and place each piece, cut side up, into a 9" x 13" pan.
Cover the pan with plastic wrap and place it into the refrigerator overnight. (Or, let it rest for about 30 minutes and proceed to the baking directions.)
In the morning, take the tray out of the refrigerator and allow it to come up to temperature for at least 30 minutes.
Preheat oven to 375 degrees.
Bake the cinnamon buns for 25-30 minutes.


For the glaze:
(based on Joy the Baker)

1 cup confectioners' sugar
1 tablespoon maple syrup
2-6 tablespoons milk (I needed more than I expected!)

Measure the confectioners' sugar into a medium bowl. Whisk in the maple syrup and enough milk (adding it a little at a time) to make a good, easily pourable consistency.

Drizzle glaze over finished cinnamon buns.

Enjoy!

Tuesday, May 22, 2012

Sourdough Coffee Cake

I am having so much fun with Sourdough Surprises. I love trying new things with my sourdough starter, and it's even more fun doing it with a group of friends!

Keeping a sourdough starter healthy is very easy, requiring nothing more than flour and water.  But, when feeding a starter, you don't feed the entire thing - you only feed a portion of it.  The un-fed is referred to as the "discard" portion.  

The thing is, I almost never discard my discard. I don't like wasting food of any sort, and definitely not a portion of the starter I've been feeding and caring for for months!

So I am always looking for new and delicious ways to use my discard starter, and last week's was a super one.

I was looking for something quick, easy and breakfast-y when I found the perfect recipe. Coffee cake.

Little miss was a big help - she prepared the streussel topping and helped me mix together the cake batter.


Then, easy peasy, the batter was poured into the pan and the streussel topping was sprinkled on top.


Then the cake rests. We prepared this cake after dinner, right before the kids hopped into the tub. So, while the recipe calls for the cake to rest for 30 minutes, I let it rest for all of the kids' bathtime and bedtime routine.  Once the kids were in bed, the cake went into the oven.


It smelled delicious, and looked crumbly and delicious when it came out of the oven. Now we just had to wait until breakfast time to try it!


And let me say - this was worth the wait.  I actually brought this over to my in laws' house the next morning, as they were babysitting little miss first thing in the morning, and everyone enjoyed it!  This is definitely a great use for "discard" sourdough, and I look forward to making it again.


Sourdough Coffee Cake

for the streussel topping:
1/2 cup flour
1/4 cup sugar (I used light brown sugar)
1/8 teaspoon cinnamon
1/4 cup butter, cold

Combine flour, (brown) sugar and cinnamon until well combined. Rub in cold butter using your fingertips until the mixture is crumbly and sticks together when you press it together with your fingers. Set topping aside.


for the cake:
1 cup healthy sourdough starter (100% hydration)
1/3 cup oil
1 egg
1 cup flour
3/4 cup sugar (I used 1/2 cup white sugar, 1/4 cup brown sugar)
1/2 teaspoon salt
1 teaspoon baking soda
1/2 teaspoon ground cinnamon (optional)
1/4 teaspoon ground cardamom (optional, I omitted this)

Spray 8" x 8" or 9" x 9" square cake pan with non-stick cooking spray.
Stir together all ingredients until they are just combined.
Spread batter into prepared pan and smooth the top. Sprinkle the reserved crumbs evenly over the top of the cake.
Allow the cake to rest for 30 minutes. While it is resting, preheat oven to 375 degrees. 
Bake for 35 minutes, or until the cake is set and the sides begin to pull away from the pan.
Allow to cool before cutting.

Enjoy!

Related Posts with Thumbnails