Monday, November 12, 2012

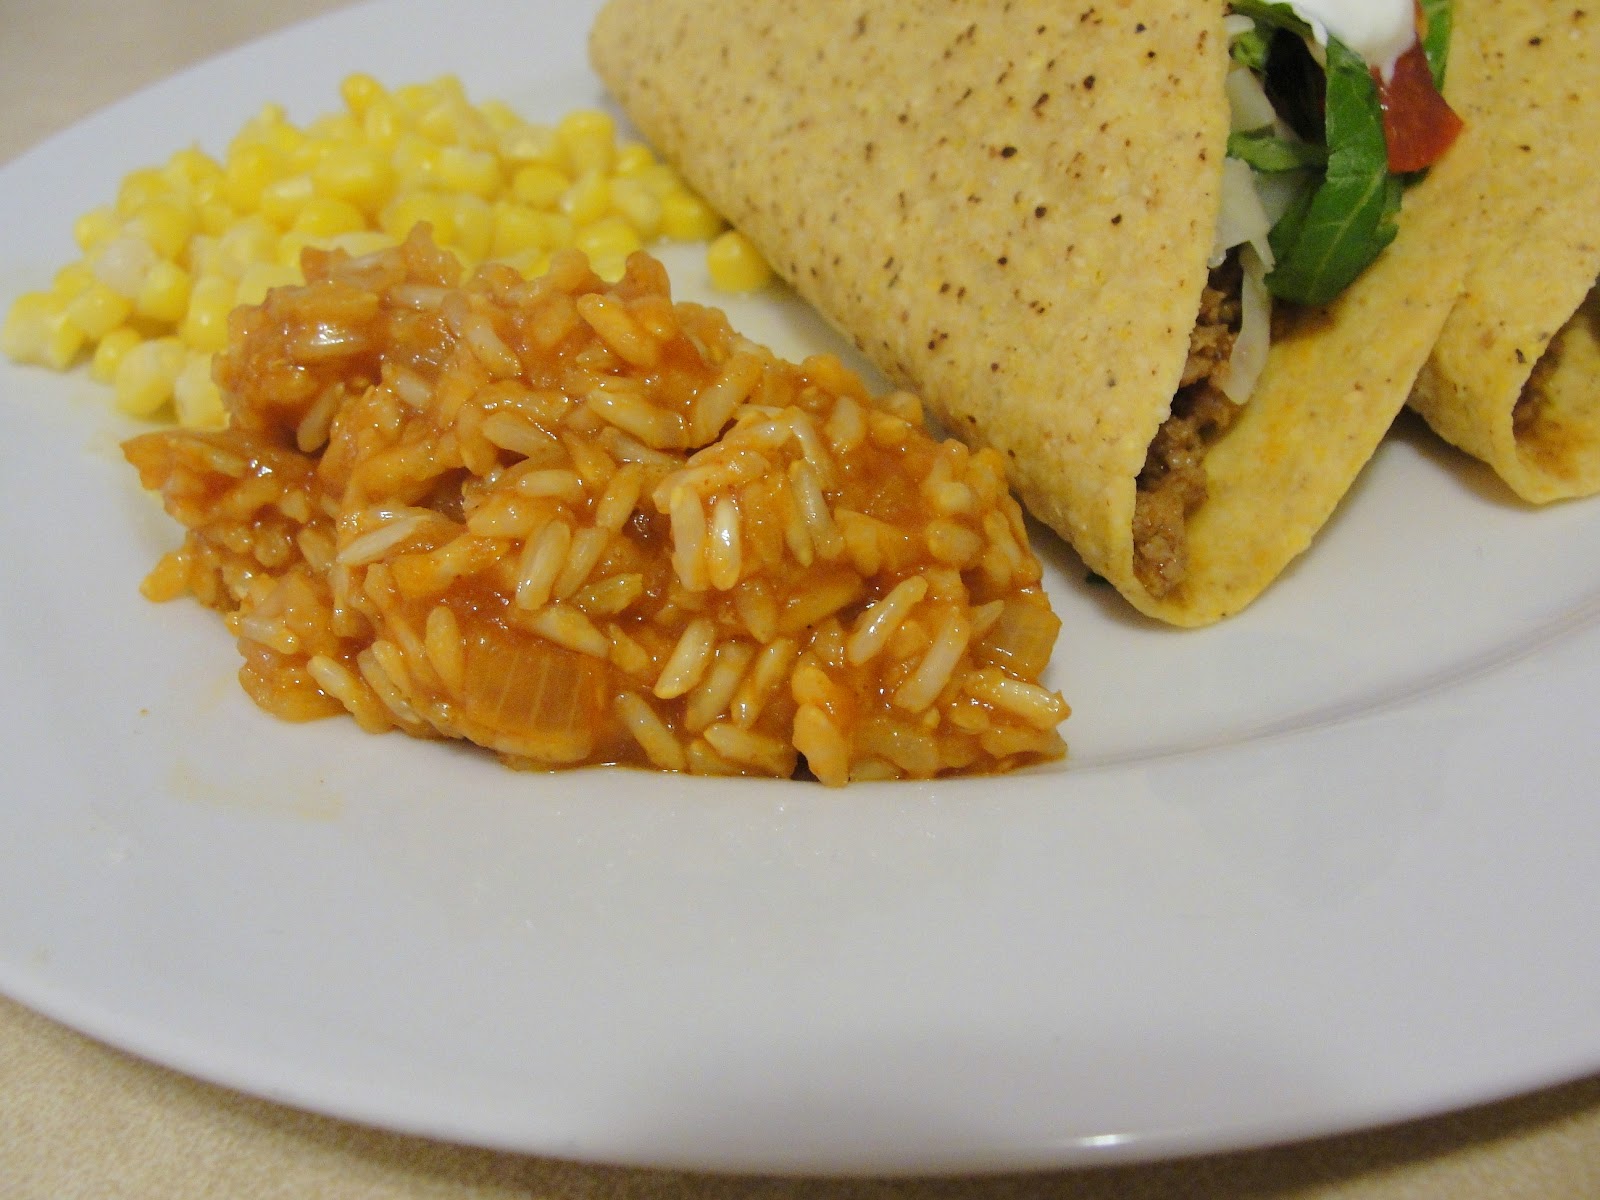
Mexican Fried Rice

For this month's Secret Recipe Club, I was assigned the blog Jen's Journey. Jen is pretty much a super mom. She has two fantastic teenage kids, she homeschools, she reads, she crafts... oh, and she cooks really, really well! She is also really honest about her life and the paths that it has taken, and uses her blog to share her journey with the world. Talk about a strong woman!

I had some trouble choosing what to make, and let me tell you - there were some terrific options. My first thought was to try her homemade ketchup, since I have been wanting to try my hand at that for some time. Then I saw this amazing looking chocolate cream pie. Yum. I may just try that one for Thanksgiving! Then I saw this delicious looking honey mustard BBQ chicken. Oh my gosh. But I was worried about allergy boy having it with the mayonnaise. But I am definitely going to try an allergy-free version of it.

Then daddy asked me if we could have tacos for dinner one night and my decision was made. In perusing the blog, I'd seen her posting for Mexican Fried Rice, and as soon as I heard "tacos," I knew what we'd be having as our side!

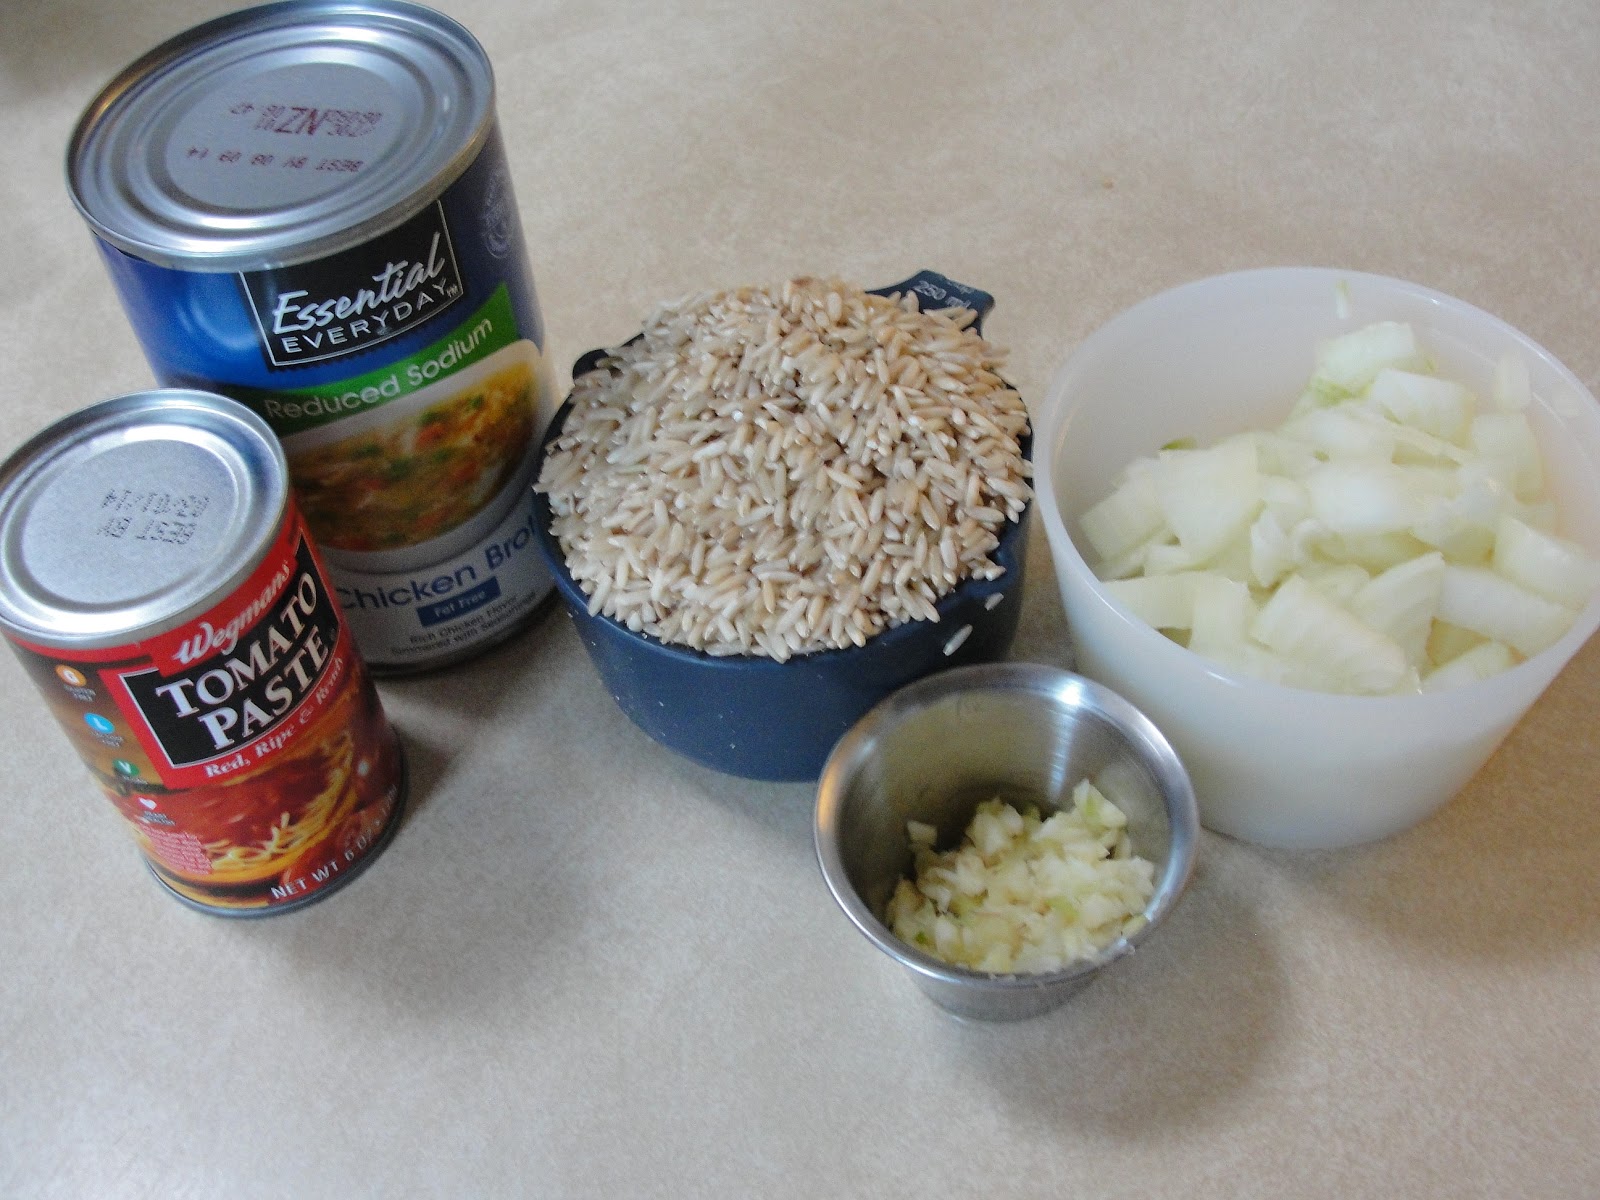
I started by gathering the ingredients and chopping my onions and garlic.


The rice, onion and garlic were then sauteed in a little bit of olive oil...


...and then the tomato paste and chicken broth (along with any spices you are using - I used cumin and a dash or paprika) are added to the pot and the whole thing is stirred up.


Once the mixture comes to a boil, you cover it, lower the heat, and let it simmer (covered) for half an hour. Now, it is not uncommon for me to have bad luck with one-pot rice dishes, so, when timing out my dinner, I timed it to give the rice 45 minutes, rather than 30. Just to have a buffer.

And it's a good thing I did that, because when I removed the lid at 30 minutes, this is what I saw...


Soupy rice that was still pretty crunchy. NOT the idea.

I let it cook for another 15-20 minutes while we served up our tacos and corn, then gave it another try.


The flavor was fantastic. But my rice still had... umm... a bit more bite than I wanted. I have no idea what I did wrong, whether it was the style of rice or some sort of weird one-pot-rice-dish curse I seem to have... BUT I will definitely try this again, because, as I said, the flavor was delicious, so, even though it didn't work out perfectly, I would not call it a fail.

And I look forward to making many more dishes from Jen's blog!

To see the other dishes cooked up for this week's Secret Recipe Club revel, click on the links below:


Mexican Fried Rice
(only slightly adapted from Jen's Journey)


1 tablespoon olive oil
1 cup long grain white rice (I used brown basmati rice)
½ cup finely chopped white onion (I used a whole onion, decent sized)
1 clove garlic, minced (I used four cloves... I like garlic!)
2¼ cups chicken broth
3 tablespoons tomato paste
1¼ teaspoon kosher salt

In a large heavy saucepan, heat the olive oil on medium-high heat. Add the rice, onions and garlic.
Saute until the rice has an opaque color and is fragrant, about 2 minutes.
Add the chicken broth, tomato paste and salt. Mix well to incorporate evenly.
Cover, reduce the heat to low, and simmer until rice is ready, about 30 minutes.
Fluff with a fork and serve immediately.

I needed to simmer my rice for much longer, but I am not sure if that is due to the type of rice that I used or not. Jen had luck with this recipe, so I'd like to keep trying!

Enjoy!

Friday, November 2, 2012

S'mores Cheesecake


This is it - the final Willow Bird Baking Challenge! I have been having so much fun innovating along with Julie and the Willow Bird Baking crew, and am super proud to have participated in each of the five weekly challenges.

That being said, I almost sat this one out. Not because I didn't want to participate, but because things have just been crazy busy around here, with school (little miss), work (daddy), broken legs (little man and daddy), hurricanes and random assorted other goings on, not to mention the fact that a typical cheesecake is not exactly allergy-friendly for little man. I considered trying a vegan alternative, but then decided I'd just jump in - use Julie's basic cheesecake recipe and create something the rest of us could enjoy, and provide other yummy goodness for little man.

Julie is something of a cheesecake master, and has made some absolutely amazing versions over the years. While she did not require that we use one of her recipes, I thought it would be appropriate to base my cheesecake on her tried and true base recipe.

The requirement for this challenge was to innovate a cheesecake that represents our own culinary journey.  I am not sure my selection really represents a true culinary journey, but it does represent one of my favorite flavor combinations, not to mention a flavor combination I have been thinking of incorporating into each and every one of the Willow Bird Baking challenges: s'mores.

I started with the crust - graham crackers.

I then prepared a ganache, using half milk chocolate and half semi-sweet. I used chocolate chips, but, if you are a purist, I'd recommend finding really good quality chocolate and chopping it into pieces.


The chocolate was mixed with hot heavy cream until smooth, then a couple of cups of that delicious, creamy ganache was poured right into the crust. As you can see, my crust was a little... crumby... so it fell apart a little bit as I tried to spread the ganache out, but I didn't mind too much.


While the ganache-covered crust went into the fridge to set, little miss helped me prepare the cheesecake filling. Well, she helped me get the cream cheese into the mixer.


Then she went into the other room and played. But that's an okay option for a six year old baker, too.

The filling was so light and creamy that, were it not for the eggs, I would have eaten it right out of the bowl. But I resisted, and poured it into the prepared and cooled crust.


This then went into the oven for about 40 minutes, until it was beautiful, golden and set.


But there was one problem. All of Julie's awesome cheesecakes (and the idea behind this challenge, really) have layers. This plain cheesecake layer was supposed to comprise half of the full cake. But it came up to the top of the pan. Oops.

I had originally planned my s'mores cheesecake to have a chocolate mousse layer with marshmallows folded into it on top of the cheesecake layer.  But now there was no way to give that mousse layer any structure.

So I had to resort to plan B.

I covered the prepared cheesecake with more ganache, cooled it, then topped it with lots and lots of marshmallow.


I then popped this under the broiler.  While it toasted, little man helped me crush up some more graham crackers.


And a minute and a half later, the marshmallows were nice and toasty.


We alternated layers of graham cracker crumbs and drizzled ganache to finish off the cheesecake.


Then the whole thing went back into the fridge until it was time for dessert.


The marshmallow layer was a little bit messy to cut through (next time I may try marshmallow cream or a marshmallow frosting instead...), but the whole thing was decadently sweet and amazingly delicious.


Julie, thank you so much for these amazing, fun challenges. And for the inspiration to innovate. I can't wait to try more braids, stuffed cookies, cinnamon rolls, cupcakes and cheesecakes, and will think of you and these awesome challenges each time that I do. I can't wait until you challenge us again!


S'mores Cheesecake
(inspired by Willow Bird Baking)

Graham Cracker Crust Ingredients:
2 heaping cups graham cracker crumbs
6 tablespoons butter

Ganache Ingredients:
20 ounces chocolate, chopped (I used half semi-sweet and half milk, you can use any type you like)
1 1/2 cups heavy cream

Cheesecake Ingredients:
3 (8 ounce) packages cream cheese, at room temperature
1 cup granulated sugar
1 1/2 tablespoons all-purpose flour
2 teaspoons vanilla extract
3 large eggs

Make the crust: Preheat the oven to 350 degrees F. Lightly grease a springform cheesecake pan. Combine the cookie crumbs and melted butter in a small bowl. Toss with a fork to moisten all of the crumbs. Using a flat-sided glass, press into an even layer covering the bottom and sides of your cheesecake pan (you want it to be tall — try to get to about 2.5-3 inches high — and a little thicker than for your usual cheesecake; maybe 1/4 inch thick so it won’t crumble). Bake the crust for about 6 minutes and let it cool as you make your cheesecake filling.

Prepare your ganache: Place chopped chocolate into a medium sized, heat proof bowl.  Then, in a small saucepan, heat the heavy cream until it begins to simmer. Carefully pour the hot cream over the chocolate and allow it to sit for a minute or two. Then, slowly and carefully mix the cream and chocolate (I start with a spatula and end with a whisk) until it is smooth.

Pour about 1 1/2 - 2 cups of the ganache into the prepared crust, spreading carefully to coat the crust (even up the sides, if you can). Freeze the crust for about half an hour to set the ganache while you prepare the cheesecake filling/

For the cheesecake filling: In a large bowl, beat the cream cheese and sugar on medium-high speed until well blended. Beat in the flour. Add in the vanilla and beat until well incorporated, scraping down the sides of the bowl as needed. Beat in the eggs one at a time, scraping down the bowl between each addition. Pour the filling into your prepared, ganache-coated crust.

Bake at 350 degrees for about 40 minutes.

When you pull the cheesecake out, you can use a sharp knife to score a circle around the top of the cheesecake about an inch inside the crust so that as it cools and chills/sinks, it won’t pull the crust in too much. Don’t worry if the circle you cut isn’t pretty, because you won’t be able to see it in the finished product! Let cheesecake cool completely on a wire rack. Add another layer of ganache to the top of the cheesecake before chilling it in the fridge for at least 3 hours (I let mine chill overnight).

For the S'mores topping:
mini marshmallows (I used about half a batch of my homemade marshmallows, cut into small pieces)
prepared ganache, re-warmed to drizzling consistency
graham cracker crumbs (just a little bit, about one graham cracker sheet worth - for decoration)

Remove the chilled cheesecake from the refrigerator and turn your oven to the broiler setting. Top the cheesecake with your mini marshmallows/marshmallow pieces and place under the broiler for about 1 1/2 minutes, watching very carefully. You just want the marshmallows to melt and look a bit toasty. Too long and they will burn. Remove the cheesecake from the oven and turn off the broiler. Sprinkle the marshmallow coating with a few of the graham cracker crumbs, then drizzle with some of the ganache. Repeat graham cracker crumb and ganache layers one more time, or to your preferred design/taste. Chill the cheesecake for at least one hour before serving.

Enjoy!

Saturday, October 27, 2012

October Daring Bakers' Challenge - Mille Feuille


Our October 2012 Daring Bakers’ challenge was hosted by Suz of Serenely Full. Suz challenged us to not only tackle buttery and flaky puff pastry, but then take it step further and create a sinfully delicious Mille Feuille dessert with it!

I wasn't familiar with "mille feuille" until Suz mentioned its other, more common (well, to me) name - the Napoleon.  This month's challenge was to create the delicious towering desert that alternates layers of flaky puff pastry with creamy, delicious pastry cream. Wow.

Puff pastry has been on my to-try list for some time, I have just been too nervous to try it. I don't know why, though. It's a laminated dough, and I have had success with laminated doughs before. Yet I was still worried. But this challenge gave me just the push I needed to jump right in.

And, as it turns out, it wasn't that hard! There are two components to prep for the dough - the dough itself, which comes together much like an unsweetened pie crust, and the butter block, which is mostly butter with a bit of flour mixed in.  Each component is chilled, and then they are worked together. The butter is laid onto the dough...


...and then the dough is folded around the butter, kind of like an envelope, and then rolled out and folded. And rolled out and folded. And chilled. Then rolled out and folded yet again. This basically created tiny, thin layers of dough and butter throughout the entire  piece of dough. As long as you make sure to carefully chill the dough between sets of folds and to keep the work-surface adequately floured, it works out pretty easily!


Once the dough was done and back to chilling out in the fridge, it was time to work on the creamy filling. Traditional pastry cream contains lots of milk and eggs, both of which are no-nos for little man, so I decided to look for a more allergy-friendly filling for our desserts. I also wanted to try to stick seasonal, so was very pleased to find this recipe for pumpkin custard. A can of pumpkin, a can of coconut milk, some maple syrup, cinnamon and vanilla - how could you go wrong?


The mixture is then thickened with a bit of softened, unflavored gelatin (making this recipe allergen free, not vegan...), then chilled in the refrigerator for several hours to set.

When it was time to bake the pastry, little man was itching to help. But his method of helping me with dough often times includes him pinching off little pieces of the dough and eating them. Yuck. So instead I had him help me prep my work surface. Armed with his own little bowl of flour, he helped me flour my counter for dough-rolling.


I then rolled my dough and cut it into pieces. Suz's directions had us making one large pastry, which was to be cut into serving sizes once complete. I decided I'd make smaller ones for us to save the cutting time later.


The interesting part about baking the puff pastry for this dessert is that you bake it weighed-down, minimizing its ability to actually puff. But it still managed to puff for me, and I had some gorgeous, airy pockets in my finished, baked pastry.


And, with this month being as crazy as it has been, I am sad to say that I didn't have a chance to really go to town on the decorating like I wanted to. So rather than a gorgeous royal icing/chocolate design on top, I went with a thin layer of my pumpkin custard and a sprinkling of powdered sugar. Which mostly dissolved into the custard on contact, but oh well.


But, despite the lack of decoration, I was really proud of how this came out. The custard was only okay - I will have to keep playing with the recipe a little, but it definitely worked, and little man didn't have to skip out on dessert.

And now I know that I can make my own puff pastry, which is a huge win for me!!

Suz, you are awesome and I am so glad you were our hostess this month. I am definitely going to try the mille feuille again, too, as it is a delicious and totally impressive dessert. What a great choice for us!!

To see the beautiful, amazing and impressive desserts baked in the Daring Kitchen this month, check them out here.


Mille Feuille/Napoleon

Pâte feuilletée /Puff Pastry
(from the challenge)

(yields: 675g pastry)

1¾ cup all-purpose flour
Scant ¼ cup unsalted butter, chilled and cubed
1 teaspoon salt
½ cup plus 2 tablespoons cold water

14 tablespoons butter, room temperature
3½ tablespoons all-purpose flour

Additional flour for rolling/turning

Cut the larger quantity of butter into smallish pieces and set aside at room temperature.
Put the larger quantity of flour into a bowl with the salt and the cold, cubed butter.
Lightly rub the butter and flour between your fingertips until it forms a mealy breadcrumb texture.
Add the cold water and bring together with a fork or spoon until the mixture starts to cohere and come away from the sides of the bowl.
As the dough begins to come together, you can use your hands to start kneading and incorporating all the remaining loose bits. If the dough’s a little dry, you can add a touch more water.
Knead for three minutes on a floured surface until the dough is smooth.
Wrap in clingfilm and refrigerate for at least 30 minutes.
While the dough is chilling, take your room temperature butter and mix with the smaller amount of all purpose flour until it forms a paste.
Place the butter paste between two sheets of clingfilm, and either with a rolling pin or your hands (I found hands easiest) shape it into a 4.5”/12cm square. You can use a ruler (or similar) to neaten the edges.
Refrigerate the butter block for about 10-15 minutes so the butter firms up slightly. If it’s still soft, leave it a bit longer. If it’s too hard and inflexible, leave it out to soften a touch. You want it to be solid but still malleable.
Once the dough has chilled, roll it out on a floured surface into a 6”/15cm square. Place the square of butter in the middle, with each corner touching the centre of the square’s sides (basically, rotated 45 degrees from the orientation of the dough square).
Fold each corner of dough over the butter so they meet the centre (you might have to stretch them a little) and it resembles an envelope, and seal up the edges with your fingers. You’ll be left with a little square parcel.
Turn the dough parcel over and tap the length of it with your rolling pan to flatten it slightly.
Keeping the work surface well floured, roll the dough carefully into a rectangle ¼ inch thick.
With the longest side facing you, fold one third inwards, so it’s covering the middle section, and ensure that it is lined up. Then, fold the remaining flap of dough (on the left) inwards, so you’re left with a narrow three-layered strip. It's like folding a business letter.
Roll out the dough again into another rectangle and repeat the letter-fold.
Wrap up the twice-folded dough in clingfilm and chill for at least 30 minutes.
Remove the dough from the refrigerator and repeat the rolling/folding process two more times.
Wrap up in clingfilm again and chill again for at least 30 minutes.
Remove the dough again and, once again, repeat the rolling and folding process ad additional two times.
Wrap up in clingfilm and refrigerate until you are ready to bake the dough. The dough keeps a couple of days in the fridge.


for the pumpkin custard
(from Health-Bent)

14 oz. can pureed pumpkin
14 oz. can coconut milk
1/3 c maple syrup
1 teaspoon cinnamon
1 teaspoon vanilla extract
1 tablespoon unflavored gelatin powder
1/4 cup luke warm waterp

In a medium sauce pot, whisk together the pumpkin, coconut milk, maple syrup, cinnamon and vanilla. Right when it’s about to come to a simmer, remove it from the heat.
While the pumpkin mixture is heating up, in a cup or small bowl, sprinkle the geltain over the luke warm water and stir to combine, making sure there are no lumps. Let it firm up as the pumpkin mixture is heating. Whisk the semi-solid gelatin mass into the pumpkin mixture.
Pour the pumpkin custard into a bowl and press plastic wrap directly onto the surface of the pumpkin custard. This keeps a ‘pudding skin’ from forming on the top.
Refrigerate for 4-6 hours, until the custard to sets-up.


final construction of the Mille-Feuille/Napoleon
(from the challenge, modified slightly for my own version)

1 batch puff pastry (see above)
1 batch pumpkin custard (see above)

Preheat oven to 400°F.
Lightly dust your work space with flour and remove your dough from the fridge.
Roll into a large rectangle, the thickness of cardboard (will probably be about 12" x 18").
Cut the dough into three equal pieces and place on parchment paper on a baking tray. If you don’t have space for all three, you can bake them separately. (I made smaller pieces for mine, to make smaller completed pastries - make what works for you)
Prick the pastry sheets all over with a fork.
Place another sheet of parchment paper over the top and then cover with a heavy baking tray. This will prevent the layers from puffing up too much.
Bake each sheet for about 25 minutes at 400°F, removing the top layer of parchment paper and the tray 10 minutes before the end to allow the tops to brown. Keep an eye on them and lower the temperature if you think they’re browning too much.
Remove the baked sheets from the oven and leave on a wire rack to cool.
Once the pastry has cooled, you’re ready to assemble your mille-feuille. Get a sturdy flat board, your pastry and the chilled custard from the fridge.
Lay one sheet on the board and spread half the custard evenly over the top.
Take the second sheet and place it on top, pressing down lightly with your hands to ensure that it sticks to the filling.
Spread the remaining custard over the second sheet of pastry, then place the last sheet of pastry on top, pressing down again.

The challenge recipe calls for this to be decorated with royal icing and melted chocolate. For my mille-feuille, I spread a very thin layer of the pumpkin custard over the top, then sprinkled it with powdered sugar for a simpler topping/design.

Enjoy!
Monday, October 22, 2012

Caramel Apple Cupcakes

Another week, another challenge from Willow Bird Baking!

This week, Julie challenged us to innovate cupcakes, using the current season as our inspiration. Being in the North-Eastern U.S., it's Fall. I mean, it's Fall all over the U.S., but here in the Northeast, the temperatures have dropped and the leaves have fallen from the trees, so Fall flavors are calling my name. The only problem (as usual with these challenges...) was narrowing it down to one flavor combination.

The requirements of this challenge were to create a cupcake consisting of a base (the cake), a filling, and a frosting.  I have to tell you - when I watched the announcement, I was excited. I mean, it was like our own at-home version of Cupcake Wars! Only... you know... no crazy time limit or cameras following you around.

My first thought was s'mores - what's better than ghost stories around a campfire on a nice Fall evening? Then I thought pumpkin... pumpkin pie, pumpkin cheesecake - tons of possibilities. But daddy, little miss and I discussed it over dinner and we decided on caramel apple. We only ever have caramel apples in October, usually from one of the farms at which we do our pumpkin picking. It was perfect.

While I had a pretty good idea as to what I wanted to use for both my base and my filling, I did a little bit of googling to see if I could find specific recipes for what was bouncing around in my head. And, as luck would have it, I found a recipe that, aside from the frosting, was almost exactly what I wanted.

The cake batter was delicious and light, with diced apples folded right in.


And the filling was exactly what I had been thinking - a butter/sugar/apple mixture cooked to caramel-y perfection (then thickened a bit with a cornstarch/milk slurry).


 Once both the cupcakes and the filling had cooled, it was time to put everything together. Little miss helped me use my handy dandy cupcake corer.


And then we had a tray of hole-y cupcakes!


And then it was time for filling. And we got a bit worried. It tasted delicious, but the caramel, despite the slurry we'd added  while it was cooking, was pretty thin, and we were concerned that it wouldn't work well as, well, a filling - that it would only leak through the cupcake, leaving a soggy cake with a pretty much empty hole. So we whipped some cream, folded the prepared filling into it, and - ta da! Caramel apple mousse as our filling!


The last component was the frosting, and I knew I wanted caramel. We recently borrowed the King Arthur Flour Baker's Companion from the library, so that was the first place I looked. And, lo and behold, they had a recipe for caramel frosting! And it was simple! So that's the one I went with. It's not the fluffy-pipe-it-on kind of frosting, which is good, because that's not what I wanted. This was the perfect spread-it-on-to-cover-the-top kind of frosting that I wanted. And it tasted perfectly caramel-y, just like I'd wanted.


These made a perfect dessert for our weekend family dinner.


The cake was delicious and moist, the filling was light, and the frosting was the perfect complement.


These were a delicious taste of Fall!


Caramel Apple Cupcakes
(makes 12 cupcakes)

for the cupcakes:
(from java cupcake)

1/2 cup unsalted butter, room temperature
1/2 cup sugar
1/3 cup packed brown sugar
2 eggs
1 teaspoon vanilla
1 1/2 cups flour
1 tablespoon baking powder
1/2 teaspoon salt
1/2 teaspoon cinnamon
1/2 cup milk (I used coconut milk, you could use apple juice too)
1/2 cup chopped apples

Preheat oven to 350 F degrees. Line your cupcake pan with liners.
Cream together the butter and sugars.
One at a time, mix in the eggs. Add the vanilla then beat on high for 2 minutes. Scrape the sides of the bowl.
Sift the flour, baking powder, salt and cinnamon together and then slowly add into the batter. Mix by hand about 5-6 strokes.
Add the milk and mix only until all the flour and milk are incorporated.
Gently fold in the apples. Do not over mix!
Bake for 17-19 minutes or until a toothpick comes out clean.
Leave in pan for 3-4 minutes before removing to a wire rack to cool completely.
Once cooled, use a cupcake-plunger or other tool to carefully cut a hole in the middle of each cupcake, being careful not to cut too deeply (the bottom of the cupcake needs to be strong enough for the cupcake to hold up once filled!).


for the filling:
(slightly adapted from java cupcake)

1 large apple, chopped
2 tablespoon butter
1/4 cup sugar
1/4 cup dark brown sugar
1 teaspoon vanilla
1 tablespoon milk mixed with 1 heaping tablespoon corn starch
1/2 cup heavy cream, whipped to stiff peaks

In a medium pan, melt the butter over medium-high heat.
Add the apples, sugars and vanilla and stir. Cook until bubbling, about 5 minutes.
Add the milk/cornstarch mixture and bring to a bubble. Cook for 1-2 minutes, until the mixture thickens.
Remove from heat and continue to stir for about 1 minute.
Set aside to cool.
Just before filling cupcakes, whip the cream and fold the caramel apple mixture into the whipped cream.
Using a piping bag (or plastic bag with the corner snipped), fill cupcakes.


for the frosting:
(recipe provided here is halved from what is in the book)

4 tablespoons (1/2 a stick) butter
1/8 teaspoon salt
1/2 cup packed brown sugar
1/8 cup (2 tablespoons) milk (I used coconut milk)
1/2 teaspoon vanilla extract
2 cups confectioners' sugar

Melt the butter in a medium sized heavy saucepan. Stir in the salt and brown sugar and heat the mixture to boiling, stirring constantly. Cook over low heat for two minutes, until the sugar is totally dissolved. Stir in the milk and return to a boil. Remove the pan from the heat and cool to lukewarm. Stir in the vanilla, then gradually stir in the powdered sugar. Adjust consistency with a little more milk if necessary.

Spread frosting over the tops of the filled cupcakes.

Enjoy!

Saturday, October 20, 2012

Sourdough Surprises #7 - Grissini (breadsticks)

Oh my goodness.

I had a sourdough scare this week.

I thought I'd killed my starter.

Seriously.

Thank goodness I'd already completed our Sourdough Surprises recipe for the month! 

This month we made these delicious, twisted breadsticks, called grissini.  And you'd never believe how easy they were to make. You just add all of the ingredients to a bowl and mix.


That's it.

Then let the dough rest, giving it a few folds along the way, and you're ready to make some breadsticks!

The recipe called for the dough to be topped with olive tapenade, but I chose to try a couple of different fillings. For both, I brushed my dough with butter...


...and the for one, I sprinkled it with bread dipping spices.


Then just stretch and twist. This is a bit messy, and you have to be careful, because the dough really stretches quite a bit, but it goes pretty quickly, and soon you're ready to bake.


For the other half, I chose a sweet topping - brown sugar and cinnamon.


And after 30-40 minutes, all that's left to do is let these babies cool enough to be able to taste.  As you can imagine, the brown sugar and cinnamon ones were the biggest hit. Various members of my family kept grabbing them off of the cooling rack before I could get all of the pictures I wanted...


The bread dipping spices didn't show well after baking, but they added a delicious flavor to the breadsticks. And they went just as quickly as the sweet version.


And there's a happy ending to this post - I was able to revive my starter! It took a few successive feedings using some strong whole wheat flour, but we were back in delicious, bubbly business. I might just make another batch of these to celebrate!

So what flavor did you choose for your grissini? Link up your post, and don't forget to leave some love for all the awesome bakers who posted with us this month!


Grissini (breadstick twists)
(from Delectable Tidbits)


120 grams white bread flour
220 grams stone ground whole wheat flour
200 grams water
1 ½ teaspoons salt
23 grams olive oil
230 grams well fed, 100 % hydration sourdough starter
toppings of your choice

Combine all of the ingredients except for the toppings in a bowl and mix well. You may need to add extra water, a tablespoon at a time, until it forms a medium soft dough. Turn the dough out onto a lightly floured board and knead for 5 to 10 minutes to form the gluten. (You should be able to stretch the dough without it breaking apart). Transfer your dough to a lightly oiled bowl and cover it with a clean kitchen towel. Let the dough ferment for 2 – 3 hours, with a fold at 40 and 80 minutes (For the folds: Pat the dough into an 8” x 4” rectangle and fold it like a letter. I usually do this a couple of times. Do not pat it roughly, you want to form air pockets and stretch the gluten but you don’t want to abuse the dough).

At the end of the fermentation time, preheat the oven to 350 degrees and line two cookie sheets with parchment paper.

Divide the dough into 3 pieces. Working with one piece at a time, flatten each piece into a 6” x 4” rectangle. Brush the rectangle liberally with the toppings of your choice (I used melted butter and cinnamon sugar for half, melted butter and bread-dipping spices for the other half). Cut the rectangle into long strips. You should be able to cut about 8 strips from each piece of dough. Move the dough strips one at a time to the cookie sheet. Pull the dough gently to stretch it to the length of the cookie sheet and then twist the dough into a loose coil from top to bottom. Repeat until all three dough pieces are flattened, brushed with tapenade, cut and twisted. Bake the breadsticks for 30 – 40 minutes, until browned. Remove from the oven and transfer the bread to wire racks to cool completely before enjoying.

Enjoy!

Wednesday, October 17, 2012

Caramelized Banana Stuffed Oatmeal Cookies

It's time for this week's Willow Bird Baking Challenge. I'm thinking I am going to need to join a gym after a couple more weeks of this. Because the challenges are too good to skip.  So far, Julie has challenged us to innovate cinnamon rolls and breakfast braids. So what would she have us innovate this week? Cookies. And not just any cookies - stuffed cookies.  

I'm sure that you've seen the oreo-stuffed chocolate chip cookies that are pictured all over the web.  Julie was asking us to use that idea and, well, innovate!

I had a bunch of ideas, actually. But I wanted to do something a little different. So I didn't want to do chocolate. Or pumpkin. Or sugar cookies. I chose oatmeal. And bananas. You know, to be... umm... breakfasty.

Never mind that I chose to drown the bananas in caramel first.

I made a basic caramel using brown sugar and butter.


Then added plenty of sliced bananas.


I then made the basic oatmeal cookie recipe (minus raisins) from the Quaker oats container.

I don't have too many photos of this process since it was very... umm... hands on, shall we say. Meaning messy.

Basically, I rolled a cookie's worth of cookie dough into a ball, then flattened it and shaped it into a sort of bowl shape.

I then filled the bowl with a spoon of the banana-caramel mixture.


I then took another cookie's worth of dough, flattened it into a disc and covered the filling, making sure to seal the edges as well as I could.


These then went into the oven until they were golden brown and yummy looking.


And then it was time to see how it worked!


Not too shabby!

These came out very sweet, but pretty tasty!

And they're BIG.


One is definitely a good treat.


And with the ooey, gooey, banana-y goodness in time, you can even pretend that they're guilt free.

I still want to try some of the other ideas that I had, but I am glad that I gave these a try. It's something I'd never have thought of myself, and a cookie style I probably wouldn't have thought to try on my own.

Julie, I can't wait to see what you challenge us to make next!!


Caramelized Banana Stuffed Oatmeal Cookies
(based on Quaker's cookie recipe and my own inspiration)

for the caramelized bananas:
6 tablespoons light brown sugar
2 tablespoons butter
5 bananas 

In a medium, heavy bottomed pot, heat the brown sugar over medium heat, stirring only as much as necessary to make sure it doesn't burn. Once the sugar is mostly melted, add the butter and stir until the mixture is smooth. Add the bananas and stir, cooking only until the bananas just begin to soften. Remove the pot from the heat and allow it to cool fully.


for the cookie dough:
1 ½ cup all-purpose flour
1 teaspoon baking soda
½ teaspoons salt
14 tablespoons unsalted butter, at room temperature
1 cup light brown sugar
2 eggs
1 teaspoon vanilla extract
3 cups old-fashioned oats

In a small bowl, sift together flour, baking soda and salt. Set aside.
In the bowl of your stand mixer, beat the butter and brown sugar on medium-high speed until light and fluffy, about 2-3 minutes. Beat in the eggs one at a time, then beat in the vanilla extract. With the mixer on low speed, mix in the flour mixture until just combined. Stir in the oats. 
Cover dough bowl and chill for at least 1 hour in the refrigerator.


For the final cookies:
Preheat oven to 350 degrees.
Scoop out about 1 to 1 1/2 tablespoons of the cookie dough and place it on an ungreased cookie sheet, shaping it to have a small well in the middle. Spoon some of the caramelized banana into the well in the cookie dough. Scoop out another 1 to 1 1/2 tablespoons dough, shape it into a flat round about the size of the bottom cookie, and place it on top of the bottom cookie and banana filling, sealing the edges as well as possible. Repeat with remaining dough, placing cookies about 2 inches apart on the baking sheets. 
Bake cookies for 10 to 15 minutes or until dry and light golden brown on top (mine took 12-13 minutes). Let cookies cool for a few minutes on the pans, then transfer to a wire rack to cool completely. 

Enjoy!

Monday, October 15, 2012

Secret Recipe Club Bonus: English Muffins

So, as you saw earlier, my Secret Recipe Club group had its reveal today. Hooray for lots of blog-love and recipe-sharing!

I am lucky enough to have a second Secret Recipe Club recipe to share with you today.  We had a call for a last-minute fill-in today, and I volunteered to fast-track a recipe. So the organizer sent me the URL and it was for the lovely Camille at Growing Up Gabel. Which was, like, super meant to be, or something, because Camille was the blogger assigned my blog this month, and I was already busy drooling over the awesome recipes she has over there! So what better way to show my gratitude to her for her awesome version and write up of my Pumpkin Pull-Apart Bread than to share a recipe of hers??

Since this was to be quick turnaround, I wanted to pick something that would fit in with our planned meals. Obviously, my first thought was dessert, since that goes with everything, but Camille has a beautiful selection of breads to choose from, and my eyes kept drifting to those. I was pretty set on recreating her Easy Dinner Rolls, since our meal plan called for soup tonight, but then I saw the one for me. English muffins.

If you've spent any time on C Mom Cook at all, you know that I have been testing out all kinds of English muffin recipes (so far these, these and these). So when I saw that Camille has a recipe that is different from any of those three, I was set.

And, to make matters even better, this dough comes together super easily.  For the most part, simple mix all of the ingredients together...


...then knead into a smooth ball.


Then, after the dough rises for about an hour or so, roll it out and cut out circles. I used my English muffin rings as cutters and was able to get 14 muffins out of this dough.


Then, like the other recipes I've made, these English muffins are cooked on the stove top in a covered skillet/pan.


It took a bit of adjustment to figure out the right temperature for these guys, but once I did, they cooked up absolutely beautifully.


And, even though English muffins don't traditionally go with soup, we split ours spread them with some butter, sprinkled on some garlic salt, and they made the perfect side.


They were a little more bready and a little less nook-and-cranny-y than some of the other English muffins I have made, but they are absolutely delicious and I can't wait to have one for breakfast tomorrow!


So, Camille, thank you so much for the delicious recipe and it was an honor to bake with you this month! :)

Once again, to see the other delicious recipes from the Secret Recipe Club, check out these awesome links:


English Muffins
(from Growing Up Grabel)

1¾ cup warmed milk
2 teaspoons yeast (I used active dry)
3 tablespoons butter
2 tablespoons sugar
1¼ teaspoon salt
1 teaspoon baking powder
1 egg
4-4¼ cups flour (I used all-purpose, but you can use white, whole wheat or any combination thereof)
Corn meal for dusting


Put milk, yest, sugar and butter in the bowl of a stand mixer. Allow butter to mostly melt.
Add the rest of ingredients. Mix until well combined. (you can also do this with a sturdy wooden spoon rather than the mixer, if you would like.)
Remove bowl from stand mixer and fold dough over a few times while in the bowl. The dough will be sticky so you may need to use a tad of flour. Either grease the bowl of the stand mixer or lightly grease another bowl and allow dough to rise in a warm place, covered with plastic wrap, for about an hour.
Punch down the dough and roll it into a rectangle on a surface lightly dusted with corn meal.
Using a 3″ round cookie cutter (or an English muffin ring), cut out rounds from the dough.
Re-roll and re-cut as needed until all the dough is used up.
Place cut dough on cookie sheets and cover with a wet towel (I used plastic wrap). Allow to rest for 20 minutes.
Warm a large skillet (with a top) over low heat (I found I needed the heat to be on medium rather than low) on stove top. Sprinkle pan with corn meal.
Cook muffins in skillet for 6-7 minutes on each side, covered.
Be gentle when turning so as not to deflate the muffins too much. Cool on a rack.
Store in zip top bag. And these are freezable!

Enjoy!
Related Posts with Thumbnails