Sunday, October 27, 2013

October Daring Bakers' Challenge - Savory Pot Pie

This month's Daring Bakers' Challenge was a little different from the norm.  Usually the challenges have us baking up all kinds of sweet goodies. Or breads.  This month, that wasn't the case.

Hannah of Rise and Shine was our October 2013 Daring Bakers’ hostess and she challenged us to bake our own double crusted savory pot pies. Using any from-scratch crust and filling we choose, we were allowed to get completely creative with our recipe, showing off the savory flavors and fillings from our own home or region.

What fun - a savory baking challenge!  I pondered long and hard as to what kind of filling to choose. But I kept coming back to our old standard - chicken pot pie.  Yes, yes, I know that there are so many more pot pies, that I really should have been more creative... but we really, really like chicken pot pie. In fact, I've even shared other versions with you before - here, here and here.  But what can I say? It's good!

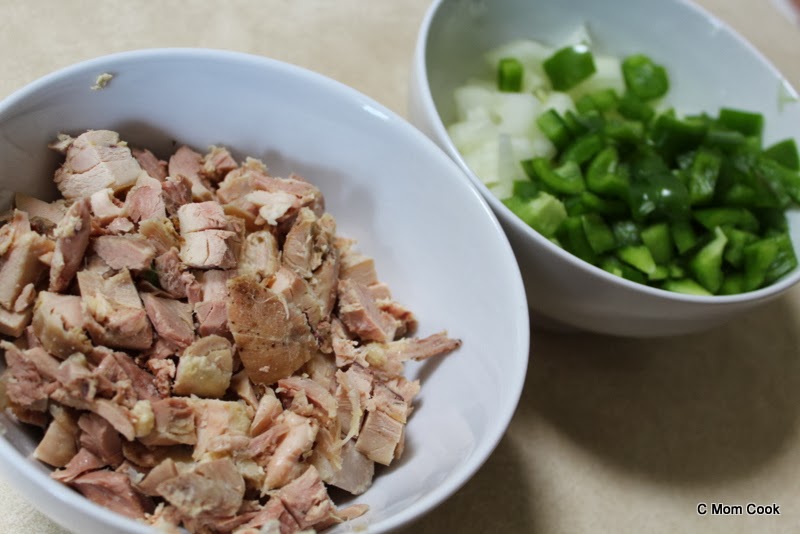
The version I chose to make for this challenge was slightly Mexican inspired.  And it started with the prep work - chopping sweet onion, green pepper and pre-cooked chicken.

I made my pot pie completelly dairy free so that little man could enjoy it. Usually, the sauce of a pot pie starts with some kind of roux, which is generally made with a combination of butter and flour. I started by sauteeing the onions and peppers in olive oil, then added a bit more oil, then my flour.


I then poured in chicken stock, which thickened up beautifully with my improvised roux.  And then all that was left to do was add in the rest of the goodies - corn kernals, black beans and the chicken.


And for my crust? Sourdough, of course!


And then it's just a matter of putting everything together...


...and baking it up!


It was awesome to see how well the crust baked up on all sides of the pie - golden delicious and crispy on all sides!


But the most important part is how it tasted.  And it tasted delicous. Little miss even asked for seconds. Which, if you know seven-year-olds and dinner, is not an everyday occurance.


Hanna, thank you so much for giving me a fun opportunity to make a delicious meal for my family. I hadn't made a pot pie in a while and now I know I'll be making them a lot more often.

To see the challenge as Hannah prepared it, with all of her delicious inspiration recipes, check it out here.

To see the other delicious pot pies baked up in the kitchen this month, check them out here.


Sourdough Pie Crust
(from The Bojon Gourmet)

2 cups flour (you can use all purpose, whole wheat or a combination)
1 teaspoon salt
2 teaspoon sugar
1 cup (2 sticks) butter, cold, cut into cubes
about 1 cup 100%-hydration sourdough starter


In a large bowl, whisk together the flour(s), salt and sugar. Add the butter and rub it in with your fingertips until the mixture looks like gravel, with some butter worked in and some 1/4" chunks remaining. Gradually add the starter, folding the mixture with a spoon or your hands until it just starts to come together into large clumps.

Turn the dough out onto a lightly floured surface. Divide roughly into 8 portions. Fraisage the dough: using the heel of your hand, scrape a portion of dough across the surface. Repeat with the remaining dough. Gather the dough into a ball. Flatten the ball into a disc and wrap in plastic wrap. Chill for at least 30 minutes, and up to a few days. (Or freeze for up to a couple months. Defrost before proceeding.)


Mexican-Inspired Chicken Pot Pie Filling
(made it up as I went along!)

4 tablespoons extra virgin olive oil
1 sweet onion, chopped
1 green bell pepper, chopped
1/4 cup flour
2 cups chicken stock
1/2 can corn kernals (drained)
1/2 can black beans (drained)
2 cups cooked chicken, chopped
salt, pepper, cumin, paprika, to taste
2 tablespoons salsa

In a large sauce pan,  heat one tablespoon of oil over medium  high heat. Add chopped onion and and pepper and sautee until softened and fragrant. Season with a touch of salt and pepper.  Add remaining oil, then sprinkle in flour. Mix well to fully incorporate the flour. The mixture will be thick, almost like a paste. This is okay.
Pour in the chicken stock and mix it well until there are no lumps from the flour.
Stir in the corn, black beans and chicken. Season to taste with your spices.
Remove the pan from the heat and stir in the salsa.
Allow the mixture to cool.

To prepare the pot pie:
When you are ready to proceed with your pie, preheat your oven to 375 degrees and remove the dough from the fridge. If it is very firm, you may need to let it soften at room temp for 15 minutes or so. On a lightly floured surface, roll half the dough out into a round large enough to line the bottom of the dish you are using for your pot pie. I used a 1 1/2 quart casserike dish. Fit the crust into the pie pan leaving a slight overhang.

Pour cooled filling into the prepared bottom crust.

Roll the remaining dough into a round just slightly larger than the dish and place it on top of the filling.  Trim the bottom crust to approximately the size of the top crust, tuck the edges under all the way around and crimp the edges (with a form or your fingers - whatever look you are going for). Cut a few vent slits in the top crust.

Bake pie for 45 minutes until the crust is golden brown.

Allow to cool for a few minutes before serving.

Enjoy.


Sunday, October 20, 2013

October Sourdough Surprises - Quick Breads

This month's Sourdough Surprises challenge was the perfect choice for how busy things have been around here - quick breads! You know, muffins or other breads that can be started, baked and completely finished in darn near no time flat.

We love muffins in our house, and I've made plenty of varieties over the years. And have made quite a few sourdough quick breads, too, from sourdough beer bread to a sourdough chocolate banana loaf.  So despite sourdough's reputation for requiring lots of time, there is so much that you can do with it quickly, too!

I couldn't decide what to make for this challenge, since there are so many options to choose from, but decided, on a whim one afternoon, to whip up some muffins as an after school snack for little miss.

I started with my go-to site for quick sourdough recipes, then took inspiration from my favorite fall flavor - pumpkin!

With a hint of cinnamon and a swirl of pumpkin-y goodness, I quickly threw together sourdough pumpkin swirl muffins!


It's amazing how easy these are to make. So easy, in fact, that I completely forgot to take in-process photos. Oops!

But the most important part is that the kids loved them, and so did us parents. And they made a perfect after-school snack, and even a pretty good breakfast the next morning!


So what kind of quick bread did you make this month? Link up and show us!


Sourdough Pumpkin Swirl Muffins
(based on Smart Sourdough Mama)

1 cup flour
1/4 cup sugar
1 teaspoon baking powder
1/4 teaspoon soda
1/2 teaspoon salt
1 teaspoon ground cinnamon
1 well beaten egg
1 cup sourdough starter (100% hydration)
1/4 cup oil
1/4 cup pumpkin puree

Preheat oven to 400 degrees and spray a 12-well muffin tin with non-stick cooking spray.
Sift flour, sugar, baking powder, baking soda, salt and cinnamon into a bowl and mix to combine. Make a well in the center. Combine egg, starter and oil. Add all at once to the dry ingredients. Stir quickly just till dry ingredients are moistened. If your starter is thicker you may need to add a little milk.  Once the ingredients are just combined, spoon in the pumpkin puree and stir just a few times, only to swirl the pumpkin evenly through the batter. Make sure not to fully incorporate the pumpkin or you will lose the swirl.
Fill greased muffin pans 3/4 full.
Bake at 400 F about 17-20 minutes. Makes 9-12 depending on the size of your muffin tins (I got 11).
Allow the muffins to cool for a few minutes, then transfer them to a wire rack to cool completely.

Enjoy!

Monday, October 14, 2013

October Daring Cooks' Challenge - Dumplings

This month's Daring Cooks' Challenge, like the Daring Bakers' Challenge back in July, an "eeny meenie miny moe" challenge - each cook was challenged to go through all of the past challenges, both on the cooks' and bakers' side of the daring kitchen, and choose a challenge that spoke to us.

In a "celebration" of past Daring Cooks and Daring Bakers challenges, Lisa challenged all of us to search through the Daring Kitchen archives and pick any one we'd like! The REAL challenge was picking which delicious recipe(s) to try!

Oh yes, it definitely was a challenge choosing which, well, challenge to choose. I wanted to stay on the cooks' side, as I'd stayed on the bakers' side with the bakers' choose-your-own-adventure challenge, and I wanted to try something from before I joined the Daring Kitchen myself.  At least that narrowed things down!

I finally settled on making Chinese dumplings, the Daring Cooks' Challenge from June 2009.

While the recipe was a bit intimidating at first, I wound up being surprised by how simple (though a bit time consuming...) these delicious morsels are to make.

There are two components to dumplings - the dough and the filling.  The dough is, quite simply, a combination of flour and water. That's it.

The filling, however, has a few more ingredients than that.


I started with ground pork, to which I added minced napa cabbage, minced green onions, minced garlic, soy sauce, sesame oil, a sprinkle of ginger and a bit of cornstarch.

In order to help me stay organized, I prepared both the dough and the filling earlier in the afternoon. Then, when it came time to prepare for dinner, it was simply a matter of putting the dumplings together.


This, however, is the time consuming part.  And I got a bit of help from my fun dumpling press.  I simply divided the dough into about 24 sections, rolled each one flat, laid it in the press and added the filling.


Then... just... press!


And then I got to use my bamboo steamer. Which may or may not have been a factor in my choice of this recipe this month...

The dumplings were placed on a bed of napa cabbage leaves in the steamer...


...and six minutes later, we were ready for dinner!  (okay, 12 minutes later... I had to steam them in two batches so that the dumplings would lay in a single layer in the steamer baskets...)


I also prepared a quick dipping sauce, using soy sauce, rice vinegar, a pinch of brown sugar and a sprinkling of each garlic powder and ginger powder.


The result was absolutely delicious. Everyone loved them, and everyone ate very well that night. I will definitely have to make these again.

Lisa, thank you so much for giving me the opportunity to go back and try this delicious challenge!!

To see what the other members chose this month, check them out here.


Chinese Dumplings
(from the June 2009 Daring Cooks' Challenge)

For the Filling:
1 lb ground pork
4 large napa cabbage leaves, minced
3 stalks green onions, minced
1 garlic clove, minced
1/4 teaspoon ginger powder
3 tbsp soy sauce
2 tbsp sesame oil
2 tbsp corn starch

For the Dough:
2 cups all-purpose flour
1/2 cup warm water
flour for work surface

(note: these proportions make enough dough for half of the filling, but it is the proportions that are easiest to work with. Either double the recipe, make two single batches, or, as I did, cook up the remaining filling separately as delicious meatballs!)

To prepare the filling, simply combine all of the ingredients until well mixed. Set aside until you are ready to make the dumplings. I covered my filling with plastic wrap and placed it in the fridge.

To prepare the dough, place the flour in a large bowl, then mix 1/4 cup of water, stirring until the water is absorbed. Continue adding water one teaspoon at a time and mixing thoroughly until dough pulls away from sides of bowl. We want a firm dough that is barely sticky to the touch.
Knead the dough about twenty strokes then cover with a damp towel for 15 minutes.

When you are ready to prepare the dumplings, take the dough and form a flattened dome. Cut into strips about 1 1/2 to 2 inches wide. Shape the strips into rounded long cylinders. On a floured surface, cut the strips into 3/4 inch pieces. Press palm down on each piece to form a flat circle (you can shape the corners in with your fingers). With a rolling pin, roll out a circular wrapper from each flat disc. Take care not to roll out too thin or the dumplings will break during cooking - about 1/16th inch. Leave the centers slightly thicker than the edges. Place a tablespoon of filling in the center of each wrapper and fold the dough in half, pleating the edges along one side (see images in post for how to fold pleats). Keep all unused dough under damp cloth.

The prepared dumplings can be boiled (until they float), fried (as potstickers) or steamed - in a single layer in a steamer basket, covered, for about 6 minutes.

Enjoy!

Granola Bars

I have to apologize. Again. I have not been a good blogging friend. Life has been busy and I have not been keeping up with the blog, and I am sorry about that.

But today is a crazy blog day - it's reveal day for two different challenge, so two posts are coming your way.

The first is this one, for this month's Secret Recipe Club.

This month, my assigned blog was Little Bit of Everything, a super delicious blog written by Julie, a super talented, fun and creative cook and baker.

There were so many recipes that I wanted to try from Julie's blog, but the one that stood out to me was her granola bar recipe.  I mean, it's a healthy food that can be breakfast on the go, easily adaptable, and it's totally kid friendly, to boot! Perfect choice for me!

Granola bars are pretty simple to make, and these were no exception, although there were a number of steps involved, as well as a whole bunch of dishes.

First, rolled oats, coconut and nuts (or, in my case, sesame seeds - wanted to make sure little man could enjoy these, too!) are mixed together.


The mixed ingredients are then quickly toasted in the oven until they get nice and toasty-golden brown.


The toasted oat mixture is then mixed with wheat germ and cinnamon, and I also added a tablespoon of chia seeds, just to give a bonus power boost to the bars.


Then, finally, a quick syrup of butter (okay, coconut oil for me - again - keeping it little man friendly), honey, brown sugar and vanilla is boiled and then mixed into the dry ingredients.


Once the mixture has been evenly moistened, add some dried fruit (craisins, for us)...


...then press the whole thing into a pan and bake!


The finished bars smelled super, and looked pretty darn good, too.  And I baked them in time to have them perfectly cooled and ready to go fr when little miss returned home from school.


I mean... how's that for an after school snack??


Julie, thank you so much for the delicious inspiration and for all of the wonderful recipes on your blog. I can't wait to come back and try many more of your recipes!


Granola Bars
(only slightly adapted from Little Bit of Everything)

2 cups old fashioned oats
1 cup sunflower seeds
1 cup shredded coconut
1/2 cup toasted wheat germ
1 tablespoon chia seeds (optional)
2 teaspoons cinnamon
3 tablespoons coconut oil
2/3 cup honey
1/4 cup light brown sugar, lightly packed
1 1/2 teaspoons pure vanilla extract
1/4 teaspoon kosher salt
1/2 - 1 cup dried cranberries (or other assorted dried fruit) (to taste)

Preheat oven to 350 degrees. Spray an 8 x 12 baking pan with cooking spray and line it with parchment paper.
Toss the oatmeal, sunflower seeds and coconut on a sheet pan and bake for 10 - 12 minutes, stirring often for even browning. Toss the mixture into a large mixing bowl, add the wheat germ, cinnamon and chia seeds (if using). Mix well.
Reduce the oven temperature to 300 degrees.
Place coconut oil, honey, brown sugar, vanilla and salt into a small saucepan. Bring to a boil over medium heat. Cook, stirring for a minute. Pour over the oatmeal mixture. Add the dried fruit and mix well.
Pour into a prepared pan. Using a small piece of parchment or wax paper, lightly press the mixture into the pan. Bake for 25 to 30 minutes or until light golden brown. Cool at least 2 to 3 hours before cutting into bars or squares.
Store in an airtight container.
Enjoy!


Monday, September 30, 2013

Pumpkin Cake - an SRC Bonus

Last week there was a little hiccup with the Secret Recipe Club reveal, and one of the hostesses sent out a last minute call asking if anyone could cover a missing blog.  I was in the mood to bake, despite how busy my day was, so I volunteered.  The hostess said that, since it was late, I could share the results with the next group's reveal. So even though I am in group B, and last week's orphan was from group C, we're posting today - with group D.

Mangia is an awesome blog, written by the adorable Chelsy, with a huge variety of recipes to choose from. And a ton of recipes that take into consideration a variety of dietary restrictions, from vegan to gluten free to paleo - there is something for everyone on this blog.

Right away, I found four recipes that I wanted to try. Crazy.

Now, remember that I said I had a busy day? Apparently my cooking mojo was elsewhere that day, because nothing worked out quite like I'd expected.

The first thing I'd wanted to try was making my own coconut butter. I'd never heard of it before, but it's just like any nut butter or seed butter... just... made with coconut! It's used in a whole bunch of the recipes Chelsy has posted and it looked super simple.  But I had two problems. One, the only ingredient is coconut. Unsweetened coconut. Which I thought I had. Turns out I only had sweetened. Hmm... thought I'd try it anyway.  And the second? The way to make it is to grind the coconut in a food processor. All I have is the mini version, an attachment to my immersion blender. But I've made sunflower seed butter in the thing, so I thought I'd be okay.

Umm... not so much. After five minutes, I had to give the machine a break. I'd expected that. I didn't want to burn out the motor. But no matter how many rests I gave it, it was heating up more and more quickly each time I'd go back to it, and after about 20 minutes (half grinding, half resting), I was nowhere near "butter" consistency.


Okay, coconut butter not happening.

So I moved on (skipping the recipe I'd intended to make using said coconut butter...) to another awesome looking recipe that had caught my eye - coconut banana bread bites. The recipe calls for coconut flour, for which I used... the failed coconut butter!

But something didn't work...


These were supposed to be rounder... fuller... more like balls and less like cookies. Mine were definitely too wet, and, even after extra time in the oven, were still very... chewy. But I have to say... they were darn addictive. I knew I'd messed up, but I couldn't stop eating them. And, funny enough, I let little miss taste one after school and she had the same reaction... ("Mom, these are weird... Hmm... can I have another??")

I was determined to do better though.

Did I mention that it was an already busy day? Yeah.

I decided to go for my favorite fall flavor this month - pumpkin.


She has plenty of pumpkin recipe to choose from.  I chose to try the pumpkin bread bars.

The only thing I did differently was to substitute all purpose flour for the coconut flour called for in the recipe, as I was thinking that maybe my homemade non-coconut-butter-coconut-flour was the reason that the banana bread bits hadn't had the right consistency.  Oh, and I used a round pan instead of a square one (my square one was already in use).

My resutls?


Well, didn't look like any pumpkin bread I'd ever seen, but it sure as heck looked good!  And I made a simple confectioners' sugar-coconut milk-maple syrup glaze to go over it (since the glaze accompanying Chelsy's recipe included... you guessed it... coconut butter...), which definitely went a long way in improving the aesthetics of my version.


The resulting cake (because really, I couldn't call it a bread...) was very custard-y, but super duper delicious. Little miss absolutely loved it and asked for it for her after school snack all week long.

So, Chelsy, I am sorry that I wasn't able to do any of your recipes the justice I was hoping to, but I have to say that your blog has inspired me, and I will absolutely not give up.


Pumpkin Cake
(only slightly adapted from Mangia)

1 cup pure canned pumpkin
4 eggs
1/4 cup coconut milk
3 tablespoon extra-virgin olive oil (or melted coconut oil)
1/2 teaspoon pure vanilla extract
1/2 cup granulated sugar
1/2 cup all purpose flour (coconut flour, if you have it)
2 teaspoons ground cinnamon
1/2 teaspoon baking soda

Preheat the oven to 350 degrees. Grease an 8×8 in. square baking dish with cooking spray (I used an 8 inch round pan).
In a large mixing bowl, whisk together the pumpkin, eggs, milk, oil, vanilla, and sugar until smooth.
Stir in the flour, cinnamon, and baking soda.
Pour the batter into the prepared pan, smoothing it out evenly with a spatula.
Bake for 22-25 minutes or until a toothpick inserted into the center comes out clean and the top is lightly golden.
Allow the cake to cool completely.
If desired, as it is cooling, you can prepare a simple glaze of confectioners' sugar (1 cup), maple syrup (2 tablespoons) and coconut milk (approximately 2 tablespoons, adjust until you have the consistency you want). Drizzle the glaze over the cake once it has cooled.

Enjoy!

Friday, September 27, 2013

September Daring Bakers' Challenge - Tres Leches Cake


Inma of la Galletika was our Sept. 2013 Daring Bakers’ hostess and WOW did she bring us something decadent and delicious! Pastel de Tres Leches or Three Milk Cake, creamy yet airy, super moist but not soggy.. just plain delish!

Yum! I've actually made tres leches cake before, and it really is a delicious treat.

But I had one problem with this challenge.

When I made this cake last time, it was before little man was born. Before we had a dairy allergy to contend with in the house. In a cake whose title specifically says "three milks," how could I make this dairy free?

Luckily, our awesome hostess had suggestions, and was very open to us doing what we needed to make this challenge suit our dietary needs, so I put on my thinking cap and set out to work.

The first step is to make the cake - a light, airy sponge that is actually relatively simple to put together.

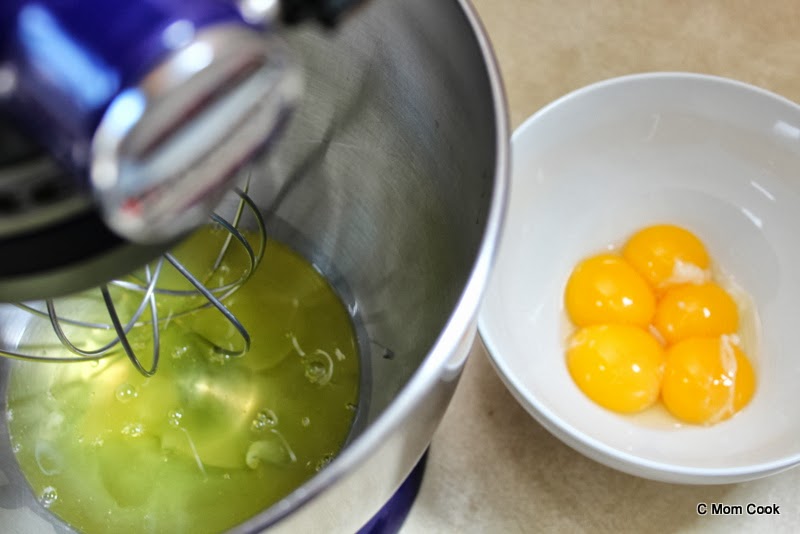
It starts by separating five eggs and whipping the whites and yolks separately.


Then, with the addition of some sugar (to the whites) and vanilla (to the yolks), the two are gently combined.


A little bit of flour is then folded in, then the whole thing is baked to light, airy deliciousness.


And then came the challenge.  The milks. Or... "milks," as the case may be.

The three milks used in the "real" recipe are heavy cream, sweetened condensed milk and evaporated milk.  Two of those were easy choices - for the sweetened condensed milk, I whipped up a batch of the dairy free coconut milk version.  For the heavy cream, I used coconut milk beverage. And for the evaporated milk? I couldn't decide. So I went way out of the box. I was inspired by the cooler temperatures, by the changing leaves... and went with pumpkin puree.


I know, it's not a milk. But I wanted to try it. So I did. I also added in a dollop (probably a tablespoon or two... I didn't measure...) of maple syrup as it cooked.


Now... the mixture cooked up deliciously, but it was a bit thick. I had some worries as to how it would work for the actual assembly of the cake, but I'd already made my choice, so I stuck with it.

I cut my cake in half to make two rectangles instead of one big square, and also trimmed the edges to help the cake soak up more of the liquid.


I also used a fork to poke holes in the surface of the cake, too, also trying to help the liquid to soak in.

And then I brushed on the pumpkin/"milk" mixture.


Yeah, it was a bit thick... A bit more like a custard than I'd anticipated... but I went with it.


The cakes were then popped into the fridge to rest, and then it was time for the final step - a coating of whipped cream.  Or... coconut whipped cream in our case.


The final cake looked decent, though I probably should have decorated the top a little bit more...


And the verdict?


Little miss liked it a lot.  Little man loved the whipped cream.  I liked it overall, but I definitely wish that the pumpkin/"milk" mixture had done a better job of soaking in. Daddy liked it, but thought that maybe there were a few too many flavors going on (pumpkin, maple, coconut... it's a bunch of strong flavors...).  All that being said, I was pretty happy with it, and am super glad that I was able to participate.

Inma, thank you so much for being such a sweet, helpful and enthusiastic host this month!! What a delicious challenge!

To see the challenge as presented to us, check it out here.

To see the amazing cakes baked up in the Daring Kitchen this month, check them out here.


Dairy Free Pumpkin Maple Coconut Tres Leches Cake
(inspired by this month's challenge)

For the sponge:
5 large eggs, separated
1/2 cup sugar
2 teaspoons vanilla extract
1 cup all-purpose flour

Preheat oven to 350. Prepare a square 9”x9” pan or 9” round cake pan
Separate the egg whites from the yolks.
In a stand mixer, beat the egg whites on medium speed, 3 - 5 minutes.
When soft peaks form slowly add the sugar in small batches.
Whip until stiff peaks form about 5 minutes. Set aside.
In a medium bowl (I moved the beaten egg whites to a separate bowl, cleaned out the mixer bowl and then reused the same bowl), beat egg yolks at medium-high speed for about 5 to 6 minutes, or until the egg yolks become pale colored, creamy and puffy. Stir in vanilla.
Pour the egg yolks over the egg whites, gently fold until just combined trying not to lose any volume from the mixture.
Fold in the flour little by little in the form of rain. Mix until just combined (over-beating will result in a denser, flatter cake).
Pour the batter into the prepared cake pan.
Bake in the preheated oven for 25 minutes or until the toothpick comes out clean.
Allow the cake to cool completely.


For the pumpkin "milk" mixture":
1 batch (about one cup) dairy free sweetened condensed milk (I used maple syrup to sweeten the sweetened condensed milk, to match the flavors I was working with for this cake)
1 cup coconut milk beverage
1 cup pumpkin puree (you may want to use less... maybe that would make the finished product thinner and help it soak in better...)
1-2 tablespoons maple syrup

Combine all ingredients in a medium saucepan and bring to a boil over medium high heat. Reduce heat and simmer the mixture for about 5 minutes. Remove from heat and allow to cool.


To prepare the cake:
prepared and cooled cake
prepared and cooled "milk" mixture
coconut whipped cream (from one can of coconut milk)

I chose to trim the edges of the cake to expose more of the interior sponge, but that is optional. Using a fork, gently poke holes in the surface of the cake. Using a pastry brush, brush the milk mixture over the top and sides of the cake. Be very generous with this step, using as much of the pumpkin mixture as you can.
Set the cake in the refrigerator for at least a few hours or overnight to allow the "milk" to soak into the cake.
Before serving, spread the coconut whipped cream over the cake like frosting.

Enjoy!

Friday, September 20, 2013

September Sourdough Surprises - Waffles

Ah, breakfast. The most important meal of the day. And probably the most fun, if you have time to do it up right!

This month, Sourdough Surprises had breakfast in mind when presenting our challenge - specifically, pancakes and waffles!

I've made sourdough pancakes before and they were a big hit. So for this challenge, I thought I'd switch it up and do waffles!  And, to make it all the more fun, we made them for dinner instead of in the morning. What's more fun than breakfast for dinner?

All it takes is a tiny bit of planning. The batter, while easy to prepare, needs to be mixed together a good eight hours in advance. No problem - I just whipped it all up after dropping little miss off at school in the morning!


The directions said that once all of the ingredients were incorporated, I would find myself with a nice, thick batter.


Umm... not so much. I was a bit worried, but covered it up and let it rest for the whole day, hoping that it would still work.

As dinner time approached, it was time to pull out the waffle iron and get down to the real work!


These cooked up beautifully - nice and crisp and golden, just how a waffle should be.


I will say that I think this recipe might be more suited to a traditional waffle iron rather than the Belgian style I have, but I don't think it matters too much either way.

We served ours with a delicious apple/pear compote on top.


And, of course, pork roll and mixed fresh berries on the side, as well, but the star of the dinner was definitely the waffles. Both kids ate theirs right up, and neither guesses that sourdough was involved!


So what breakfast goodie did you go with this month? Link up and let's see!


Sourdough Waffles
(from Breadtopia)

4 oz (1/2 cup or 115 g) butter
8 oz (1 cup or 225 g) milk (I used coconut milk)
9 oz (about a cup or 255g) white starter
1 tsp salt
1 Tbsp (packed) brown sugar
6 oz (about 1 1/2 cups or 170 g) all purpose flour
2 eggs
1/4 teaspoon baking soda

Heat the butter and milk in a small saucepan over medium heat until the butter is fully melted. Allow the  mixture to cool to room temperature.
As the milk and butter cool, combine your sourdough starter, salt, brown sugar and flour.  Once the milk mixture cools, combine everything together.
Once your batter is done, cover the bowl tightly with plastic wrap and let it stand at room temperature for 8-14 hours. (You can do this before going to bed if you want to have these for breakfast!)
When you are ready to proceed, preheat your waffle iron.
As it heats, beat the eggs and baking soda into the rested batter.
Pour 1/2 to 3/4 cups of batter on the hot waffle iron and close the lid. Let cook for 3-5 minutes until golden brown and crisp.
Top as desired and enjoy!
Related Posts with Thumbnails