Wednesday, November 20, 2013

Sourdough Kolaches

This month's Sourdough Surprises was particularly awesome, in that it was inspired by one of our members! She suggested that it might be fun to try to make kolaches, a pastry of Czeck or Slovak heritage consisting of a soft dough surrounding a sweet (usually) filling.

To be completely honest with you, I'd never heard of kolaches before this. I had to google them to get an idea as to what we'd be making.

And to make it trickier, we couldn't find a sourdough version anywhere. Sure, we'd seen references to sourdough versions, but we could not find a single sourdough-risen kolache recipe to use as our inspiration.

So this was a double challenge, as we would now all be forced to step outside of our comfort zones and either create or adapt a recipe for these treats.

Never having had kolaches before, I knew I couldn't create a recipe from scratch, so I chose to adapt one. I started with the King Arthur Flour version. To adapt the recipe, I started by omitting the yeast. Obviously.  I then looked to the wet ingredients. The easieset to look at, for substitution purposes, was the water.  1/2 cup.  Since my starter is at 100% hydration, it is comprised of equal parts water and flour. Well... by weight, not by volume. That's okay, it's close... I figured. So I thought... half a cup of water... there's approximately half a cup of water in one cup of starter... that's what I'll use. But, since that cup of starter also contains half a cup of flour, I figured I'd have to adjust the amount of flour called for in the recipe by, you got it, about half a cup.  Using these calculations and this jerry-rigged recipe, I was ready to start.

I'm pretty much going to let the photos tell the story here, because... well... there are a lot of them.

Once I'd figured out my recipe, the dough came together relatively easily, though it has a bunch of components, as this is a nice, rich pastry.  Melted butter, sour cream, sugar, eggs... and of course, our star... a cup of nice, bubbly, well fed sourdough starter.


And it's seriously just a matter of combining everything together...


...then adding flour until the douch turns into... well... dough.


The yeasted-version recipe that I was basing mine on had said that it would be a soft and smooth dough, but I was surprised at just how soft it was. I wound up needing to add about a cup more of flour than I'd anticipated, but was soon left with a dough that was super silky and soft, yet that I could shape into a ball for its overnight rest.


The next morning was when the real fun started.  My dough was nicely rested and ready to play. The recipe called for the dough to be divided into 20 equal sections. I made my job a little easier by starting with four so I could more readily make the smaller sections.


Little man tried to help me roll each section into balls. We both wound up washing our hands a lot that morning.


We soon had 20 balls of dough...


...which then needed to be flattened out.


Little man found this process to be hysterically funny.

Once the flattened dough balls had rested for another ten minutes, it was time to shape and fill them. I tried to use the back side of a spoon to create the indentations in the middle, but soon found that my fingers worked much better.


You can use any number of fillings, but I went a bit easy on myself and used jam. I used home-made peach jam to fill eight of them, pre-made grape jam for six, and for the final six, I decided to be decadent and used Biscoff.

All that was left was the streussel topping...


...and off to the oven they went!

Now, I knew that mine would take longer to bake than the recipe called for, since the base recipe had said that each of my 20 dough balls would be roughly the size of a golf ball. Mine were definitely larger than golf balls, so I had to really keep an eye. I waited until the dough got nice and puffy and golden...


...and knew that they were perfectly done.

The peach jam worked out really well. The grape...


...got a little runny.  The Biscoff was delicious, but made for an overall pretty dry pastry, so the fruit ones definitely received the better reviews, overall. But everyone really enjoyed them and they made a yummy treat (as well as a special breakfast, too!).

The batch made so many that I even packaged a bunch up to share with neighbors and friends.


What a great introduction to kolaches, and what a fun double challenge for myself!

So how did your kolaches work out? I can't wait to see everyone's posts!


Sourdough Kolaches
(adapted from King Arthur Flour)

For the dough:
1 cup sour cream
1/2 cup sugar
1 1/2 teaspoons salt
1/2 cup (1 stick) butter or margarine, melted
1 cup 100% hydration starter, recently fed
2 large eggs
4 cups all purpose flour (approximately)

Warm the sour cream gently, and combine it with the sugar, salt, and butter in the bowl of an electric mixer, fitted with the paddle attachment. Add the sourdough starter and eggs, and  mix to combine. Switch to the dough hook attachment and begin adding the flour. Knead the dough, continuing to add flour, until it’s soft and smooth.  This will take a little bit, so be patient. The dough will be very soft, but you will be able to make a loose ball with it. Transfer the dough to a lightly greased bowl, cover the bowl with plastic wrap, and allow the dough to rest at room temperature for a couple of hours, then refrigerate the dough overnight. Note: This dough won’t rise much, so don’t worry about having to put it in a huge bowl.

For the filling:
There are many, may options for filling. I used two different jams (one homemade, one store bought) and Biscoff for my three different fillings - be creative here!

For the streussel topping:
2/3 cup all purpose flour
1 cup sugar
1/3 cup butter, melted

Combine the flour and sugar, then stir in the butter, mixing until it is incorporated and the mixture is crumbly.
*note: this made way more topping than I needed - I recommend cutting back a bit... or, since the streussel topping is super delicious, finding something else to top with it!

When you are ready to assemble and bake:
Remove the dough from the fridge and divide it into about 20 pieces, rolling each piece into a ball. Place the dough balls on lightly greased or parchment-lined baking sheets, leaving about an inch between them. Flatten the balls till they’re about 1/2-inch thick, then cover them with lightly greased plastic wrap, and allow them to rest for 10 minutes.

Using your fingers, make a wide, deep indentation in the center of each flattened dough ball. Don’t be afraid of being decisive here; you want to make a deep enough indentation that it doesn’t just disappear as the buns rise and bake. Place about 1 tablespoon of your chosen filling into each bun. Cover the kolaches, and allow them to rise for about an hour. Don't worry if they don't rise much.

Preheat the oven to 350 degrees and sprinkle the streussel topping on top of each bun.

Bake the kolaches about 35 minutes, until golden brown (I checked mine every few minutes starting at about 20 minutes). Remove them from the oven, and serve warm, or at room temperature.

Enjoy!

Friday, November 15, 2013

#tributetolis #daringbakers

This is, quite possibly, the most difficult post I have ever written.

This post is a tribute to a wonderful, caring, funny person. Someone who touched the lives of countless people all over the world.

If you remember way back to my first posts, the whole reason that I started this blog was so that I could join the Daring Kitchen.  Since that time, I have completed 90 challenges, hosted two, and written several product and cookbook reviews for the site overall. I have learned so many things, from different cooking techniques to different world cuisines. I've also made countless friends. Good friends. All because of the Daring Kitchen.

And the Daring Kitchen was able to thrive because of the dedication, love and commitment of its founder, chief and backbone, Lis.

This week, we suddenly and very unexpectedly lost Lis. The Daring Kitchen lost its leader, the world lost an amazing person, and I lost a friend.

I can't find the right words to put here. I've been staring at the screen for a very long time just putting together these few sentences. There is nothing I can say to make sense of this. She was young. She was vibrant. She genuinely cared about each and every member of the group that she started. She was funny. She was a good person. And I can't believe that I'm writing a post about her in the past tense.

As painful as it is, as difficult as it is to understand, we (Daring Bakers, Daring Cooks, bloggers, family, friends and anyone who was touched by Lis) wanted to come together and pay tribute to the person behind the scenes. Through writing, through cooking, through baking - whatever helps.

I made pretzels.

These pretzels are made based on the first challenge that Lis ever hosted for the Daring Bakers back in November of 2006. They were the basis for the whole group, for the whole reason I have a blog at all.


So I made pretzles to honor a friend gone too soon.  To celebrate a life lived for others. To honor all of the love she put into everything she did. To honor her family and friends who are hurting so much right now.

The best way I can honor my friend is to try to help her legacy live on, which is what I will do.

Today, I do that with pretzels.

Lis, you will be forever missed. And forever remembered.

Thursday, November 14, 2013

November Daring Cooks' Challenge - Sopa Castellana

Our November Daring Cooks’ hostess was Begoña, who writes the beautiful blog, Las recetas de Marichu y las mías. Begoña is from Spain and didn’t want to go with the more common challenges of paella or gazpacho, she wanted to share with us another very popular recipe from Spain that we don’t see as often called Sopa Castellana which is a delicious bread soup!

Our hostess provided us with several delicious looking (and sounding) recipes, but the real requirements were that we make our own stock, use it to make a soup, and include a bread element. The recipes that were provided all looked delicious, but I wasn't sure if the kids would eat them, so I went pretty simple, in order to make something the family would enjoy.

I started with stock - chicken stock, to be precise.


And while the stock simmered away, I prepared a simple bread dough to make baguettes.


Once the stock was strained, I used it to make a simple chicken and corn soup. And once the baguettes were baked, I prepared my bread element - I sliced one of the baguettes into rounds and rubbed each round with a cut piece of garlic (adding a tiny garlic sliver to the top of each, as well). I then popped the rounds in the oven for about 7 minutes to toast them up a bit.


Three rounds into the bottom of each bowl, a hearty and healthy serving of soup right on top...


...and dinner was served!

My version is a bit more like... chicken soup with giant (soft-ish) croutons, but it was tasty! We always have our chicken soup with noodles, so this was a change, but it was a nice one, and everyone really liked the garlic rounds with their soup.

Thank you, Begoña, for this challenge - I hope one day to try the full, flavorful recipes that you provided, and I appreciate the opportunity to try something a little  bit different.

To see the full challenge, take a look here.

To see the other soups cooked up in the kitchen this month, check them out here.

Monday, November 11, 2013

Caramel Glazed Apple Bread

Happy Monday! And happy Secret Recipe Club reveal day!

This month's assignment brought me over to Family, Food, and Fun, a delicious blog written by Rebekah, an absolutely amazing woman. She has five absolutely adorable children and cooks and bakes beautifully. Reading her blog, it seems that we have similar approaches in how we feed our families (as much from scratch as possible and as many "real" ingredients as possible), so flipping through all of her posts was both fun and moutwatering.

I had a hard time (as always) choosing what to make, but found myself repeatedly drawn to her Caramel Glazed Apple Bread. Full of apple-y goodness and drizzled with caramel, how could I go wrong?

The only changes I made to the recipe were to eliminate the dairy aspects from it to make it a bit more little-man-friendly. While it does contain eggs, he can eat those baked into products like this. But I don't like to push my luck, so I like to try to make substitutions where I can. In this case, it was pretty straightforward - replace the buttermilk called for with coconut beverage. No problem. And I omitted the (optional) nuts, as well. Oh, and I took Rebekah's suggestion to add a bit of vanilla extract to the recipe - yum!

Little man helped me combine the dry ingredients...


...while I cracked the eggs and grated the apples.


The batter came together super easily, and was soon in the loaf pans, all ready for the oven.


And they baked up beautifully, all golden brown and yummy looking.


The only thing left to do was to make the caramel sauce. Now, the recipe calls for butter and milk. No problem, I thought. For the milk, more coconut milk. For the butter? I tried coconut oil.  Melt the coconut oil, add brown sugar and stir, stir, stir.

Umm... yeah. We had a bit of a problem.  The coconut oil melted easily. But the brown sugar didn't incorporate with it. No matter how much I mixed. All it did was...


...burn. Ew. Thank goodness it was a nice, mild day around here - I had to air out the house!

But a bit of fresh air (for the house, for the kids and for me, too!) gave me the breather I needed to try again. This time with Earth Balance buttery spread.  This time it worked, and I had a delicious sauce ready to drizzle all over the now-cooled breads.


Oh my gosh, this was delicious. The bread itself is moist and delicious, with a nice apple flavor. And it isn't overly sweet, either - which is perfect, seeing as the caramel sauce is absolutely decadent.  They pair together beautifully and make for a super delicious treat. We had this for dessert after dinner, then again for breakfast the next morning.


And I absolutely loved the color of the crumb of the bread - slightly pink and absolutely, invitingly appetizing.  The second loaf went directly into the freezer so that we can enjoy it in a couple of weeks as a delicious treat.

Rebekah, thank you for your delicious and inspiring blog - I am so impressed with you and already have a list of other recipes I plan to make from your blog! (Including these S'mores On A Stick - I had something like that at a fair over the summer and they are so fun!)


Caramel Glazed Apple Bread

For the Bread:
1 1/2 cups apples, grated and peeled apples (I used Jonagold)
1 cup packed brown sugar
1/2 cup buttermilk (I used coconut milk beverage)
1/4 cup canola oil (or other flavorless vegetable oil)
1/4 cup applesauce
4 eggs, lightly beaten
3 cups white whole wheat flour (I used all purpose)
2 teaspoons baking soda
2 teaspoons ground cinnamon
1 teaspoon salt
1 teaspoon ground nutmeg
1 teaspoon vanilla extract

For the Topping:
2 tablespoons butter (I used Earth Balance buttery spread, a vegan alternative)
1/4 cup packed brown sugar
1 tablespoon milk (I used coconut milk beverage)
1/2 cup powdered sugar


Preheat oven to 350°.  Grease bottoms only of two loaf pans with cooking spray or butter.
In a large bowl, stir together apples, the 1 cup of brown sugar, buttermilk (coconut milk), oil, applesauce, and eggs.  In a separate bowl, sift or whisk together the dry ingredients.
Stir the dry ingredients into the wet ingredients just until moistened.  Pour into prepared pans.
Bake 35-40 minutes or until toothpick inserted in center comes out clean. Cool in pans for 10 minutes, then remove from pans and cool on wire racks.
While the breads cool, prepare topping:
In a small saucepan, melt butter (or substitute) over medium heat.  Stir in the 1/4 cup of brown sugar.  Heat until boiling, stirring constantly.  Reduce heat to low.  Boil and stir for another 2 minutes.  Stir in milk.  Heat to boiling; remove from  heat.  Cool for 10-15 minutes. 
Gradually stir powdered sugar into glaze mixture.  Stir in additional milk, 1/2 teaspoon at a time, as needed, if mixture is too thick.  Beat until smooth and thin enough to drizzle.  
Drizzle glaze over loaves. 
Wrap tightly and store at room temperature for up to four days or refrigerate up to ten days. 

Enjoy!


Sunday, November 3, 2013

Vegan Banana Chocolate Chip Bread Pudding

Wow - a non-challenge post? Shocking! 

I know I keep saying we've been busy, but that's not really a good excuse. Yes, I'm still cooking and baking, but I feel that I've been in a bit of a blog rut. And for that I apologize. But I promise I have not forgotten about you, and I greatly appreciate that you are here reading this. Thank you!!

So, I know how it sounds... vegan bread pudding... honestly, only the hard-core vegans I know find the thought of it appealing. I mean... the whole idea of bread pudding is the custard, rich with eggs and milk (or, even better, cream!). But when one member of the family is allergic to those two key ingredients. well, it just doesn't seem fair to load up a dish of deliciousness with things he can't eat.

Believe it or not, this recipe is super easy. And tasty enough that non-vegans like it!!

It starts the way "normal" bread pudding starts - with bread. Lots and lots of bread, all cut up into cubes.


And then we go to the "custard." Only, in this case, it's not custard. It's coconut milk (or whatever milk you choose), maple syrup and spices.


If you're lucky enough to have a cute baking assistant, by all means, have him help you mix together the "custard."


Once the bread soaks up the "custard," mix in some mashed bananas and chocolate chips.


Then just smoosh everything into a  sprayed loaf pan.

Yes I said smoosh.

Trust me, it's what you have to do.


Into the oven, everything all toasty and golden...


...then all that's left to do is to wait for it to cool... and to find someone brave enough to taste it. A lot of people were a bit... put off by the word "vegan" in the title.

But then they tasted it.  And were shocked. This is very rich and very, very delicious. With pockets of chocolatey and banana-y goodness mixed in, this is an absolutely delicious treat. That you can even have for breakfast, if you are so inclined... just sayin'...


So call it allergen-friendly if you must, but definitely give this a try - I promise you won't be disappointed!


Vegan Banana Chocolate Chip Bread Pudding
(from vegan.com)

6 cups 1″ cubed stale bread (about 1 lb)
1 cup chocolate chips
3 ripe bananas, roughly mashed
2-2 1/4 cups rice milk, almond milk, soy milk or coconut milk (I used coconut milk beverage)
3 tablespoons arrowroot powder or tapioca flour (I used cornstarch)
1/2 cup maple syrup
1 teaspoon vanilla extract
1/2 teaspoon cinnamon
1/4 teaspoon ground nutmeg

Preheat oven to 350 degrees and grease a 9 x 5 loaf pan with nonstick cooking spray. Place cubed bread in a large bowl.
In a small bowl whisk together 1/2 cup of the milk you are using with the arrowroot powder (cornstarch) until no lumps remain. Add 1 1/2 cups of the milk you are using, maple syrup, vanilla, cinnamon and nutmeg and whisk to combine. Pour over cubed bread and stir to coat every piece. Allow to sit for at least 15 minutes for liquid to soak into bread. Depending on what kind of bread you use and how stale it is, you may need to add a bit more milk - just do so slowly, then allow more soaking time till every piece of bread is saturated and there’s a little bit of extra liquid. Mixture should look mushy and wet. Fold in chocolate chips and bananas. Pour mixture into loaf pan, patting down to make an even top.
Bake 28-35 minutes till top is puffed, slightly browned and feels firm. Allow to cool slightly before slicing and serving. Also pudding can be scooped with an ice cream scoop when slightly cooled.

Enjoy!

Sunday, October 27, 2013

October Daring Bakers' Challenge - Savory Pot Pie

This month's Daring Bakers' Challenge was a little different from the norm.  Usually the challenges have us baking up all kinds of sweet goodies. Or breads.  This month, that wasn't the case.

Hannah of Rise and Shine was our October 2013 Daring Bakers’ hostess and she challenged us to bake our own double crusted savory pot pies. Using any from-scratch crust and filling we choose, we were allowed to get completely creative with our recipe, showing off the savory flavors and fillings from our own home or region.

What fun - a savory baking challenge!  I pondered long and hard as to what kind of filling to choose. But I kept coming back to our old standard - chicken pot pie.  Yes, yes, I know that there are so many more pot pies, that I really should have been more creative... but we really, really like chicken pot pie. In fact, I've even shared other versions with you before - here, here and here.  But what can I say? It's good!

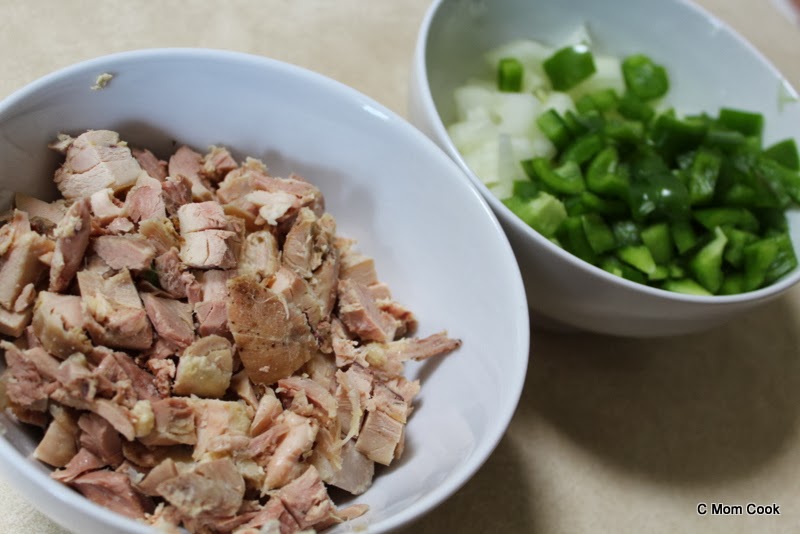
The version I chose to make for this challenge was slightly Mexican inspired.  And it started with the prep work - chopping sweet onion, green pepper and pre-cooked chicken.


I made my pot pie completelly dairy free so that little man could enjoy it. Usually, the sauce of a pot pie starts with some kind of roux, which is generally made with a combination of butter and flour. I started by sauteeing the onions and peppers in olive oil, then added a bit more oil, then my flour.


I then poured in chicken stock, which thickened up beautifully with my improvised roux.  And then all that was left to do was add in the rest of the goodies - corn kernals, black beans and the chicken.


And for my crust? Sourdough, of course!


And then it's just a matter of putting everything together...


...and baking it up!


It was awesome to see how well the crust baked up on all sides of the pie - golden delicious and crispy on all sides!


But the most important part is how it tasted.  And it tasted delicous. Little miss even asked for seconds. Which, if you know seven-year-olds and dinner, is not an everyday occurance.


Hanna, thank you so much for giving me a fun opportunity to make a delicious meal for my family. I hadn't made a pot pie in a while and now I know I'll be making them a lot more often.

To see the challenge as Hannah prepared it, with all of her delicious inspiration recipes, check it out here.

To see the other delicious pot pies baked up in the kitchen this month, check them out here.


Sourdough Pie Crust
(from The Bojon Gourmet)

2 cups flour (you can use all purpose, whole wheat or a combination)
1 teaspoon salt
2 teaspoon sugar
1 cup (2 sticks) butter, cold, cut into cubes
about 1 cup 100%-hydration sourdough starter


In a large bowl, whisk together the flour(s), salt and sugar. Add the butter and rub it in with your fingertips until the mixture looks like gravel, with some butter worked in and some 1/4" chunks remaining. Gradually add the starter, folding the mixture with a spoon or your hands until it just starts to come together into large clumps.

Turn the dough out onto a lightly floured surface. Divide roughly into 8 portions. Fraisage the dough: using the heel of your hand, scrape a portion of dough across the surface. Repeat with the remaining dough. Gather the dough into a ball. Flatten the ball into a disc and wrap in plastic wrap. Chill for at least 30 minutes, and up to a few days. (Or freeze for up to a couple months. Defrost before proceeding.)


Mexican-Inspired Chicken Pot Pie Filling
(made it up as I went along!)

4 tablespoons extra virgin olive oil
1 sweet onion, chopped
1 green bell pepper, chopped
1/4 cup flour
2 cups chicken stock
1/2 can corn kernals (drained)
1/2 can black beans (drained)
2 cups cooked chicken, chopped
salt, pepper, cumin, paprika, to taste
2 tablespoons salsa

In a large sauce pan,  heat one tablespoon of oil over medium  high heat. Add chopped onion and and pepper and sautee until softened and fragrant. Season with a touch of salt and pepper.  Add remaining oil, then sprinkle in flour. Mix well to fully incorporate the flour. The mixture will be thick, almost like a paste. This is okay.
Pour in the chicken stock and mix it well until there are no lumps from the flour.
Stir in the corn, black beans and chicken. Season to taste with your spices.
Remove the pan from the heat and stir in the salsa.
Allow the mixture to cool.

To prepare the pot pie:
When you are ready to proceed with your pie, preheat your oven to 375 degrees and remove the dough from the fridge. If it is very firm, you may need to let it soften at room temp for 15 minutes or so. On a lightly floured surface, roll half the dough out into a round large enough to line the bottom of the dish you are using for your pot pie. I used a 1 1/2 quart casserike dish. Fit the crust into the pie pan leaving a slight overhang.

Pour cooled filling into the prepared bottom crust.

Roll the remaining dough into a round just slightly larger than the dish and place it on top of the filling.  Trim the bottom crust to approximately the size of the top crust, tuck the edges under all the way around and crimp the edges (with a form or your fingers - whatever look you are going for). Cut a few vent slits in the top crust.

Bake pie for 45 minutes until the crust is golden brown.

Allow to cool for a few minutes before serving.

Enjoy.


Sunday, October 20, 2013

October Sourdough Surprises - Quick Breads

This month's Sourdough Surprises challenge was the perfect choice for how busy things have been around here - quick breads! You know, muffins or other breads that can be started, baked and completely finished in darn near no time flat.

We love muffins in our house, and I've made plenty of varieties over the years. And have made quite a few sourdough quick breads, too, from sourdough beer bread to a sourdough chocolate banana loaf.  So despite sourdough's reputation for requiring lots of time, there is so much that you can do with it quickly, too!

I couldn't decide what to make for this challenge, since there are so many options to choose from, but decided, on a whim one afternoon, to whip up some muffins as an after school snack for little miss.

I started with my go-to site for quick sourdough recipes, then took inspiration from my favorite fall flavor - pumpkin!

With a hint of cinnamon and a swirl of pumpkin-y goodness, I quickly threw together sourdough pumpkin swirl muffins!


It's amazing how easy these are to make. So easy, in fact, that I completely forgot to take in-process photos. Oops!

But the most important part is that the kids loved them, and so did us parents. And they made a perfect after-school snack, and even a pretty good breakfast the next morning!


So what kind of quick bread did you make this month? Link up and show us!


Sourdough Pumpkin Swirl Muffins
(based on Smart Sourdough Mama)

1 cup flour
1/4 cup sugar
1 teaspoon baking powder
1/4 teaspoon soda
1/2 teaspoon salt
1 teaspoon ground cinnamon
1 well beaten egg
1 cup sourdough starter (100% hydration)
1/4 cup oil
1/4 cup pumpkin puree

Preheat oven to 400 degrees and spray a 12-well muffin tin with non-stick cooking spray.
Sift flour, sugar, baking powder, baking soda, salt and cinnamon into a bowl and mix to combine. Make a well in the center. Combine egg, starter and oil. Add all at once to the dry ingredients. Stir quickly just till dry ingredients are moistened. If your starter is thicker you may need to add a little milk.  Once the ingredients are just combined, spoon in the pumpkin puree and stir just a few times, only to swirl the pumpkin evenly through the batter. Make sure not to fully incorporate the pumpkin or you will lose the swirl.
Fill greased muffin pans 3/4 full.
Bake at 400 F about 17-20 minutes. Makes 9-12 depending on the size of your muffin tins (I got 11).
Allow the muffins to cool for a few minutes, then transfer them to a wire rack to cool completely.

Enjoy!
Related Posts with Thumbnails