Friday, September 14, 2012

September Daring Cooks' Challenge - Paella

Our Daring Cooks’ September 2012 hostess was Inma of la Galletika. Inma brought us a taste of Spain and challenged us to make our very own delicious Paella!

I have been wanting to try paella for a long time, but something kept holding me back.

Perhaps it was the fact that paella is, traditionally, a very seafood heavy dish. And we don't eat much seafood in our house. Which makes it funny that it's been on my list...

But this month's challenge not only gave me the final push that I needed, but provided options that better suited my family than what I'd always though of when hearing paella.

Our wonderful hostess Inma provided a vegetarian version of the recipe, which is what I went with. But, of course, I adjusted it for the vegetables that I had on hand.

Which was a lot.


Trust me when I say that the longest and hardest part of this recipe is the prep work. All of those vegetables needs to be chopped. Which takes a lot of time. And a lot of bowls.


*phew*

If you notice, I un-vegetarianized the recipe... I added chicken...

But once all the cutting and chopping was done, it was time to cook. I used the biggest pan that I have, which is much smaller than a standard paella pan. But each vegetable (or sometimes pair of vegetables) is sauteed and then pulled off to the pan to make room for the next one... It takes a bit of time, but it is not too difficult.

Another thing that I was excited for with this recipe is that it gave me a chance to use this:


My wonderful mother in law included this bottle of saffron in a gift bag for me one time, and I have been looking for the perfect time to give it a try.  Well, saffron is a key spice in paella, so it worked out perfectly!

Anyway, once everything has been sauteed, EVERYTHING is returned to the pan, spiced, liquid is added (chicken stock, in my case), and then, when the liquid comes to a boil, rice is added. Finally, the pan is covered to let everything finish cooking.


I think I added too much liquid... Not quite sure what happened there, but even once all of the rice was fully cooked, absorbing as much of the liquid as it needed, my paella was still pretty wet.


But it was still delicious. I am not sure if the extra liquid was due to a conversion error on my part, or due to the different vegetables that I used... either way, this came out a bit more like a chicken/vegetable/rice stew than what I think of as a traditional paella.  But again - it was delicious. And I am glad that I finally gave the dish a shot!

Inma, thank you very much for giving me the kick I needed to give this delicious dish a try.

To see the other paellas cooked up in the kitchen this month, check them out here.


Vegetable Paella:
(recipe as posted in September Daring Cooks' Challenge)
Servings: 4 people

Ingredients
9 oz (250 gm) cauliflower
2 red (bell) peppers (capsicums)
3½ oz (100 gm) green beans
2 oz (50 gm) shelled peas
3½ oz (100 gm) shelled tender beans
A bunch of tender garlic
2 natural artichokes
1 eggplant (aubergine)
2 medium potatoes
2 ripe tomatoes
4 garlic cloves
14 oz (400 gm) of rice
1¼ cups (300 ml) oil
saffron, paprika and salt
12 cups (3 liters) of water

Directions
Cut the cauliflower in pieces, wash and rinse it.
Wash the peppers, cut them, remove seeds and stem.
Cut both edges of the green beans, wash them and chop them.
Peel and chop the garlic
Clean the hard leaves of the artichoke, cut the edges and chop them soaking in water with lemon juice.
Peel and chop the eggplants and potatoes.
Peel and mince the tomatoes and garlic.
In a paellera heat the oil and fry in the following order:
The eggplant and peppers, remove and reserve
Then the potatoes, cauliflower, artichoke, green beans, beans, peas, garlic and finally the tomatoes and the chopped garlic.
Add 1 teaspoon of paprika and 3 liters of hot water.
Add a pinch of salt and a pinch of saffron.
Cook over medium heat for 30 minutes. Add the eggplant and the peppers. Cook 15 additional minutes.
Add the rice, distribute it in the paellera.
Cook over high heat for 10 minutes and gradually reduce the heat to medium and cook for other 8 to 10 minutes.
Remove from heat and let stand for 5 minutes and it will be ready to serve.

Storage & Freezing Instructions/Tips:
You can store it in a sealed container in the refrigerator up to 3 days.
Freezing is not allowed.

Enjoy!

Wednesday, September 12, 2012

Crock Pot Apple Pie Oatmeal

This whole having-a-school-age-kid thing is tough. She has to adjust to all day school (kindergarten is half-day here), and, honestly, I have to adjust to her being gone all day. 

One of the adjustments that we have to make concerns food.

When she is home, we can schedule meals and snacks around our appetites, and we can spread the daily nutrition requirements among, well, a whole day's worth of meals and snacks.

Being in school all day makes that a little tougher. I have to make sure that she has a nutritious and filling breakfast first thing when she wakes up, and it has to be a meal that can carry her all the way through to lunch time, as there is no morning snack at school.

Little miss likes oatmeal, and I like that it is a filling start to her day. So this week, I decided to try a new overnight, crock pot version of oatmeal. This past spring I made pumpkin oatmeal in the crock pot, but this time I was inspired by a different autumn fruit - apples.  I looked around online to find some guidance, and after reading this recipe, I decided to just go for it.

I started by putting the oats in the crock pot, and then chopped up three granny smith apples. The recipe I read called for two apples, but I wanted my oatmeal to be super apple-y, so I added an extra.


And then I kind of went off-recipe. Meaning I didn't actually remember the real measurements and, as it was late, didn't bother grabbing the computer to re-check them.  Turns out that I added one more cup of liquid than the original recipe calls for, but, funny enough, I usually do increase the liquid a little bit when I make oatmeal, as we like ours nice and creamy. Coconut milk, water, brown sugar, cinnamon, and even a little bit of honey (I have no idea why I wanted to add the honey - I just did...).


I then stirred everything together put the lid on the crock pot and went to bed.


Nope, I didn't turn it on. I go to bed about nine hours before breakfast time, and this oatmeal only takes seven hours to cook. So I enlisted daddy to help - he was up later than I was. I asked him to please turn the crock pot to low before coming up for the night, as I knew that, even if it was more than seven hours, it would be closer than if I started it up before I went up.

And it worked out beautifully. We woke up in the morning to this:


It smelled like fall and was deliciously creamy.


Everyone enjoyed it and I felt good about little miss having a healthy yet delicious start to her day.


Crock Pot Apple Pie Oatmeal
(inspired by The Yummy Life)

3 apples (I used granny smith)
1 cup steel cut oats
1 1/2 cups coconut milk (the beverage kind, not the canned variety)
2 1/2 cups water
1 tablespoon butter
2 tablespoons brown sugar
1 teaspoon ground cinnamon
1 tablespoon honey

Peel, core and chop the apples. Combine all ingredients in your slow cooker. Set cooker to low and cook for seven hours. Remove lid, stir and enjoy!

Monday, September 10, 2012

Apple Kugel

Have you heard of the Secret Recipe Club? It's this fun idea where members are assigned a blog of another member, and get to choose one recipe from that assigned blog to make and post about all on the same day. And no one knows who has whose blog until the posting date. Thus... secret!

I heard about this club a while ago, and instantly wanted to join.  So I immediately set about working on my blog, making as many improvements as I could, and I applied. But the wait list was lllllloooooonnnnnnggggg.

I almost gave up hope, to be honest.

Until last month! I got the exciting message that they were working down their waiting list and that I was now a member! Hooray!

I eagerly awaited my first assignment, and when it came, I couldn't wait to check it out.  I was assigned Bizzy Bakes, which is a really great blog chock full of delicious looking recipes!!

Seriously, every single time I checked her blog, I found more recipes that I wanted to try.

So I finally just had to choose... and the recipe that I kept coming back to me was one for Apple Kugel.  I had always thought of kugels as noodle puddings, so this noodle-less kugel intrigued me, and I just knew that it would be my choice.

The stars of this recipe are the fruits - and veggie.  Apples (I used two gala and two fuji), a carrot and dried cranberries.


All that fresh goodness is shredded, chopped and combined.


In a separate bowl, you mix together a batter. I made a couple of minor changes to the recipe as it was posted... instead of one cup of white sugar, I used a half a cup of white and a half a cup of light brown sugar.


The other change that I made involved the wet ingredients - the recipe calls for 3/4 cup of oil. To up the apple-ness (that's a word, right??), I substituted 1/4 of a cup of applesauce in place of 1/4 of a cup of that oil.


Then the batter is mixed up, and the fruit (and veggie) is folded in, and the whole thing is poured into a sprayed baking dish.


And then it bakes! And turns beautiful and golden and smells delicious.


We served this as a side dish to roasted chicken, and it was absolutely delicious. Seriously, daddy and little miss thought that I'd put a scoop of dessert on their dinner plates. And they both had seconds.


And little miss may have had another piece for breakfast the next morning...

I will definitely be making this one again, and can't wait to try more recipes from Bizzy Bakes!


Apple Kugel
(only slightly adapted from Bizzy Bakes)

4 -5 apples, peeled, cored and cubed
1 carrot, peeled and shredded
1/2 cup dried cranberries
1 cup all  purpose flour
1/2 cup grandulated sugar
1/2 cup light brown sugar
2 teaspoons baking powder
1/2 cup oil
1/4 cup applesauce
juice of 1 lime (or 1 teaspoon lemon juice)
1 teaspoon pure vanilla extract
2 eggs, beaten
Ground cinnamon to taste

Preheat oven to 350 degrees.  Spray 1 1/2 quart casserole or 8 inch square baking pan with non-stick cooking spray.
In a medium bowl, combine apples, carrots and cranberries.  Set aside.
In a separate bowl, mix together flour, cinnamon, sugars, baking powder, oil, apple sauce, lime (or lemon) juice, vanilla extract and eggs. Mix together until well combined.
Add apple, carrot and cranberry mixture to prepared batter.  Mix well.
Pour into prepared pan.  (If you would like, sprinkle cinnamon sugar on top. I didn't do it this time, but I will definitely try it next time!)
Bake for 45 minutes at 350 degrees until golden on top.
Serve warm or hot.

Enjoy!


To check out more of the deliciousness from Secret Recipe Club members, check these out!


Saturday, September 8, 2012

Cheese-Filled Garlic Focaccia for Twelve Loaves

Are you on Twitter?

I recently joined, and am still figuring it out. 

At this point, I am following a bunch of fellow food-bloggers, but I'm starting really slowly.

But I'm glad I joined, because that is how I learned the theme for this months Twelve Loaves (#TwelveLoaves) bread baking group - cheese!

At first, all of my thoughts were of the sweet variety - danishes and other breakfast or dessert treats using sweet cheese fillings.

And then I changed my mind. While it might not be the most original thought, I suddenly had the desire to make a focaccia. And to try to stuff it with cheese.

I started by making the most basic dough that I make - the one that I used when making my French Fougasse. I know, "French" focaccia... but I was looking for a basic lean dough, and that one does it.

Once the dough was done rising, I gathered the rest of my ingredients - oil, garlic salt, sliced provolone and grated Parmesan.


And then it was time to work on the dough.


I started by covering a cookie sheet with parchment, then rolling out my dough as large as I could.


I transferred the dough to the baking sheet, where it hung off of both sides, and then placed slices of provolone over the middle.


I then folded the dough back over itself and did my best to seal all the seams.


And then I did my best to turn it into a focaccia by using my fingers to dimple the surface. I then brushed lots of olive oil over the top and gave it a healthy coating of garlic salt and grated Parmesan.


I let the prepared bread to rest for half an hour, and then baked it in a 425 degree oven for about 25 minutes. And when it came out, it smelled amazing and looked beautiful.


And it was BIG! It was the size of my biggest cutting board.


But most importantly, it was DELICIOUS.


I shared some with my neighbor, and between me, daddy, little miss and that neighbor, we ate the whole thing by the end of the day.

I want to give a big thanks to this months hosts, Cake Duchess, Creative Culinary and Life's A Feast for this fun challenge. I still may make a sweet cheese bread, but this is something I wouldn't have thought of if not for the cheese theme.

And don't forget to check out gallery at the bottom of Lora's post to see the other cheese breads baked up for Twelve Loaves this month!


Cheese-Filled Garlic Focaccia
(my own adaptation, based on my previous bread)


500 grams bread flour
5 grams active dry yeast
10 grams salt
375 ml water
5-8 slices of provolone cheese
extra virgin olive oil
garlic salt (to taste)
grated Parmesan cheese (to taste)

Stir yeast into the flour until evenly distributed. Stir in salt, then water, and mix until the dough begins to form.
Transfer the dough to a clean work surface. Continue mixing/kneading the dough by stretching it out and folding it over onto itself repeatedly and from each direction. Continue working the dough until it comes away cleanly from the work surface and is not (or, for me, is less...) sticky.
Move the dough to a floured area of your work surface, and shape the dough into a ball (as best as you can - it is still a wet dough). Transfer the dough into a lightly oiled (large!) bowl, cover it with a tea towel (or plastic wrap) and allow it to rest for at least one hour.
After the dough has rested, turn it out (carefully) onto a floured work surface. Generously flour the top of the dough, then cover with a tea towel and allow it to rest for another five minutes or so.
Cover an 11" x 17" cookie sheet with parchment paper and spray it with cooking spray.
Roll out the dough until it is a rectangle about double the size you want it and transfer it to the prepared cookie sheet.
Place the slices of provolone on the dough and then fold the ends over itself to cover all the cheese, fully enclosing the bread. Pinch all of the seams and then use your fingers to spread the dough evenly over the surface and dimple the top.
Brush the top liberally with olive oil and sprinkle (to taste) with garlic salt and grated Parmesan cheese.
Allow prepared bread to rest for 30 minutes.
Meanwhile, preheat oven to 425 degrees.
Bake bread for about 25 minutes until the top is golden brown.

Enjoy!

Friday, September 7, 2012

Chick Pea Spread

Kids can be such picky eaters.

I consider myself pretty lucky at the variety of foods that my kids will eat. 

But.

But they are still kids, and are thus still pretty picky.  Between allergies and preferences, it can sometimes be hard to keep up.  

But every once in a while these picky-issues work out in my favor.

Like how little miss prefers my home-made chick pea spread to store bough hummus.  

This easy version is super quick, and is much less expensive than its store bought counterpart.  It only has four ingredients, and can be whipped up super quickly.

It stars with a can of garbanzo beans (chick peas, mostly drained), a clove of garlic (or more, depending on how strong you like the garlic flavor) and a sprinkling of salt.


Blend those together in a food processor (I use the mini food processor attachment to my immersion blender, you can use whatever you have!). Then add a teaspoon of sesame oil.


You can use olive oil or any other oil you'd like. Since I omit the tahini (sesame seed paste) that is traditionally used in hummus, I use the sesame oil to add a touch of "authenticity" to my, well, mock-hummus. But seriously, use what you have and what you like.

Then mix a bit more until you have the consistency you want.


Aanndd... then you're done. Yeah, that's it!

Little man eats his with multi-grain pretzels.


Okay, he uses his fingers. He tends to just use the pretzel as a spoon, anyway, so the fingers work just as well...

We dip pretzels, chips, crackers, carrots, cucumbers... we spread it on sandwiches, bagels... pretty much everywhere. Yum!


Chick Pea Spread
(my own version)

1 15-ounce can garbanzo beans (chick peas)
1 clove (or more, to taste) garlic
1 pinch of salt
1 teaspoon sesame oil

Mostly drain the can of chick peas, leaving a little bit of the liquid, then empty the chick peas and the little bit of liquid into a food processor. Add the clove of garlic and salt. Process until everything is well chopped and combined. Add the oil and continue to process until the mixture is as smooth as you would like it.

Enjoy!

Wednesday, September 5, 2012

BBD #53 - Swirly Bread Roundup!

I have been waiting for a month to share this post.
It's a post that was a whole month in the making.
It has been a pleasure all month to check my inbox and be greeted by beautiful, delicious swirliness.


It is my honor and pleasure to present to you the roundup for Bread Baking Day #53 - Swirly Breads!


The first beautiful bread is an Estonian Kringle with coconut.


It was baked by Connie, who comes from the Netherlands and lives in Thailand. Connie blogs at my discovery of Bread.


The next bread is a delicious Wild Garlic Pesto-Italian Cheese-Knot


It was baked by Sandra, from Seeheim, Germany, who blogs at from-snuggs-kitchen.


Our next swirly deliciousness is this lovely Paprika Brotschnecke / Paprika Bread Plait.


This savory filled bread was baked by Katha in Berlin Germany, who blogs at Katha-kocht!


This next mouthwatering beauty is a Kanlefläta - Cinnamon Swedish Braid.


This braided, cinnamon-y delight was baked by Barbara, from Sweden, who blogs at My Italian SmörgÃ¥sbord.


Our next bread took a slightly different inspiration from our "swirly" theme, and presented us with this beautiful Wurzelbrot With Walnuts, which she called her swirly bread with a twist.


This twisty, swirly goodness was baked by Ninive, from Germany, who blogs at ninivepisce - Music, Dreams & more.


The next swirly beauty is this delicious looking Zimtwirbelbrot, a cinnamon swirly bread.


This cinnamon-swirled loaf was baked by Bella in Otterwisch Germany, who blogs at Kirschfrau.


The next submission for this month comes in the form of these beautiful and adorable Kanelbullar (Swedish Cinnamon Buns).


These gorgeous little swirls were baked by Korena from British Columbia, Canada, who blogs at Korena in the Kitchen.


Another wonderful, mini, swirly beauty came to us in the form of the amazing chocolate swirly brioche buns.


These delicious swirls were baked by Jenni in Ohio, USA, who blogs at The Gingered Whisk.


Our next swirly bread is the delicious chocolate babka.


This beauty was baked by Ruth in Pennsylvania, USA, who blogs at The Crafts of Mommyhood.


The next submission is a savory, spicy Sriracha Cheddar and Pepper Jack Swirl Loaf.


This amazing bread was baked by Lisa in New Jersey, USA, who blogs at Parsley, Sage & Sweet.

Lisa also earns an honorable mention, as she was doubly inspired this month, and prepared a second swirl - this Three Cheese Prosciutto, Roasted Red Pepper, Broccoli Rabe Stromboli.


Yum! Thanks, Lisa!


The next submission brought us back to mini-swirls with these beautiful Walnut-Honey Swirls.


These sweet treats were baked by none other than our wonderful founder Zorra, in Andalucia, Spain, who blogs at 1x umrühren bitte aka kochtopf.


Following the sweets, our next bread brought us back to some savory swirls with this lovely Sun-dried Tomato and Parmesan Swirl Bread.


This flavorful bread was baked by Judy, in California, USA, who blogs at Judy's Gross Eats.


Our next swirls help bring us into the autumn mood with these beautiful Apple, almond and cinnamon swirls.


This apple-y goodness was baked by Manuela, from Portugal but living in São Paulo, Brazil, who blogs at Cravo & Canela.


Our next beautiful swirls came in the form of this lovely Roses Cake.


This delightful confection was baked by Cinzia, from Garda Lake, Italy, who blogs at Cindystar.


And, finally, my own submission for this month's swirly bread challenge. I baked a chocolate povitica.


I also baked a cinnamon swirl bread this month, as I couldn't get enough of the gorgeous, swirly goodness!


Thank you so much to all of the fabulous bakers who participated this month - it has been an honor and a pleasure seeing each of these delicious goodies come into my inbox, and I look forward to trying each and every one of these!

Thanks, Zorra, for the opportunity to host this wonderful event and I look forward to baking with you all again soon!


Wednesday, August 29, 2012

Chocolate Povitica for BBD#53

When I chose the topic for this month's Bread Baking Day event, I wasn't sure what I was going to choose as my own submission. There are so many beautiful and delicious options that it was very hard to choose just one. But my mind kept returning to a beautiful and utterly swirl-filled bread that I'd made once before, and I just knew that I would take this opportunity to make it again.

I'm talking about the povitica.  I originally made the povitica as a Daring Bakers' Challenge, but have been looking for an opportunity to try it again, as everyone in the family truly enjoyed it.  And, being the swirliest bread that I have ever made, I knew that now was the time.

The original recipe provided for the challenge was written to make four loaves. When I made the bread for the challenge, I halved the recipe and made two loaves. Today I chose to make just one, so did a little bit of math and quartered the recipe.

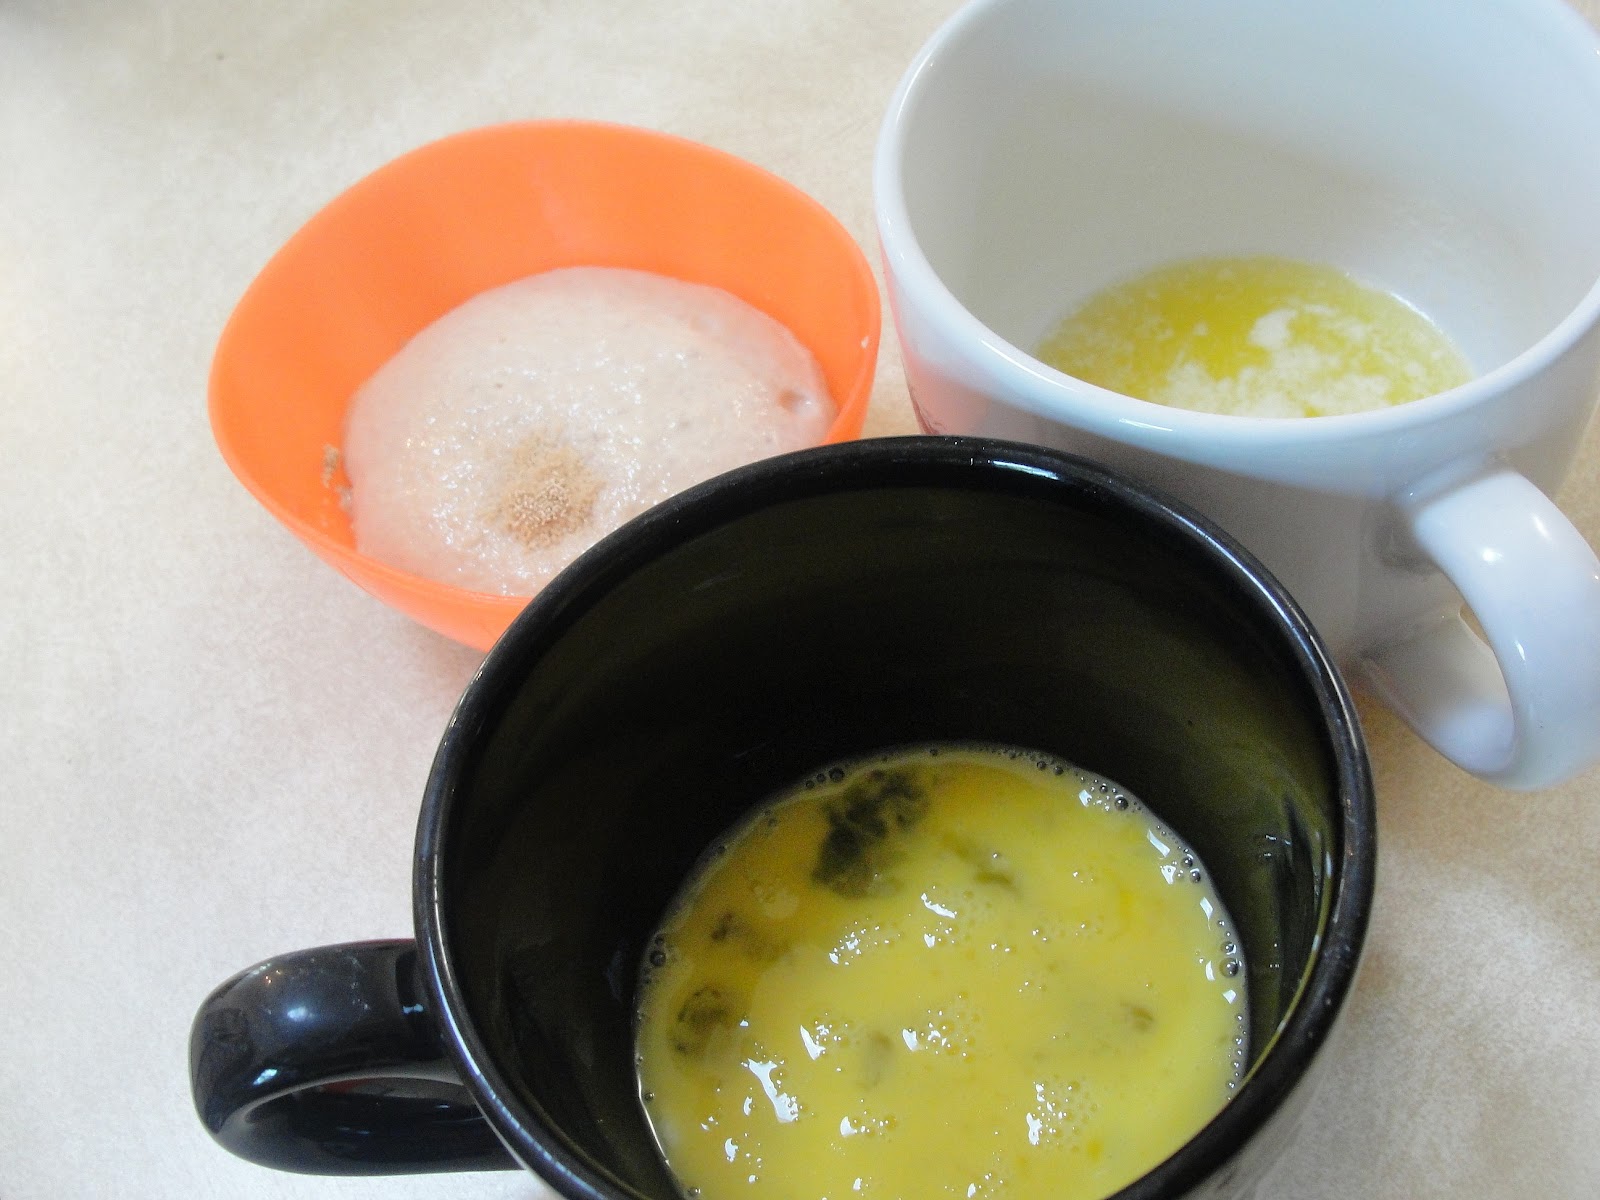
The dough comes together pretty easily, but has  a few components, including activated yeast, melted butter and beaten egg, so it generates quite a few dishes.


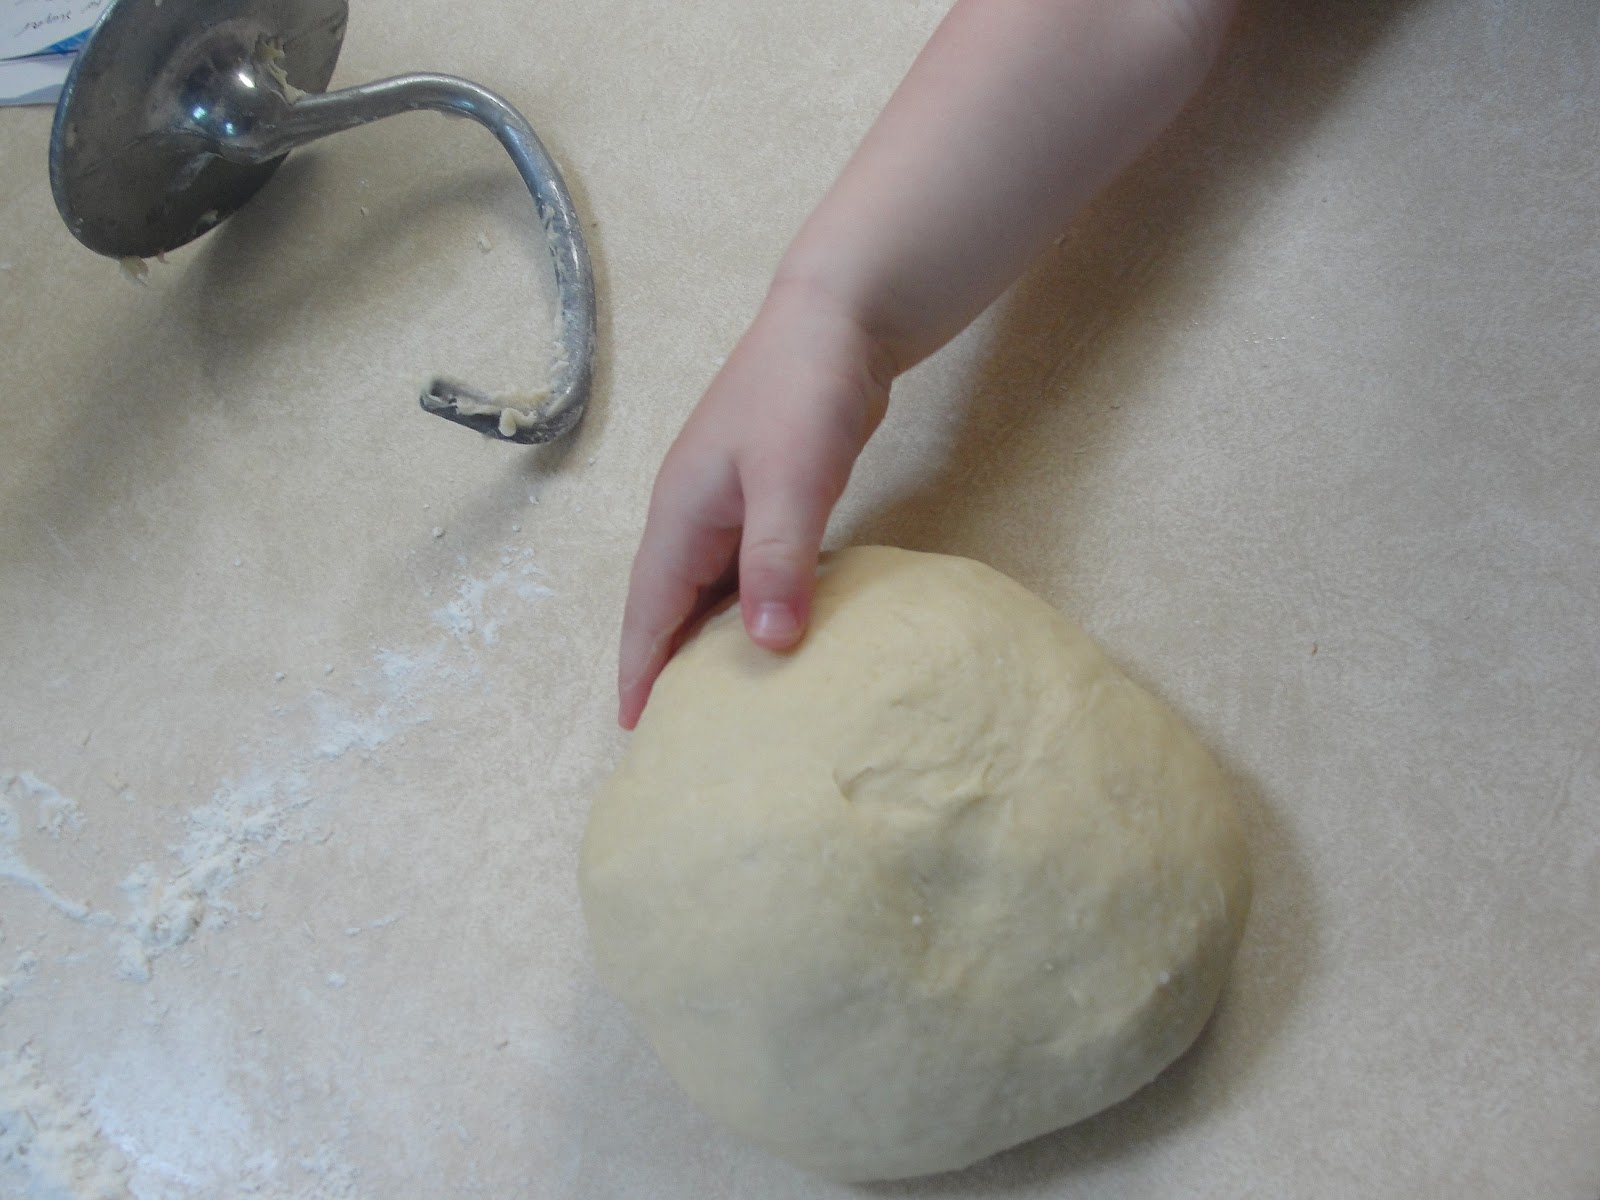
But after some heating, cooling, mixing and kneading, the result is a dough so soft and smooth that some little boy, who shall remain nameless, could not keep his hands off of it.


I set the dough aside to rise and we went about the rest of our morning.

Once little man went down for his nap, it was time to get down to the nitty gritty of this bread.

As a filling, I chose to go with chocolate. The traditional fillings for this type of bread include either nuts, which we avoid in our house due to allergies, or poppy seends, of which I am not a huge fan.  So I chose a sure crowd pleaser.

Chocolate.


To my cocoa powder, cinnamon, sugar and chocolate chips, I added boiled coconut milk and butter.


The hot milk melted the chips and the result was a smooth and pretty delicious looking and smelling chocolate spread that was all ready to go.

The dough had risen beautifully, so I carefully deflated it and turned it out onto a well cleaned and well floured counter. I used the two foot by three foot island in my kitchen.


And I rolled out that dough as thinly as I could.


Okay, I probably could have rolled it a little thinner, but I was starting to worry about time, so I stopped when I could see through it, and proceeded to spread on the delicious filling...


...until it basically looked like I'd covered the entire kitchen island with chocolate sauce.


And then we roll! It's a little tough to neatly roll dough that thin, but I made it work...


And then I coiled the rolled dough into a loaf pan.


Phew.

I then put the bread into the oven and (im)patiently waited. It came out just in time to pick little miss up from school, so I turned it out, on its side, on a cooling rack. Turned out so that it wouldn't gather condensation in the pan, creating a soggy bottom, on its side so that it wouldn't collapse on itself.

Which worked alright, but it did wind up slanting the side in a bit...

But that's okay, because it still swirled beautifully!!


It kind of reminds me of zebra stripes, with all of those random dark swirls...


But the most important thing is how tasty it is.


Seriously, I don't think this bread will last until the morning. We've eaten two thirds of it already. I probably should have made two. There is a decent chance that I will be making another one of these before the weekend...


Chocolate Povitica
(slightly adapted from The Gingered Whisk)

To Activate the Yeast:
1/8 cup warm water
1/2 teaspoon sugar
1/4 teaspoon flour
1/2 tablespoon active-dry yeast

For the Dough:
1/2 cup milk (the higher the fat the better) (I used coconut milk)
3 tablespoons sugar
1/2 teaspoon salt
1 egg
2 tablespoons unsalted butter, melted
2 cups flour (approximately)

For the Filling:
1/2 cup milk (the higher the fat the better) (I used coconut milk)
1/4 cup unsalted butter
1 teaspoon vanilla extract
1/4 cup sugar
1 teaspoon cocoa powder
1 teaspoon ground cinnamon
1/2 cup chocolate chips

To activate the yeast:
In a small bowl, stir sugar, flour, and the yeast into the warm water and cover with plastic wrap. Allow to stand for about 5 minutes.

To make the dough:

In a small saucepan, heat the milk up to just below boiling (about 180 F or 82 C), stirring constantly so that a film does not form on the top of the milk. You want it hot enough to scald you, but not boiling. Allow to cool slightly, until it is about 110 degrees.
In a the bowl of your stand mixer, mix the scalded milk, sugar, and salt until combined.
Add the beaten egg, yeast mixture, melted butter, and 1/2 cup of flour.
Blend thoroughly and slowly, add remaining flour, mixing well until the dough just starts to clean the bowl. Don't add too much flour at this point, you still want it to be fairly wet and sticky.
Turn dough out onto floured surface and knead, gradually adding flour a little at a time, until the dough is smooth and does not stick.

Place the dough into a lightly oiled bowl, cover loosely with a layer of plastic wrap and then a kitchen towel and let rise an hour and a half in a warm place, until doubled in size.

While the dough rests, prepare your filling:
In a medium bowl, mix together the sugar, cocoa, cinnamon, flour and chocolate chips.
Heat the milk, butter and vanilla extract to boiling.
Pour the liquid over the chocolate/sugar mixture and stir carefully until all of the chips have melted and the mixture is smooth.
Add the egg and continue to mix thoroughly.
Allow the mixture to stand at room temperature until ready to be spread on the dough.
(If the mixture thickens, add a small amount of warm milk.)

Once the dough and your filling mixture is done and cooled, it is time to assemble the bread.
Generously flour a large surface - a table, a kitchen island - or, if all else fails, clean and flour a sheet and spread it on the floor! You need space for this.
Roll the dough as big and thin as you can. You can use your hands to gently pull and stretch the dough, as well. As you work, try to lift the dough from the surface periodically to both help stretch the dough and to make sure that it is not sticking to your work surface. When you think you have rolled the dough about as thin as you can, try just a little more - this dough as very stretchy and you can probably get it just a bit thinner!
Carefully spread the filling over the stretched dough until it is covered.
Carefully (again!) roll up the dough, starting at a long end, jelly roll style until it is a long, rolled snake.
Once the dough is rolled up into a rope, gently lift it up and place it into a greased loaf pan in the shape of a “U”, with the ends meeting in the middle. You want to coil the dough around itself, as this will give the dough its characteristic look when sliced.
Once the dough is in the pan, cover it loosely with plastic wrap and preheat your oven to 350 degrees. The bread needs to rest for about 15 minutes, which gives your oven just about the perfect amount of time to preheat.
Once the bread has rested and the oven is preheated, put the pan in the oven and bake for 15 minutes at 350 degrees.
After 15 minutes at 350 degrees, lower the oven to 300 degrees and continue to bake for another 45 minutes. Check the bread after about half an hour to make sure it is not getting too brown. If needed, you can tent the bread with foil to keep the top from getting too dark.
When done, allow the bread to cool on a wire rack for at least half an hour.

Enjoy!


Related Posts with Thumbnails